Doodle Days of Summer: 3Doodler’s Guide to Creative Adventures

School’s out for the summer! Which means long, sunny days filled with possibility.

Before the kids break out the screens, inspire hands-on creative play with a series of 3D pen projects to encourage skill building and creative exploration.

Drawing and coloring are timeless activities but now kids can take creativity off the page with a 3Doodler 3D pen. Transform your ideas into tangible, three-dimensional masterpieces, letting kids (and adults!) create anything they can imagine.

Jump start summer fun with a few ideas to get those creative gears turning!

Your Summer’s Creative Sidekick

As educators, you know first-hand how important it is to offer options to encourage creative play and reduce summer learning loss. Introducing 3D pens to inspire learning at home, can help in many ways.

How 3D Pens Inspire Learning:
  • Boost STEM Skills (Without Even Knowing It): While doodling away, kids are subtly developing critical skills like spatial reasoning, problem-solving, fine motor control, and even basic engineering concepts. They’ll be designing structures and figuring out how to make them stable without realizing they’re learning!

  • Inspire Imaginative Play: From fantastical creatures to miniature models of dream vacation spots, the possibilities are only limited by what they can dream up. 3D pens offer a unique medium for artistic expression.

  • Portable & Versatile: 3Doodler 3D pens are compact and easy to take anywhere – whether you’re at the beach house, visiting grandparents, or just chilling in the backyard.

  • Instant Gratification: Designing with 3D pens provides an immediate result. Kids can see their ideas take shape right before their eyes, fostering a sense of accomplishment.

Oodles of 3D Pen Doodles

  • 3D pen art: Butterfly on green leaf plant

Ready to get started? Here are some exciting 3D pen project ideas perfect for summer:

Miniature Beach Scenes:

Create tiny palm trees, surfboards, flip-flops, and even little crabs or fish. You can then assemble them on a base to make a personalized beach diorama.
Pro Tip: Use blue filament for waves and clear/translucent for water effects!

Get the Stencil

Custom Keychains & Bag Tags:

Design personalized keychains with names, initials, or summer-themed icons like ice cream cones, popsicles, or suns. These make great gifts for friends or mementos of summer adventures!

Get the Stencil

Nature-Inspired Art:

“Draw” flowers, butterflies, or even intricate spiderwebs. Go on a nature walk and collect leaves or twigs for inspiration, then replicate them in 3D!

Get the Stencil

DIY Room Decor:

Craft unique picture frames to display summer memories. Design small decorative sculptures for shelves or desks, like abstract art pieces or geometric shapes. Create personalized pencil holders or small organizers for their summer reading nook.

Get the Stencil

Wearable Wonders:

With adult supervision, create unique earrings or pendants for necklaces. Design fun glasses or headbands for a quirky summer look (think oversized sunglasses or flower crowns!).

Get the Stencil

Bust summer boredom and embrace the world of three-dimensional possibility. 3Doodler 3D pens are a gateway to creativity and hours of screen-free fun. So, grab your pens, a rainbow of filaments, and let the summer doodling begin!

What amazing things will you create this summer with your 3D pen? Share your ideas @3Doodler or #3Doodler #WhatWillYouCreate!

Leveling Up: Bring Gamification to the Classroom with 3D Pens

We’re unlocking a new dimension in the classroom – literally! Today, we’re diving into the exciting world of gamification with points, badges, leaderboards, challenges, and more.

It’s time to move on from worksheets and passive listening. Envision a learning environment where creativity explodes, and students are intrinsically motivated to conquer learning prompts and challenges like never before. That’s the power of gamification, and 3D pens are the ultimate tools to bring it to life!

A Winning Combination: Gamification & 3D Pens

At its core, gamification is about taking the elements and principles of games and applying them to real-world activities – in this case, the classroom.

Re-imagining games for new environments taps into our desire for:
  • Autonomy: Offer students choices and some control of their learning.

  • Mastery: Providing opportunities to develop skills and see progress.

  • Purpose: Connecting learning to meaningful outcomes and goals.


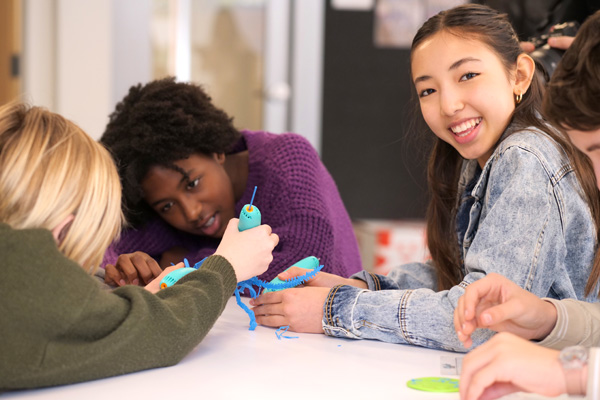
Student creating an object with a 3Doodler 3D pen

Now, let’s add a 3D pen into the mix! These incredible tools allow students to transform their ideas into tangible, three-dimensional creations. This hands-on element amplifies the benefits of gamification in several ways.


Benefits of Using 3D Pens with Gamification
  • Increased Engagement: The novelty and creative freedom of 3D pens instantly grab attention and foster deeper involvement.

  • Tangible Rewards: Encourage students to create physical items representing their achievements in a particular lesson.

  • Problem-Solving in 3D: Challenges become more engaging when students need to design and build solutions in three dimensions.

  • Multi-Sensory Learning: Engaging with 3D creations involves visual, tactile, and kinesthetic learning styles, catering to a broader range of students.

Unlocking New Lessons

Interested in taking the leap and bringing this dynamic duo to your classroom? We’ve got you covered. Here are some gamified activity ideas using 3D pens:

Objective-Based Challenges:

Frame learning objectives as quests! For example, in a geometry lesson, the “quest” could be to design a specific geometric shape with accurate dimensions to earn “geometric gems” (points or small rewards).

Badge Systems (Tangible Badges!):

Students can create badges to represent mastery of a concept or skill instead of using digital badges. Imagine a “History Hero” badge for completing a timeline project or a “Science Superstar” badge for a successful experiment model.

Collaborative Builds for XP:

Divide students into teams and assign them a 3D design challenge related to the lesson. The team with the most accurate, creative, or functional build earns points or privileges. Think of designing a model of the water cycle or a historical landmark.

Escape the Classroom:

Create a series of clues or puzzles students need to solve related to the curriculum. The final clue could require them to 3D draw a specific object that “unlocks” the next stage or a small reward.

Boss Battles (Knowledge Checks):

At the end of a unit, present a complex challenge or problem related to the material. Students can use their 3D pens to represent their solution visually. Successfully presenting and explaining their creation “defeats the boss” and helps them earn rewards.

Personalized Tokens:

Offer students different learning pathways with reading challenges, for example. As they complete their reading and comprehension tasks, they can draw a small 3D token representing their progress.

The Future is 3D Gamification!

Integrating 3D pens with gamification offers a powerful and engaging way to bring learning to life in your classroom. It fosters creativity, problem-solving, and collaboration and presents learning in a format we know students enjoy. So, get your 3Doodler 3D pens, unleash your inner game designer, and watch your students level up their education in exciting new ways!

Have you tried gamification? Share your experience with us @3Doodler or #3Doodler #WhatWillYouCreate!

Bio-Inspired Builds: 3D Printing Pens and the Wonders of Nature

The natural world never ceases to amaze us, and for those who look closely, it can also be a source of inspiration for designing and solving problems.

Biomimicry, or biomimetics, draws inspiration from nature to solve challenges and design new technologies. It’s an exciting way to approach problems, and using 3Doodler 3D printing pens makes it easy to break down the concept into small lessons for students to explore. We’ve pulled together a few examples to encourage students to experiment with biomimicry using their 3D pens in the classroom!


Fibonacci sequence

Strong & Flexible: Spiderwebs
Spiderwebs are incredibly strong and lightweight. The web has complex geometric patterns and varying thread thicknesses to withstand wind and capture prey.

Students can study the Fibonacci sequence with our lesson plan and use their 3Doodler 3D pens to practice building interconnected lines to form a net-like structure and create a working model.

In addition, students can discuss how spiders use different silks for different purposes, and how this translates to using different 3D pen filament types for different structural properties. How would they apply their learning to real-world problems?

Get The Lesson


Black, yellow & red-winged bug on white 3d pen art.

Patterns & Structure: Seashells

Seashells often exhibit spiral growth patterns and can show the Fibonacci sequence but also feature strong, curved layered structures. Studying these patterns and exploring ways to apply them to real-world problems is helpful. For example, students can explore how seashells are formed through biomineralization and how their shapes provide protection and structural support.

Invite students to learn more about shell structure and design by creating models with their 3D pens. It’s an easy way to study the science behind shells and have fun!

See The Tutorial


Vibrant 3D pen art: colorful butterfly on green leaves in a garden.

Color, Camouflage & Symmetry: Butterflies

According to the Smithsonian, there are approximately 17,500 species of butterflies in the world. Butterflies come in all sorts of colors, shapes, and sizes. They are beautiful and curious insects with a lot to teach us, from the unique ways they use color to camouflage themselves from predators to their ability to repel water and dirt.

For younger students, butterflies offer an excellent lesson in symmetry. The 3Doodler lesson plan invites students to study the symmetry of Monarch butterflies and create their own butterflies to demonstrate their understanding of the concept.

Older students could have an opportunity to research different butterfly species and identify their unique characteristics. They can connect their learning to real-world applications and identify opportunities for biomimicry. Examples include self-cleaning surfaces to repel dust and debris, aerodynamic design for aircraft, or using color for textiles and technology.

Get The Lesson

How did your bio-builds turn out? Share them with us on Instagram and use #3Doodler #WhatWillYouCreate in your post!

Surprise Students with 3 Sweet Valentine’s Day Classroom Activities!

Valentine’s Day is a heartbeat away! What better way to celebrate and boost creativity than with a few sweet activities designed to engage students in 3D thinking?

Whether you’re looking to boost collaboration, or offer up a creative outlet for your students, we’ve got you covered.

These heartwarming Valentine’s Day classroom activities will have your students full attention, while teaching communication and problem solving skills all while using their 3D pens!


Heart charm bracelet with 3d pen art

Spring Flowers In Bloom

Add a touch of whimsy to your classroom and dive into STEM with lessons about flowers, their function, and a plant’s lifecycle. Explore the different shapes and sizes or how they attract pollinators. There’s so much to explore and a fun 3D activity to accompany the lesson!

Spring Flowers


Lego Animals in Snow 3D Pen Art

Heartwarming Artistic Expression

Students can explore their artistic style and develop one-of-a-kind 3D or multimedia art projects. 3Doodler’s 3D heart-shaped balloons are easy to design. Use them as pendants, key chains, or even added onto a card for a whimsical greeting. Follow our tutorial or explore your creativity with more complex patterns, swirls, or multiple layers!

Balloon Hearts


Close up of heart & love sign 3D pen cookie art.

Sweet Custom Valentine’s Day Treats

Add a tasty and personal touch to Valentine’s Day celebrations with custom cookie cutters students can create and use at home! Explore our tutorial or encourage students to come up with their own designs. The project could involve students collaborating as they brainstorm ideas and share 3D printing techniques. Students might want to give the cookie cutters as gifts for friends and family once finished. It’s a sweet hands-on project your classroom is sure to remember!

Cookie Cutters

Share your Valentine’s Day creations with us on Instagram and use #3Doodler #WhatWillYouCreate in your post!

Celebrating Creators, Makers, Artists

3Doodler is kicking off 2023 by celebrating our community of creators, makers, and artists. Over the years, a highlight of our work is to share 3D printing ideas and art that comes directly from you.

As we head into a new year, 3Doodler will look to collaborate with artists, educators, and entrepreneurs to explore ways we elevate creativity. But, of course, it’s also important to inspire new creators. With that in mind, we’ll share accessible stencils, tutorials, and more to support budding artists.

Let’s take a quick look back to revisit the projects and artists who inspired you the most. Plus, we’ll share a quick project to jump-start creativity in 2023.

"I found I could say things with color and shapes that I couldn’t say any other way – things I had no words for."-Georgia O'Keeffe Share

Dina Velikovskaya

Two men standing by tree with rope - creative 3D pen drawing.
Dina is an animation artist and director who produced “Ties,” an animated short film that debuted in 2019. The film, released to the public in 2022, explores the connection between parents and their children. A young woman leaves home to see the world. Her parents are left behind, and their world changes without her.

Dina also shared a behind-the-scenes look at creating the film using a 3D pen. First, all the characters were created using a 2d digital drawn animation technique and then outlined with a 3D pen. The result was sets of flat plastic figures. Next, the director filmed the figures frame by frame in a stop-motion set, along with wire objects.

Rick Martinez

Man sculpting human head with 3D pen art
Rick works in sculpture, painting, and photography and frequently shares his insights on working in 3D. Rick’s latest installation, titled “Memento Vivere,” gained worldwide attention as an interactive multi-disciplinary project that uses light, technology, and science to express an idea. This larger-than-life exhibit consists of a series of electroluminescent cables arranged in a skull structure that Rick designed with a 3D pen. The sectors of the installation light up as people interact with the display.

Rick continues to push the boundaries of art and technology with his creative use of materials. Keep an eye out for a 3Doodler collaboration with Rick later this month!

Cornelia Kuglmeier

3D pen art: Snowflake, dragonfly, and flower on white surface

Connie is a 3D pen artist who shares her passion for 3D art and tips of the trade freely with the community. She is constantly exploring new creative techniques with outstanding results. Her work has been featured often with the 3Doodler community to provide insight and guidance on using a 3D pen to its full potential. For example, we recently shared Connie’s tips for achieving the perfect petal. To see her mastery of 3D application, look no further than a multidimensional snowflake. The use of color, layering, and overall technique are incredible.

See more of Connie’s helpful tips and tutorials on her YouTube channel, where she shares loads of doodling advice.

Edwin Ramirez

Blue sea creature sculpture with fish, 3D pen art

Edwin is a multimedia artist who shares incredible wearable 3D creations. Each is a delicate piece of art, from jewelry to theatrical masks and other accessories. Edwin exhibited at a range of galleries in Kentucky, including recent shows at Kore Gallery (“The Education of Desire” and “Unknowns: Artists you Should Know”), as well as part of the ongoing traveling exhibition “Our Kentucky Home: Hispanic/Latin American art in the Commonwealth” curated by The Kentucky Arts Council. Musicians, models, and entomologists have all worn his designs. It is a delight to see his creations take form in 3D. Be sure to explore more of his work in the year ahead!

Spark Creativity in 2023

Now that you’ve seen a small sample of our vibrant community, we invite you to make this your year of 3D creativity. Get started by creating a custom work of art for home using our go-to phrase. What will you create?

Get the Stencil


Doodling a quote on canvas with a 3D pen art

We want to hear from you. How can we support you in your 3D journey? What tools and tips do you need to kick off a year of creativity? Tell us. Tag #3Doodler.

Make the Future in 3D with the 3Doodler Maker Bundle

Must-Have Kit for Creative Kids Who Thrive on Design Challenges With Everything They Need to Design and Build in 3D

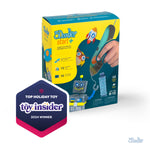
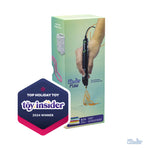
3Doodler is delighted to present two new Maker Bundles this holiday season geared toward young inventors looking for creative, easy-to-use arts and crafts tools with a techy twist. These all-in-one kits introduce kids of all ages to 3D printing and hands-on problem-solving.

3Doodler Maker Bundle

  • Cplus Maker box: 3D pens
  • Person holding 3D pen with craft kit box

The 3Doodler Start+ Maker Bundle (ages 6-13) and 3Doodler Create+ Maker Bundle (age 14+) provide hours of hands-on play with new challenges that progress from beginner to experienced designed to spur critical thinking. Once they’ve mastered the challenge cards, kids will go on to create new projects of their own imagination or access 3Doodler’s extensive library of stencils, tutorials, and lessons.

Each Maker Bundle includes the 3Doodler Start+ or Create+ 3D printing pen, tons of refill strands (either Eco-Plastic or PLA), and a set of nine project ideas for hours of inventing.

All New Projects

  • Girl creating green toothbrush 3D pen art at table
  • Brochure with 3D pen art: plant in pot

The 3Doodler Maker Challenge Cards are an ideal way for young creators to gradually increase the level and complexity of their designs. The set of cards features a 3D rhino, a custom woven basket or pencil case, and even a crafty flip book.

Each Challenge Card includes step-by-step instructions and an easy-to-access video tutorial for visual learners. All of the projects are compatible with any 3Doodler 3D pen.

Endless screen-free creation with a push of a button is now in the palm of their hands. Watch their imagination take off with an open-and-go 3D drawing experience like no other. Kids will make the future as they see it with this all-in-one kit!

Holiday Gifting Made Easy

It may be hard to believe, but holiday season is here. While we may not having started searching for the perfect gift for everyone on our list, there is a festive feeling in aisles of most retailers you visit right now and holiday catalogs are hitting mailboxes everywhere. In fact, the Toy Insider named 3Doodler Start+ Maker Bundle a Top Holiday Toy this year and featured the product in its annual holiday gift guide. This is the 17th edition of the holiday gift guide featuring a brand-new selection of fun games, educational toys, and character items. It’s a great place to start your search for the kids on your list!

Create Creepy, Crazy, or Cool Monsters with 3Doodler

Explore the history of monsters and design a few scary, hairy, one-eyed creatures with a 3D pen. With Halloween on the horizon, there’s no better time to learn about monsters and create them in 3D using your imagination.

Monsters pre-date written history as stories of them persist across the ages sparking fear, fascination, and even pity. Frankenstein, Dracula werewolves, cyclops, mummies, and zombies have terrified and delighted audiences worldwide for decades. They appear in novels, on television, in movies, and music. In recent times, monsters have been depicted as friendly, misunderstood creatures and invoke a sympathetic response. Cookie Monster, Chewbacca, Shrek, and Monsters Inc. are examples of approach, furry monsters.

With so many examples to choose from, it’s hard to decide where to begin. So follow along to create some ghastly ghouls and purple people eaters!

Early Science Fiction: Frankenstein

Close-up 3D pen art: Frankenstein movie poster with man and monster
In 1818, one of the most well-known monsters debuted in Mary Wollstonecraft Shelley’s novel Frankenstein, or, The Modern Prometheus. The story recounts the story of Victor Frankenstein, a young scientist who pursues an unorthodox method to bring a creature to life and is later horrified by his creation. The novel is considered the first true science fiction story. It has influenced literature and popular culture considerably, spawning plays, films, and more. Frankenstein, an American Horror movie, was released in 1931 featuring Boris Karloff.

Mainstream Monster Madness

In the 1900s, monster mayhem became mainstream with more approachable characters. The song Monster Mash was released by Bobby “Boris” Pickett and the Crypt Keepers in 1962. It’s become a staple of Halloween culture. Much like the latest TikTok trend, novelty dances were all the rage in the 1960s, and Monster Mash paired well with a popular dance at the time, the Mashed Potato. The song remains a classic. A few years later, in 1964, the Addams Family launched a whole family of bizarre characters in a series of single cartoons created by Charles Addams for The New Yorker.

Friendly Faces Inspire Kindness

Fast forward to the present, and monsters have become more kid-friendly in movies like Monsters Inc. and Hotel Transylvania. These films offer some creative creatures who look a lot less scary and are much more approachable to younger audiences.

The whole Monsters, Inc. crew! Credit: Disney The whole Monsters, Inc. crew! Credit: Disney

Monster Making with 3Doodler

Exploring monsters through history, we noticed a few key traits that all monsters seem to share. So as you’re thinking about crafting a monster in 3D, be sure to keep four main character traits top of mind.

Character Traits
  • Physical: What are your monster’s physical traits? Is it big and tall or small and short? Does it have large teeth or sharp claws?

  • Physiological: What scares you? What makes your monster scary?

  • Target: What motivates your monster? What or who is it trying to get?

  • Weakness: Monsters aren’t invincible. What is it that makes your monster disappear? How will you defeat it?


Now, take your ideas and imagine how your monster should look. This free 3Doodler stencil will give you plenty of options to create a monster of your own. The template provides different shapes that you can combine to come up with a scary or silly creature all your own. Review the tutorial to see how to combine the shapes and where to add detail to customize your creation.

Let your imagination run wild as you bring your version of a modern-day monster to life with @3Doodler!

EDU Spotlight: What’s Buzzin’ at Sheboygan ISD

This week we caught up with Michael Jaber, a Coordinator of Instructional Technology at Sheboygan Area School District in Wisconsin, to learn more about a multi-faceted project his high school students recently took on.

Vibrant bee-themed cake on table, 3D pen art

Their goal was to construct a sculptural wall hanging for the new Technology Department, for which they used 3Doodler 3D Pens to complete.

So, join us as we learn more about the project, and how this district is incorporating technology into its programs, classes and curriculum.

About Sheboygan High School

Sheboygan South High School offers a rigorous curriculum with a variety of opportunities to prepare students for careers, citizenship, and life.

The school is located along the shores of Lake Michigan in Sheboygan, Wisconsin with a student population of 1,184 students.

One thing that sets this school apart from other schools in the area is its Art Department, which has been experimenting with infusing technology into the art curriculum to allow for alternative representation of visual creation and expression.

What was the inspiration for the project? And what was the process?

The Technology Department at Sheboygan Area School District recently moved offices to an alternative location and asked the South High Art Department to create a sculptural wall hanging as the focal point for their offices called “The Hive.”

Students use 3Doodler 3D Printing Pens to construct 3D Bees Students use 3Doodler 3D Printing Pens to construct 3D Bees

In the early planning stages, IT Coordinator Mike Jaber and Innovation Coach Amy Dekker met with Art Teacher Brian Sommersberger so that we could share and benefit from tech devices commonly used throughout our district, including our 3Doodler 3D pens, Sphero robots, and the Glowforge Laser Machine.

After demonstrations were given, students began to collaborate and brainstorm ideas for what “The Hive” would look like visually. Since the sculpture is intended to be a conversation piece, one criteria students had was to incorporate some of the hands-on technology the district uses.  IT members can now reference “The Hive” and explain how specific hands-on technology solutions are used to create unique works of art.

Can you tell us more about “The Hive”?

Students began “The Hive” by painting white primer on a 4×8’ sheet of styrofoam intended to be the base for the project. Once dry, the sheet of foam was placed on the ground, and paper wall barriers were placed around the edges in preparation for the Sphero robot balls.

Students dipped the Sphero Balls in acrylic paint and controlled them with iPads to simulate action art painting, most commonly referenced by artist Jackson Pollock.

After the paint dried, a 4-foot circle was cut out of the foam and ready for 3Doodler pen creations. Students used the 3Doodler 3D printing pens to first create honeycomb shapes consisting of 3 hexagon shapes attached to one another.

To make honeycombs uniform, a template was placed under a transparency sheet which allowed the shapes to peel off easier.

Students using Sphero Robots to paint Students using Sphero Robots to paint

Students were also required to attach a paper clip to the backside using plastic filament instead of hot glue. Another group of students were asked to help make the 7 bees seen on the hive, each representing a member of the IT department. 3Doodler filament was doodled and molded around found objects such as glue sticks, to form the body and the head of the seven bees.

Each part was created separately and welded together using additional plastic filament.

Lastly, students in Gary Scheller’s tech-ed class used the glow forge laser etcher/cutter to create honeycomb shapes to be placed inside and around the 3Doodler components.

When did you add 3D printing pens into your curriculum? And how did you get introduced to 3Doodler?

The South High Art Department was introduced to the 3Doodler from the Instruction Technology Department only 3 months ago.

These pens have been around the district for several years and utilized during our Tech Clubs at the upper elementary schools. We had the 3Doodler Start Learning Packs initially and eventually graduated to something more sophisticated like the 3Doodler Create+ Learning Packs.

It was time to introduce these to the upper-level art classes and let them run with this type of technology. They were so popular, we ordered some 3Doodler Create+ pens just to keep in this particular art class.

Do you have any suggestions for people new to 3D pens?

The South High Art Department is always looking to explore and beta test new opportunities with technology. We are beginning to review State and National Standards to see how the 3Doodler pens fit into current standards and curriculum.

As a teacher, I am open to choice-based learning and modifying projects where the 3Doodler pens could be applied in place of a different material such as graphite drawing or painting. Some suggestions I tell students right away when beginning a project is to draw on transparent sheets to help the filaments peel off with ease. I also tell the students to use the pens like a wire welder when constructing sculptures.

The filament coming out of the pen is very similar to a wire welder and I could see the pens being very useful in trade schools where students are learning different types of welds. I have seen the most success when students are using a template to begin a design. Once a foundation is constructed students can then use their artistic expression.

The 3Doodler pens are very therapeutic from the sound of the pen to seeing the filament come out the tip of the nozzle, and most students along and staff have found the pens very addicting (in a good way). Once you pick one up and get started, it’s tough to put it down!

Don’t forget to share what your school creates with @3Doodler #3Doodler #WhatWillYouCreate.

4 Valentine’s Day Projects to Impress 

What sweeter way to surprise that special someone than with a handmade gift? Not only will these ideas mean more, but they also won’t break the bank (sorry Hallmark). Because let’s face it, chocolates, roses, off-the-shelf cards, and oversized teddy bears are all so cliche.

Whether or not you celebrate big on February 14th, we’ve pulled together some fun heartfelt Doodling activities for you to tackle this month. So grab your 3Doodler 3D pen, some filament,  and let’s craft a few gifts from the heart.

Printable templates to lift your creations off the page

Ig

Heart-Shaped Cookie Cutters – This Valentine’s day, up your game with some freshly baked cookies. Not just any cookies, these bad boys have a customized shape thanks to your Doodled cookie cutters. Doodle yours now and get baking.


Orchids

Doodled Orchids – Flowers can bring a smile to almost anyone’s face, but what better way to go the extra mile than to Doodle your own orchids arrangement? Not only will they last longer, but they’re truly one of a kind.


Hearts E

Geometric Heart – Edgy, artistic, and anything but conventional, this simple yet beautiful geometric heart design is perfect for all skill levels. Doodle your own geometric hearts now with this easy to follow stencil.


Pla

3D Heart Garland – Looking to upgrade your Valentine’s Day decorations? Try Doodling this heart garland. This design is fun and festive way to brighten up any locker, classroom or bedroom.


3D pen refills that will make your heart skip a beat

To help give you that extra encouragement to take part in these DIY projects, we will be running a plastic promo Feb 10-15.  Be sure to head on over to our Deals page to score 20% off on select plastic refills!

Don’t forget to share your Doodled Valentine’s Day with @3Doodler #3Doodler #WhatWillYouCreate.

Celebrate Lunar New Year with 3Doodler

Have you ever received a little red envelope with some money in it, or been witness to a dragon dance? If so, you likely know something about Lunar New Year, which you may also know as Chinese New Year.

As we usher in the Year of the Tiger, more than 1.5 billion people across the world will gather with family and friends to take part in Lunar New Year. So here at 3Doodler, we thought we would dive in to learn a little bit about what the holiday means, and explore some fun activities that kids of all ages can engage in whether at home or at school.

When does the Lunar New Year start?

Unlike the Gregorian calendar, which has Jan. 1 as the beginning of the new year, Lunar New Year doesn’t always take place on the same day. As you may have inferred from the name, Lunar New Year is based on the moon’s phases – each of which lasts around 29 days. We talked about the moon’s phases earlier this month, which you can read more about here. The Lunar New Year takes place annually on the new moon that appears between Jan. 21 and Feb. 20. This Lunar New Year was on Feb. 1, while the 2023 new year will start on Jan. 22.

What traditions are associated with Lunar New Year?

Much like how some celebrate New Year’s Eve to New Year’s Day and the good luck that a new year brings, Lunar New Year is a time for people to reset and look forward to the opportunity of a fresh start that comes with a new year. This important holiday that’s celebrated among East and Southeast Asian cultures, including Chinese, Vietnamese and Korean communities, is a celebration of feasting, spiritual reflection, and honoring of ancestors.

Some other traditions include buying new clothes, getting haircuts for personal self-care, and cleaning one’s house and business so as to remove any clutter and leftover things from the previous year. And of course, traditional family feasting is in abundance.

Another key difference between the Dec. 31 NYE / Jan. 1 New Year’s day celebrations and Lunar New Year, is that the latter is a 16-day observation. Because of this extended break from work, people try to prioritize spending quality time with extended family, which is one of the only times in the year when people are able to do so.

The Year of the Tiger

While last year was the year of the Ox, this year is the year of the tiger, the first since 2010. The tiger is frequently associated with things like courage, ambition, strength and a commitment to help others for the greater good. With the current state of global health and COVID-19 – we could all use a good dose of these traits in 2022.

Each Lunar year is represented by a cycle of 12 zodiac animals. Each zodiac animal is associated with a combination of traits. In case you were wondering what zodiac animal you were born into, or how the zodiac signs line up over the next couple of years, this image depicts it well.

Add A Little Bit Of Body Text

So how does your community celebrate Lunar New Year? As schools teach about this important holiday, a great activity for students is to research the East Asian heritage in their own community and find out what types of Chinese or Lunar New Year celebrations are taking place locally. Some cities might be bringing back festivals or parades. Your local children’s museum might also host a Lunar New Year Celebration day.

Another fun way to learn about the holiday is through books. These are some of our favorite PreK-5 books. And here is a great online book that retells the legends associated with the origins of the 12 Chinese zodiac animals.

The Lunar New Year in Doodles

In addition to the above resources, we also wanted to share a couple of fun hands-on projects to help you celebrate this important time of year. The first is a tiger decal to help bring you good luck in the New Year.

Ig

Our second project is a DIY Chinese lantern. In China, the first full moon of the new Lunar Year is traditionally celebrated with a holiday called Yuan Xiao Festival, a.k.a. Lantern Festival. During the festival, houses and streets are decorated with colorful and intricate lanterns. This is our take on respectfully celebrating this tradition. This project is a slightly more complex Doodle and will put your concentration and design skills to the test. Explore the tutorial here.

Ig

Don’t forget to share your decals or lanterns with @3Doodler #3Doodler #WhatWillYouCreate.


Snow Day Boredom Busters

Those magical words “snow day” can have different meanings to different people, depending on your age.

For kids, it can mean no school (or maybe a switch from in-classroom to remote learning). For parents, it can mean extra travel time into the office, or even a scramble to figure out childcare for the little ones. Either way, regardless of your age, it’s a chance to slow down for the day, brew a hot cup of tea or cocoa, and bust out your 3Doodler 3D pen. We’ve pulled together four snow-themed projects for you to pick from.

Snowflake Window Decorations

Check out our collection of super cool snowflake stencils. Download and print these templates out, and then Doodle them in a variety of snow flurry colors – white, light blue, clear, or go bold and add in some color! There’s no wrong way to do it. Once you have everything Doodled, you can string them up and hang them from the curtain rod of your favorite window.

Ig

For adults doing this project with your kids/students, here are some fun facts about snowflakes that you can weave into this fun hands-on STEM project. It’s never a bad idea to have some fast facts on hand in case you get peppered with questions from curious minds.

Snowflake Fun Facts

When temperatures are at or below 32°F (0°C), and there’s moisture in the atmosphere, tiny little water droplets will collide with dust to form ice crystals. When enough ice crystals form, they’ll stick together to create a snowflake. This video does a great job of visualizing snow being formed.

Do you know how many sides a snowflake has? All snowflakes have six sides because the molecules that make them up are hexagon-shaped.

Are snowflakes white or blue? Try neither! Snowflakes are actually translucent.

Snowflakes that descend through moist air that is slightly warmer than 32°F (0°C) will melt around the edges and stick together to produce big flakes. Snowflakes that fall through cold, dry air produce powdery snow that does not stick together.

The heaviest snowfall ever recorded in a 24-hour period in the U.S. occurred on April 14 and 15, 1921 in Silver Lake, Colorado. During this single day, 6.3 feet of snow fell. What’s the heaviest snowfall you’ve witnessed?

Snowman

Take the Olaf Challenge

Here’s another snow-related project for you to try at home or in your classroom. In this step-by-step project, we’re going to use our 3Doodler 3D printing pen to Doodle a snowman! Just like Olaf, from Frozen. This fun tutorial will walk you through creating your own little snowman from the warmth of your cozy living room.

For any teachers out there interested in going a little deeper, check out these wintery STEM-focused lesson plans – Platonic Solids Snowman Math Challenge, Doodle Snowflakes: Geometry and Symmetry


Don’t forget to share your snow fun with @3Doodler #3Doodler #WhatWillYouCreate.

Exploring the Phases of Earth’s Closest Neighbor

How many times have you looked up in the sky and seen a different shaped moon? Chances are if you look close enough, you’ll see how every day of the month the moon looks slightly different than it did the day before. Whether you are a parent or a teacher (or both) moon phases can be an exciting topic to explore with kids. When you get to bring the moons to life in 3D with your 3Doodler 3D printing pen it’s a tangible experience that helps lock in everything your learning. So grab your 3Doodler Start+ or Create+ 3D printing pens and let’s get learning.

The 8 PhasesImg

There are eight phases of the moon, in order: new moon, waxing crescent, first quarter, waxing gibbous, full moon, waning gibbous, third quarter, and waning crescent. The cycle repeats once a month (every 29.5 days). Although there are eight phases of the moon we are going to mostly focus on the four that are the easiest to see with the naked eye. This video creates a good visual of what is going on.

If you want to see another perspective of the moon check out this view of the moon Doodled by the artist Ricardo Martinez.


Newmoon

New Moon

During a New Moon, the moon is located between the Earth and the Sun, and as a result, isn’t visible to the human eye. The New Moon is considered “new” because it marks the start of the lunar cycle. It represents new beginnings, rebirth, potential, and stillness.


Waxingcrescentmoon

Waxing Moon

A waxing moon is the period of time when the moon appears to slowly grow fuller and bigger. This period includes the phases of waxing crescent, first quarter, and waxing gibbous. The waxing moon represents growth, personal development, decision-making, and progress.


Fullmoon

Full Moon

Also known as the harvest moon, the full moon holds much power. During this time, the moon and the sun sit on opposite sides of the earth, lending the moon its bright, circular appearance. The full moon represents illumination, clarity, and completion.


Waningcresentmoon

Waning Moon

When the moon is waning, it appears to fade gradually from the sky (though of course, it’s always there). A waning moon includes the phases of waning gibbous, last quarter, and waning crescent. It symbolizes letting go, releasing, retreating, and surrendering.


So tell us, do you have a favorite moon phase? A fun discussion topic can be explaining which phase is your favorite, and why / how you got to that decision. But enough talking, let’s get hands-on with this subject!

STEM Moon Project

Now that we’ve learned about the different phases of the moon, it’s time to create our own 3D versions. Use this week’s stencil and tutorial to create your own moon diagram that’ll demonstrate your understanding of the different phases of the moon.


Don’t forget to share your moons with @3Doodler #3Doodler #WhatWillYouCreate.


Balloons Are For More Than Just Birthday Parties

Up, up, and away! Have you ever seen a hot-air balloon? This magical vehicle may not be the most efficient way to travel the skies, but it is certainly a commute you will remember.

National Balloon Ascension Day on January 9th commemorates the first balloon flight, which took place in the United States in 1793. Because of their size, they require large open fields to get set up, take off, and land, which makes it difficult for most people to catch a glimpse of these behemoth balloons. One of the most popular places to experience the magic of hot air balloon rides is in October in Albuquerque, New Mexico during the Albuquerque International Balloon Fiesta. This festival sees over 500 balloons and is the largest such gathering of balloons in the world.

Hot Air Balloons

A close cousin to the hot-air balloon is the blimp. One of the most commonly recognized blimps may be the Goodyear Blimp, which provides aerial coverage for major sports events.

F Lbeoifa Nuveoloqcuafciitan Srht

History of Hot-Air Balloons

Did you know, the hot-air balloon is the first successful human-carrying flight technology. The first untethered manned hot-air balloon flight was performed by Jean-François Pilâtre de Rozier and François Laurent d’Arlandes on November 21, 1783, in Paris, France.

The first military use of a hot-air balloon happened in 1794 in France during the battle of Fleurus. Today, we use these balloons for leisure and entertainment as they are commonly colorfully designed and fun to watch. Additionally, these balloons are used for scientific research as access to the atmosphere is pretty easy from within a basket.

How They Work

A hot-air balloon is a lighter-than-air aircraft, consisting of a balloon or bag, called an envelope, which contains heated air. Suspended beneath the envelope is a wicker basket, which carries passengers and a source of heat, in most cases an open flame caused by burning liquid propane. The heated air inside the envelope makes it buoyant since it has a lower density than the colder air outside the envelope. This is what helps lift the balloon off the ground. Want to put this explanation to the test? Build an at-home hot air balloon and watch how different temperatures inflate the balloon in different ways.

Let’s Create Our Own!

Although creating and flying an actual hot-air balloon is relatively difficult, creating our own model hot-air balloon is totally doable. So grab your 3Doodler, this tutorial, and get ready to create your own flying machine perfect for demonstrating how these magical vehicles work.

Ig


Don’t forget to share your hot-air balloons with @3Doodler #3Doodler #WhatWillYouCreate.


Welcome to 2022, the Year of Doodling

Welcome the 3Doodler Community of creative minds. Our community encompasses people of all age groups, from all around the globe. Our user base is made up of crafters, artists, DIY hobbyists, designers, tinkerers, and more.

We hope everyone had a wonderful holiday break. We hope you had some fun Doodling with your new 3D pens, and we are beyond excited to welcome you into our community. For all our new users out there, or for all returning visitors looking for a refresher on our resources, we wanted to make sure you know about all of the support material at your disposal, which we provide to you for FREE so that you can learn how to use your pen to the fullest of never run out of inspiration along the way. Join our newsletter so that you never miss a new tutorial, stencil, product launch, or sale ever again. Remember, Doodles come in all different shapes and sizes. There has never been (and never will be) a one-size-fits-all approach to Doodling. So keep practicing, have fun with it, and remember to reach out to us if you ever have any questions!

Online Resources

Here on the 3Doodler website, we provide a non-stop shop for experimenting, learning, creating, and playing. Take advantage of our extensive “how to section”  so you can master the ins and outs of your new 3D pen.

Once you’re comfortable with how your 3D pen works, go and explore our tutorial library where we walk you through how to create a variety of fun Doodles with varying difficulties. Each tutorial includes step-by-step photos and written instructions. You also don’t want to miss our library of 300+ stencils which can be filtered by category to give you build ideas based on your interests. And if you are a teacher or parent, we have a specially curated library of lesson plans that feature detailed projects for all grade levels – ranging in subjects from science, technology, engineering, and math to the humanities.

Follow 3Doodler on Social!

Every week, we share content from the community (via Instagram Stories) and we also post fun video tutorial reels to help keep you inspired with weekly challenges. So find us @3Doodler on your platform of choice, be it Instagram, Twitter, TikTok, YouTube, Facebook, Pinterest. We also use social to announce new products and do occasional giveaways, which you won’t want to miss out on!


If you want to enjoy longer formate videos, on a larger screen you can explore the video section on our website or go to our YouTube Channel.

Download our App

Take Doodling to the next level with the 3Doodler App, which some find easier / more fun to navigate than a website. And for Start+ 3D Pen users, you can even Doodle directly on your phone or iPad. Download the app from Apple or Android and give it a try!

Enough Talk, More Doodling

If you have the new Start+ pen then you already have access to the Eiffel Tower stencil that comes in the Quick Start + Activity Guide. We thought it might be helpful to provide a more in-depth tutorial on how to build and construct the Eiffel Tower. This is one Doodle that once complete will be sure to impress your friends and family. So what are you waiting for? Let’s get Doodling!

Ig

Don’t forget to share your creations with @3Doodler #3Doodler #WhatWillYouCreate.


Tis’ the Season for Holiday Doodles

Can you believe it’s already December? Hanukkah is over already and Christmas is just a couple of weeks away.

We thought now would be the perfect time to put together a few festive holiday projects. Regardless of your age, these hands-on activities are a great way to get your creative juices flowing while adding some seasonal cheer to your room, house, or even classroom! Plus, if you already have a 3D Pen on hand, these projects will prove to be a much more economical option than any off-the-shelf retail options. Last year, we traveled the world through our Doodles, and this year we’ve included some fun facts that you might not have known about Reindeer, Wreaths, and more. Happy Holiday Doodling from the team at 3Doodler!

Doodle Santa’s Reindeer
Ig

Nothing says a winter wonderland like a reindeer…..or twelve! These creatures are commonly thought of as pulling Santa’s sleigh. Reindeer are also known as Carabo and live in the Arctic and other northern places in North America and Europe. Both male and female reindeer grow antlers in the Spring and Summer and lose them in the winter. Depending on their exact breed they can weigh as much as 400 lbs. Santa has to have some special magic Reindeer in order for them to get off the ground weighing that much! So what are you waiting for, it’s time to Doodle your own Reindeer.


Ugly Chrismas SweaterIg Uglysweater

Over the years one of the strangest, yet most adoring Christmas time objects has been the Ugly Christmas Sweater. Usually in different shades of red, white, and green, and made of a weird material, these sweaters have become a staple at holiday parties and family gatherings across the country. Even in places where it’s not cold outside. Thanks to pop culture, movies like “National Lampoon’s Christmas Vacation”, and cyclical fashion trends  Ugly Christmas sweaters don’t seem to be going anywhere anytime soon. To help celebrate this funky tradition, Doodle yourself a little ugly sweater tree ornament.


Put a Wreath On It
Ig Wreath

The word wreath comes from the word “writhen” which was an old English word meaning “to writhe” or “to twist.” The art of hanging wreaths originated from the Romans who hung wreaths on their doors, not as a Christmas decoration but, as a sign of victory and of their status in society. Today, Christmas wreaths are made by twisting and bending evergreen branches into a large circle which is then decorated. The circle shape of the wreath is made to represent Christ’s eternal love, his strength, and the creation of new life. Evergreens are the tree of choice for these creations because of their heartiness throughout harsh winters and that they denote strength as well as immortality. Instead of crafting a wreath with traditional evergreen branches this year, try to Doodle it. Doodle the branches and weave them together!


Don’t forget to share your holiday Doodles with @3Doodler #3Doodler #WhatWillYouCreate.


Spooktacular Doodle Ideas Using Your 3D Pen

Get crafty this Halloween with costume designs, decorations, and DIY accessories using your 3Doodler 3D pen!

By customizing your costume, you can add a bit of unique flair that is either scary, funny, or sweet that will show off your style. Even better—there’s no need to rush out and splurge on expensive store-bought items when you can make something with the 3D pen you have at home. To help with this effort, we’ve gathered a few easy-to-make Halloween costumes and accessory ideas below!

And trust us, once you get started, you’ll be surprised at just how easy these projects when coupled with our step-by-step instructions, a 3Doodler Create+ 3D Pen, and a variety of Create plastics.

Black, yellow & red-winged bug on white 3d pen art.

Spooky Bat

Use this stencil to create a life-size bat! Perfect for this spooky season. We put together a tutorial for this Doodle to help walk you through it step by step. Check it out here.

Download Stencil

Steps
Black-nosed ghost depicted in 3D pen art.

Floating Ghost

If you need more spooky decorations for around the house, office, or classroom – these simple floating ghosts should do the trick! Simple to make, these little ghouls can adapt to almost any setting. See steps below!

  • 3d pen ghost halloween tutorial animated gif
  • 3d pen ghost halloween tutorial animated gif
  • 3d pen ghost halloween tutorial animated gif
  • 3d pen ghost halloween tutorial animated gif
Steps
  • Things you’ll need: 3Doodler Create+ pen and some Create+ plastic

  • Use a paper towel or tissues to create the body of the ghost.

  • Start doodling around the tissue to create the body.

  • Make sure you stretch the plastic down so that the ghost has something to rest on.

  • After the body is Doodled, make a couple of eyes and a mouth and your little guy is ready to go!

Frog 3D pen art on book.

A Sweet Treat Ring

If you don’t want to go over-the-top with your costume, but want something to kick your daily decor up a notch, this candy corn ring is the perfect accessory.

Download Stencil

  • 3d pen ring fashion halloween tutorial animated gif
  • 3d pen ring fashion halloween tutorial animated gif
  • 3d pen ring fashion halloween tutorial animated gif
  • 3d pen ring fashion halloween tutorial animated gif
Steps
  • Things you’ll need: 3Doodler Create+ or Start+ pen and plastic.

  • Print out the Candy Corn stencil here,

  • Start by using the stencil to Doodle the ring.

  • Then once the ring base is set, craft your candy corn.

  • This is where color choice comes into play and can vary the “flavor” of your ring.

  • The last step, attach the candy to the ring!

DIY Halloween headbands

Stand out from the crowd with bats flying above your head, or go for a classic horror scene look with these Halloween headbands.

3D pen art of a woman with bat headpiece

Flying Bats Headband

This headband is fun, cool, and festive – and it’s perfect for last-minute Halloween DIY projects! You could even pair this with a witch hat for your flying bats to circle.

Download Stencil

  • 3d pen arrow halloween design
  • 3d pen bats halloween design
  • 3d pen bats halloween design
Steps

Arrow Headband

Add some humor to your rustic Halloween look with this super easy and classic arrow through head prop!

Download Stencil

  • 3d pen arrow halloween design tutorial
  • 3d pen arrow halloween design tutorial
  • 3d pen arrow halloween design tutorial
  • 3d pen arrow halloween design tutorial
Steps
Close-up of person's mask - 3D pen art in green and blue

Dress up as Erica Gray’s “Swamp Thing”

Be the coolest ghoul this season with our DIY “Swamp Thing” mask. Fashion designer and artist Erica Gray dreamt up this creature from the 3Doodler lagoon and made an easy-to-follow tutorial for you to make this eerie mask. We guarantee it’s sure to turn heads!

Download Stencil

  • 3d pen swamp thing mask 3d halloween fashion by Erica Gray
  • 3d pen swamp thing mask 3d halloween fashion by Erica Gray
  • 3d pen swamp thing mask 3d halloween fashion by Erica Gray
Steps

If these costumes inspired you to create, be sure to take a photo of your creations and share it with @3Doodler #3Doodler #WhatWillYouCreate.

DIY Haunted House

With Halloween just a couple of weeks away, we’re likely not the only ones thinking about costumes, candy, and decorations.

The Skinny on the Jack-o’-Lantern

One decoration that is a tried and true part of Halloween is the jack-o’-lantern, but why do we care so much about a squash?

We can thank the Irish and Scottish for this tradition, who used to carve scary faces into turnips or potatoes and place them in windows or near doors to frighten away wandering evil spirits like Stingy Jack. Stinging Jack is a mythical person who cheated the devil out of his soul, causing his soul to wander the earth holding a piece of coal in a carved-out turnip.

Irish and Scottish immigrants brought the jack-o’-lantern tradition with them when they relocated to the United States. Soon after though, they found pumpkins, a fruit native to the Americas, which makes perfect jack-o’-lanterns.

For Halloween 2021, we took our own spin on the classic jack-o’-lantern and created a fun mess-free crafting experience for you. Use this DIY stencil so you don’t have to carve up your pumpkin, instead simply Doodle the eyes and mouth and attach them to your own pumpkin, no knives required! ☠️???

Turn Your Porch Into a Haunted House

You’ll want to check out this week’s tutorial of a Jack-o’-lantern, but this is just the start of what you can create to spookify your living quarters. Check out more spooktacular crafting ideas below!

Stencil
Bat

Use this stencil to create a life-size bat! Perfect for scaring the unexpecting.

Stencil
Creepy Ghost Decals

Use this stencil and your 3Doodler pen to create some faBOOlous ghost decals.

Stencil
Spider Web

This project is perfect for the whole family! Simply print out the stencil in different sizes to make cobwebs for both kids and adults. There’s so many things you can do with it: you can attach the cobweb to your shirt, pin it in your hair, or even decorate corners of your house!

Don’t forget to share the haunted house you create with @3Doodler #3Doodler #WhatWillYouCreate.

STEM Projects From Around the World

For decades, pockets of the United States have celebrated Indigenous Peoples’ Day rather than Columbus Day, which was put into place as a federal holiday back in 1934 by President Franklin D. Roosevelt. This year was particularly special for Indigenous Peoples’ Day, which received its first presidential proclamation from President Biden.

Indigenous Peoples’ Day celebrates the contributions of indigenous peoples to society and honors their place as the first inhabitants of what is now the U.S., and the wrongs they suffered. Columbus Day was intended to be a day where “the nation would honor the courage and determination which enabled generations of immigrants from many nations to find freedom and opportunity in America,” according to the Congressional Research Service.

Whether you live in a state that recognizes Indigenous Peoples’ Day, Columbus Day, or both, topics such as culture, exploration, art, and discovery are subjects that ring true for both.

STEM Projects! 

Our country is a melting pot of various cultures and artistic influences. Thanks to modern-day travel and technology, we are more interconnected today than ever before. To celebrate the importance of exploration and discovery, and the effect it can have on art and technology, we put together fun hands-on STEM projects from around the world that can be adapted to any skill level and is perfect for classroom and at-home creative Doodling alike.

Stencil
Doodled “Paper Crane”

Use this stencil to create your very own Doodled paper crane! You can create it in any color, or even in multiple colors.

Stencil
Leaning Tower of Pisa

Doodle a toppling tower of your own.

We have seen members from our creative Community do incredible things, from art to fashion to full-size cars.

Cornelia Kuglmeier has been a dedicated member of our 3Doodler Community from the very beginning, and last year took on a project that required the precision, attention to detail, and artistic ability that only she could bring.

By Doodling a globe and discussing cultures and influences from around the world, we can learn to appreciate different people and places, and maybe even find new places to add to our travel wish list!

Don’t forget to share your creations with @3Doodler #3Doodler #WhatWillYouCreate.

Artist Spotlight with Rachel Goldsmith: Beyond Bovine

Rachel Goldsmith is a New York and Seattle based artist who paints with PLA plastic on canvas, using a 3Doodler Create+. She recently wrapped up with an incredible fiberglass resin grazing cow that was covered head-to-toe with colorful 3Doodler PLA filament.

Beyond (the name of her cow) was part of CowParade NYC 2021 – a public exhibit that was on display throughout New York City this month. Rachel has been a cornerstone of the 3Doodler community since the beginning, and it’s been a delight to watch her prolific work evolve over the years. We thought this would be a perfect opportunity to check in with Rachel learn more about the project, and to hear about what she has been up to with her art, her hula hooping, and her 3Doodler!

Img

Can you please introduce yourself and talk a little about your artist’s process?

Seven years ago, 3Doodler wrote an Artist Profile on me that ended with this line, “Rachel’s mix of chaotic control reflects what Doodling is at its core: endless experimentation.” … And it’s funny to think back on that time in my creative history – because I could only ever be as good as the pen… The first 3Doodlers had unexpected blips in their extrusion every 7-11ish seconds the pen would pause, maybe… this was chaos that I constantly had to respond to and attempt to control… and I really liked having to respond to the technologies’ whims… but the 3Doodler got better and better (thank you Max and Peter!) and now… I no longer have to control the chaos… I know what to expect from the pen and I have developed and perfected techniques with which I can accurately express myself and with which I can use the medium as my visual language.

The endless experimenting is no longer needed…I’m finally back to creating meaningful fine artworks at a level on par with my previously honed drawing and painting skills. It was a very challenging leap to take…. A full deep dive into 3Doodler-land… and I have no regrets. It has added so much literal depth to the layered essence of my artistry.

Img

We know you are currently working on a cow project, so where did that idea come from, and how is that project coming along? 

For a moment, this past June, I found myself once again dipping my toe into potentially experimental waters. You see… the Official Cow Parade was coming back to New York City with a fully curated group of artists creating cows for God’s Love We Deliver. I read about it online after the launch party, and I reached out to Steven at God’s Love and said, “Please, I have spent 20 years dreaming of participating in this project – can I make a cow?”

And Steven said, “Sorry, we don’t have any extras.” So, I replied, “What if I create a cow that looks like it belongs in your parade but is actually see-through… and not ultimately attached to one of the fiberglass cows. YES! Steven was on board! It would be the world’s first Cow created with a 3 D printing pen for the 100th staging of the cow parade.

So… my plan for the cow threw me back into experimental land… I had an engineering feat to consider that had never impeded my work in the past. I had to create a weather-durable/public-durable free-standing cow. For engineering’s sake, I requested a grazing cow – in case I needed to put a flower below its head to hold it up when it was complete… I also considered making my cow into a bull – adding another “leg” to stand on. Initially, I had only a short amount of time to work on top of the fiberglass cow in the Clear sponsored Artist Studio at Industry City, that I was using as a mold. So not only did I have to hit the ground running, but I had to make sure not to damage the underlying fiberglass structure, prior to another artist painting it.


In my Brooklyn studio, I began extruding PLA in an effort to create a cowhide – basically, I made a ginormous piece of mesh – for days I ironed together layers of extruded PLA. Then I rolled up my ‘hide” and brought it to the life-sized cow, which I immediately covered in heave duty aluminum (both to protect the fiberglass structure and to ensure that in molding my PLA mesh to the form it would not permanently adhere to the fiberglass.

Using a heat gun and a lot of patience, I formed that PLA along the contours of the cow. The hide, though large, wasn’t large enough and I had a lot more PLA to extrude to cover the whole cow… After several days Steven and Leslie (who was running the studio for David Stark Design and God’s Love) and I all decided that given the cow was being created for a public art piece… and cow-hugging is encouraged – it would be best if I kept my final cow on the fiberglass structure (and now there was one available for me to use). So… cut the cowhide off and removed the foil. I then began adhering the PLA directly onto the fiberglass that I had been aiming to remove it from… The plans shifted quickly… The PLA was on its last legs for reheat and cool – remember it had been extruded, then ironed, then heat-gunned… then removed from the foil and fiberglass, and now I was again heating it to adhere and mold to the cow shape. Ay de mi! The whole project basically got three times longer… but this is when the cow really started to gain its own personality!

I was aiming to create a hairy cow – like a highland cow – mainly because with this medium I could make my cow hairy! Where other artists had only used paint to color their cows, I had the ability to extend my cow BEYOND the fiberglass.

My cow’s name, Beyond, stems from other reasons as well… PLA is a plant-based filament and I am a plant-based human… so we have an affinity to Beyond Meat (in a plant-based way). Also, God’s Love We Deliver goes above and BEYOND to help our community on a daily basis. And finally, there are plenty of people who might describe me and my cow as — “beyond”.

For the horns and the hoofs, I melted the PLA in the oven prior to adding it to the cow in order to create a different texture for those areas. I flipped the cow over and working on it upside-down to do the belly and the legs and to grow grass from its feet… (working with gravity for the grass). The grassy feet started out about 8 inches high… and I cut it down half an inch at a time until I was pleased with the height. The hair also got cut and styled a bunch of times… and I am sure, that before it goes to live auction on September 30th, it will need a “salon-day” – as the public is enjoying messing with his mop of hair – in a good way. It’s spreading joy! I love that!

That is the dream! Create art that spreads joy AND ultimately benefits charity. God’s Love We Deliver is an organization that cooks and delivers millions of medically tailored meals for over 10,000 New Yorkers per year, who are living with serious illnesses. It was easy for me to pour hours of my life into creating this cow – the better the cow, the higher the value it will sell for at auction… the more money it will bring into God’s Love. It’s a no-brainer, really. All of the cows are up for auction at Heritage Auctions starting September 7st the live auction ends October 7th.

When we met, Mr. Jerry Elbaum, the founder of the Cow Parade said that this was the most artistically impressive herd of cows he’s ever seen – and this is the 100th staging of this parade… He also said that to the NYTimes… so it wasn’t just to compliment an artist. I believe him.

Working in a studio alongside so many talented contemporary artists had me star-struck at times… I was able to get into my flow state, and ignore the others, thanks to music and my hula hoop… but I am still in awe of the work I saw unfurl over 8 weeks in the studio. There is so much talent in this world! I am honored and proud to be part of this particular herd. #cowparadenyc

Do you have any suggestions for people new to Doodling?

Buy more filament now! Lower your expectations… practice patience… and patiently practice. Oh… and don’t forget you can cut off or meltdown your mistakes.

In an effort to raise more even more money for God’s Love We Deliver Rachel will soon sell some Beyond merchandise on my online art shop – All proceeds will go directly to the charity!

Make sure to follow Rachel on Instagram. She’s always sharing fun art projects and plenty of Doodles. 

Don’t forget to share your favorite Doodles with @3Doodler #3Doodler #WhatWillYouCreate.

2021 Summer Rewind

The summer has flown by and the season for pumpkin spice lattes is officially upon us. As we bid adieu to summer, let’s embrace one last mouthwatering activity.

Ice, Ice Baby

If your ice cream cone never melts, can summer really end? You decide! Whether you are trying to channel your inner creativity, or you are looking for a fun hands-on activity to do with your kids on National Ice Cream Cone Day (Sept 22) – this is the project for you!

  • 3D pen art: Person holding colorful ice cream cone
  • Purple and green ice cream 3D pen art held by someone - Original C Ed D D C Bde E Fa Pxl.
  • 3Doodler art: Pxl araffe ice cream in cone

Here Connie__Doodles whipped up some very realistic ice cream cones using her 3Doodler Create+ 3D pen and our Create+ PLA Pastel bundle of filament.

We did our own variation of this Doodle as well – because….can you really ever have enough ice cream?! Check out this week’s tutorial for some smaller ice cream cones with a few different topping options. Although you can’t eat these, they can be fun kitchen decorations or excellent props for any kid’s kitchen!

Ig

Summer rewind

As summer comes to an official end on September 21st let’s take a moment to reflect back on some of the fun we had Doodling. We did a lot and covered some exciting events, including the launch of our Start+ 3D Pen!


We can’t forget about starting out the summer on a creepy-crawly note with bugs. We also had an awesome cicada Doodle since Billions of Brood X cicadas emerged across the eastern US in the early summer.

Read the blog


We Doodled selfies in June. This fun activity helped turn our photos into real tangible objects. And give us an excuse to have some screen-free time.

Doodle a selfie


STEM week was a big hit. We laid out a week’s worth of STEM activities perfect for a classroom or an at-home Doodle camp. We capped things off with a tutorial on how to draw a robot 3D robot.

Read about STEM week


In July, we launched our new START+ 3D printing pen. With a new design, quicker charging time, 50% more Eco-Plastic and an all-new activity guide featuring 10 projects, any kid who opens this package will experience success right out of the box. We also shared a tutorial of an exclusive Doodle from the activity guide – a dream catcher.

Doodle a dream catcher


It was a whale of a time when we headed to the beach in July. In addition to sharing ideas about how to spend your time at the beach we also shared how to Doodle some sea life, you might stumble upon when you’re there.

Doodle some sea life


We got ready to head back to school. In this fun blog, we showed you ways you could create your own style using Doodles. And how to Doodle a shiny apple for your new teacher.

Doodle some sea life


There were many more, but these were our favorites. In case you missed any of our blogs this summer or want to go back and revisit your favorites not seen above see every blog here and every tutorial here.

Don’t forget to share your pirate get up with @3Doodler #3Doodler #WhatWillYouCreate.


5 Talk Like A Pirate STEAM Activities

Some of the most common pirate imagery we have comes from pop culture references such as Captain Hook from Peter Pan or Jack Sparrow from Pirates of the Caribbean. With International Talk Like a Pirate Day taking place September 19, here are 5 hands-on STEAM activities for your kids and students to have fun with this week.

Blackbeard Capture

1. Read Pirate-Themed Books

There are plenty of pirate-related books to have your kids dive into as they work on their reading comprehension. Here is a list of books corresponding to different reading levels so everyone can enjoy some pirate lore. For younger kids, “read aloud” sessions are great practice. For older kids, have them extend the story by illustrating an alternate ending using their 3Doodler!

Elementary School Reading 

Middle School Reading

High School Reading 

2. A Linguistic History

International Talk Like a Pirate Day started as a joke between two friends in Oregon and has turned into a cultural holiday over the years.

Interestingly enough, the common pirate word “Arrr!” which translates to “yes” was not originally a pirate word at all. While it was introduced into folklore in the 1930s, it didn’t become mainstream until Disney popularized the interjection with its 1950s release of Treasure Island.

Here is some pirate lingo and jokes to help you participate in this fun holiday. Feel free to use this lingo to create your own DIY greeting cards for friends, family, and teachers using your 3Doodler 3D pen.

Ahoy! – “Yo!”
Avast! – “Check it out!”
Aye! – “Yes.”
Arrr! – “That’s right!” (often confused with arrrgh…)
Arrrgh! – “I’m VERY miffed.”

Pirate jokes: 

Q: How much did the pirate pay for his piercings?
A: A buck-an-ear.

Q: How do you make a pirate really mad?
A: Take away the ‘p’.

Q: What’s a pirate’s favorite movie?
A: Booty and the Beast.

Q: Why couldn’t the 10-year-old go to the pirate movie?
A: Because it was rated arrrrrrr.

Q: What was the pirate’s name that had no legs or arms and fell overboard?
A: Bob.

DIY 3D Pirate Flair 

Last but not least, in order to help everyone celebrate and play pirate today, here are some Doodle ideas!

3. Doodle a Pirate Eye Patch 

Many assume pirates wore eye patches to cover a missing or wounded eye from battle but did you know that an eye patch was more likely to be used to condition the eye to be able to fight in the dark? Doodle this eye patch so you can be ready for anything, day or night!

4. A Pirate’s parrot

Can you believe that parrots weren’t actually common pets for pirates? We have the movies to thank for this common misconception. Although parrots were not kept as pets, talking birds did exist and were often stolen by pirates because of their value. Here’s an adorable parrot stencil and tutorial to Doodle for your shoulder – perfect for your next pirate-themed party.

Blog Feature Image Main

5. Avast – a Doodled Telescope!

If you want to complete the part, Doodle your very own telescope so you can scan the horizon for desert islands.

Don’t forget to share your pirate get up with @3Doodler #3Doodler #WhatWillYouCreate.

Fine-Tune Your Doodling Technique

Have you ever seen a Doodle and wondered how someone created it? Today, we help solve that problem by walking through several advanced techniques that’ll take your Doodling to the next level.

What You’ll Need

In this blog, we’ll be focused on techniques using our Create+ and PRO+ 3D printing pens. In addition to one of these pens, you will also want to have our Create+ PLA and Create+ ABS filament on hand. These are two different types of filament for the Create+ and PRO+ pens, and while they may look the same at first glance, they both have very different attributes and can be manipulated in different ways.

Plastic

PLA

PLA is a plant-based, non-toxic material and is recyclable & eco-friendly. You might even smell something sweet while Doodling, that’s because PLA is a corn-based material that emits a sweet, sugary smell as it heats up. PLA is very versatile and can be used on paper, glass, cloth, and metal surfaces.

PLA is unique because even after it has been extruded you have five to six seconds where you can still manipulate it. Even after it’s cooled, you have other techniques at your disposal that allow the plastic to be reshaped. Using a hairdryer, you can heat up certain parts of your Doodle to soften the filament and reshape it, without affecting your entire creation.

For more complex projects you can even use your oven to heat PLA filament. This technique will cause the entire Doodle to melt together. This technique should only be used when you are okay with melting your entire creation, as you’ll use any of the typically Doodle lines that you see after extrusion. You can also use this technique to change the transparency of the Doodle, like in this video where a telescope lens needs to be heated up to help it come together and become transparent.

ABS

When it comes to drawing in the air, ABS is your filament. ABS cools down faster than PLA allowing you to draw in the air with ease. After extrusion, you have about three seconds before the filament to harden. Once hardened, ABS will easily peel off of paper or stencils, and can bend with ease. Given how quick it cools / hardens, ABS can be easier for beginner Doodlers wishing to draw in the air. Unlike PLA, ABS does not have a sweet smell. ABS also cannot be heated up and manipulated after extrusion, so if you decide to try out any of the above-mentioned heating techniques, make sure you are using PLA!

Nozzle Set

An additional tool you can use to help shape and construct your extruded plastic is our nozzle set. This Set includes a ribbon tip, square tip, triangle tip, a super fine 0.5mm nozzle, and thicker 1mm and 1.5mm nozzles. It also includes a smoothing tool that clips onto the end of each nozzle, allowing you to smooth over or create contours and details on your Doodles. These Doodles below help show some of the different techniques possible with the nozzle set.

Let’s practice!

In order to become a pro Doodler like @Connie__doodles, @riikc.art, and @artistrachelg – you’ll need practice. So we thought, what better way to work on your Doodling techniques than by creating some miniature food replicas. Similar to cooking or baking, the more you practice the better you become. So let’s put those fine motor skills to the test and Doodle some food! Use this stencil to turn these pretzels and then Doodle some pretzels.

Whenever you’re up for a challenge, check out this week’s tutorial. We walk you through how to Doodle up a delicious mini 3D burger. Get practicing and showcase your amazing dinner Doodles. Additionally, we have a great collection of fun and advanced techniques on our website so you can take any Doodle to the next level.

Don’t forget to share your miniature dinners with @3Doodler #3Doodler #WhatWillYouCreate.

From the Shadows, to the Mainstage

Shadow puppetry is an art that collapses the world from three dimensions to two. Here at 3Doodler, we specialize in transforming 2D ideas into 3D creations. So, however ironic as it may seem, let’s make some 3D creations to put on a 2D show! In this blog, we’ll explore building, planning, and putting on a shadow puppet show.

Where does shadow puppetry come from?

One of the oldest art forms still in use, shadow puppetry originated in Central Asia-China or in India in the 1st millennium BCE. Shadow theater means different things to different cultures. Think about shadow puppets as the first cartoons. Because of the tools involved in creating the stories, it is easy to create cartoon-like shenanigans with the puppets by making them grow bigger and smaller and vanish into thin air. Because of this ability to mimic special effects, the shadow theater unlocks a whole new dimension of storytelling.

Because shadow puppets have been found in so many different cultures, they have taken many different forms. Below are examples of Chinese and Indian Shadow puppets, the two most popular types.


Ravan Chhaya Natya Sansad (India) Shadow Puppets Ravan Chhaya Natya Sansad (India) Shadow Puppets

Chinese Shadow Puppets Chinese Shadow Puppets


Set up a Shadow Puppet Theater

The shadow theater is a unique one as the stage is almost as important as the puppets. Because the puppet’s visibility is connected to how big the stage is, make sure your stage will be big enough for your puppets. This short video breaks down how to set up your theater and all the parts required.

Let’s make our own shadow puppets

Shadow puppets are commonly constructed from wood, plastic, or cardboard depending on the designer. In some special circumstances, the puppets are made from stretched leather. We have put together a FREE stencil to help you create your own puppets and this week’s tutorial will help walk you through how to put everything together.

After you have Doodled your puppets and the theater is set up it’s time to put on a show! Remember the world of puppetry allows you to do some fun and different things so think outside the box when it’s showtime!

Don’t forget to share your shadow puppets after you Doodle them with @3Doodler #3Doodler #WhatWillYouCreate.

Not All Heroes Wear a Cape

If you’re like us, you are inspired by superheroes. A superhero is a character that has extraordinary abilities and uses those abilities to help the world become a better place.

Superheroes are easy to recognize because they wear costumes that stand out. It is not uncommon for a superhero to sport a brightly colored spandex with an emblem that represents the character’s brand. But superhero costumes are practical, as well.

While capes and masks provide a certain flair, superhero costumes often incorporate tools that the hero needs to succeed. When we think about superhero costumes in this context, it isn’t much of a leap to think about clothing as a way to help people exercise their extraordinary abilities — just like superheroes.

Sweatshirts keep us warm. Sturdy shoes help us to run fast. Gloves protect our hands from cuts, scrapes, and blisters. And the list goes on; clothing is simply a practical way to help us live up to our potential every day.

Like superheroes, we all require different outfits to succeed. Many kids are impacted by health conditions that make traditional clothing inaccessible to them. Some forward-thinking companies have started to sell more inclusive clothes that help everyone express themselves confidently and stylishly.

Perhaps you’ve come across a brand like Billy’s Footwear, which smashes fashion with function by incorporating zippers that go along the side of the shoes and around the toe, allowing the upper of each shoe to open and fold over completely. Or perhaps you opt for the DIY approach and use your 3Doodler Create+ pen to modify your kids clothing, lunchbox or backpack so that it works better for their needs. It’s little actions like these that can level up your own superhero’s skills each morning.

Take a look at some of the stores that are now offering more inclusive fashion choices for kids, adults, and seniors.

Designing Your Own Superhero Costume

In honor of National Superhero Day on April 28, we wanted to take some time to look at the myriad ways that clothing can help us shine.

One of our favorite tips is “a superhero’s costume should tell something important about the hero.” As you’re designing your superhero costume this week, think about how you can best showcase your superpowers. Maybe you can pretend to harness your superior strength through magic bracelets like Wonder Woman, or rely on a high-tech utility belt like Batman. For example, some kids with visual impairments use braille patches to quickly and easily differentiate between parts of their clothes.

No matter how you choose to represent your superpowers (real or imaginary) this week, feel free to do it with some flair. The 3Doodler team has created a free superhero mask stencil for you to use as a starting point in designing your own superhero mask. Check out our full tutorial here.

Tutorial X

As you know from previous posts, we love to create wearables because they are versatile, fun, and easy to do with our 3D pens.

What do you wear that makes you a #superhero? Share with us @3Doodler #3Doodler #WhatWillYouCreate