Pencil Case
- 45 Minutes
- Intermediate

1 Gather materials!

Grab your 3Doodler 3D pen, plastic, DoodlePad, and stencil. Find a clear workspace to get doodling!
2 Trace the pieces.

Begin by tracing all the pieces on the stencil. Attach the two largest pieces to create a long panel.
3 Connect the smaller pieces.

Attach the three smaller pieces together creating a thin panel.
4 Connect the notched pieces.

Create a second thin panel by attaching the three smaller pieces. Place a piece with a notch on either end.
5 Connect all the panels.

Place all the panels on the table. Use a new color for a decorative touch. Attach the smaller panels to the base. Attach the longer thin panels to the base. When complete, you should have a rectangular box.
6 Attach the triangular shapes.

Create the front of the pencil case by connecting the two triangular shapes together.
7 Create the top of the case.

Attach the two large pieces with the notches. Next connect the front triangular piece.
8 Attach loops to the box.

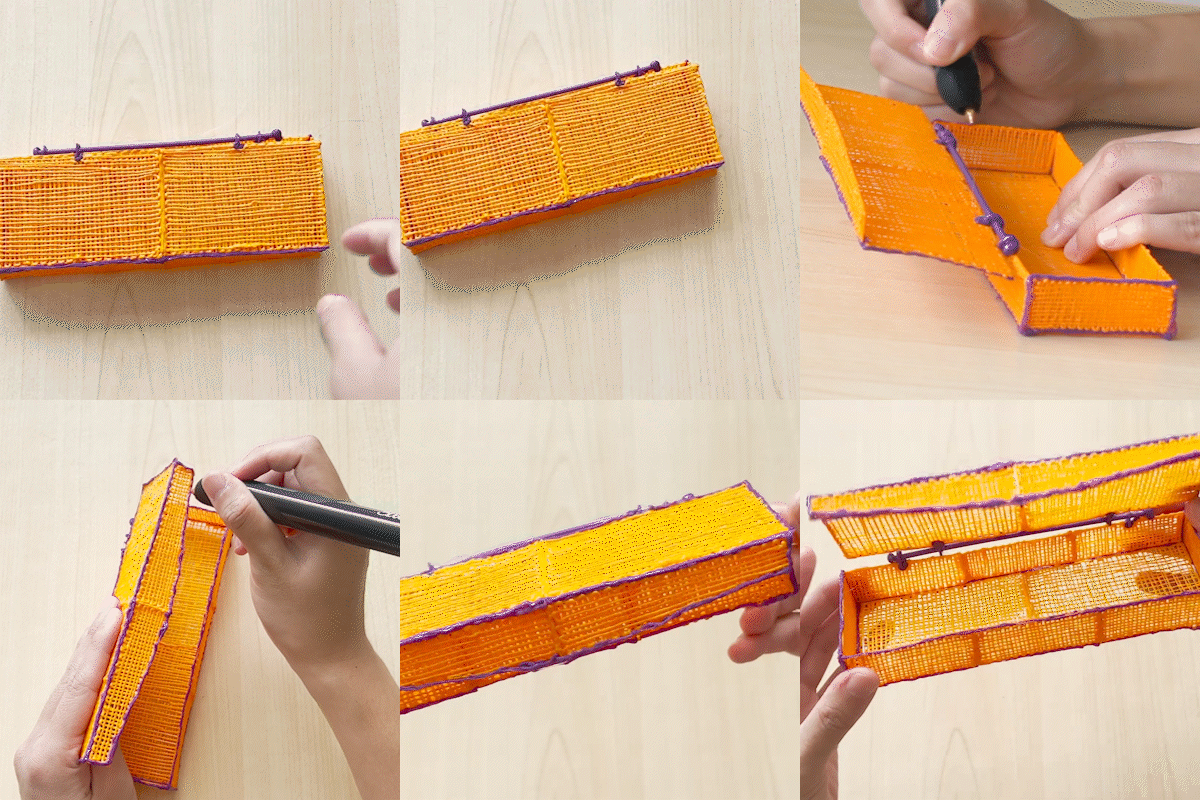
Create small loops and attach them to the notches on the rectangular box. These loops will help secure the top to the bottom of the box.
9 Connect the top and bottom.

Connect the top and bottom of the box by passing a strand of plastic through the loops. Add a bit of plastic to each end of the plastic strand to secure the strand in place.
10 Time to decorate!

Add decorative trim to the sides and any other details you like to customize your pencil case. Done!


