


Easter Bunny
- 45 Minutes
- Intermediate

1 Assemble your materials!

Print out the free stencil and grab your 3Doodler and eco-friendly filament. It's time to doodle!
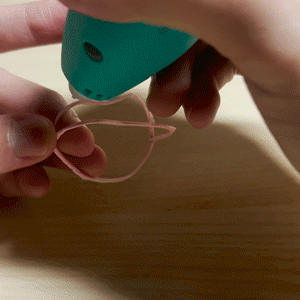
2 Let's build the bunny torso

Start by tracing out the body of the bunny using the stencil. Once you have the loose pieces, attach them as follows to form the skeleton of the body.
3 Fill in the Body

Now that we have the skeleton of the body, it's time to fill it in. Start by wrapping it with filament to make a solid shape. Then go back over the 3D shape, shaping along the way, so that the body looks round and ready to add on to.
4 Doodle the Head


Go back to the stencil to doodle the two circles that will form the head. Take those two circles and position them so that they form a 3D sphere. Once you have a 3D shape start wrapping filament around the outside of it, then go back over it with your pen and additional filament until all of the holes are filled in.
5 Doodle the Feet

Using the stencil trace out the legs. Once you have the outline, start filling in each leg until it takes shape. You can go the extra mile and make them 3D, or leave them more 2D like we do here.
6 Doodle the Ears

Trace out the outline of the ear pieces on the stencil. Once you have an outline, go back in and add some fun patterns to make the ears stand out on the bunny's head.
7 Doodle the Tail

The tail is simple. Doodle the circle on the stencil and then while slowly using your finger create a rounded shape as you add more and more filament. By the end, you should have a cup shape that looks like a puffy bunny tail.
8 Doodle the Arms

Trace out the arm pieces from the stencil and then fill them in using your fingers to smooth out the filament, creating a natural/ furry look. Or switch things up and create your own texture look / feel.
9 Let's put it all together!

Now that you have all the different body parts it's time to assemble. Using your 3D Pen and warm, fresh filament, firmly attach the legs, arms, head, ears, and tail. Hold each part firmly against the body until they are cooled and firmly attached.
Similar Tutorials
-

Let's make a creative self-portrait that pops off the page using your 3D pen and filament.
-
 - 3Doodler")
Have you ever picked up a rock and thought nothing of it? Well check again. That rock might be a geode. Crack it open and see what's inside!
-

Freshen up your Spring time home-decor with some colorful hand-Doodled Easter Eggs.
-

Try something new this Easter with these beautiful crochet-inspired Easter Eggs.

 - 3Doodler")

