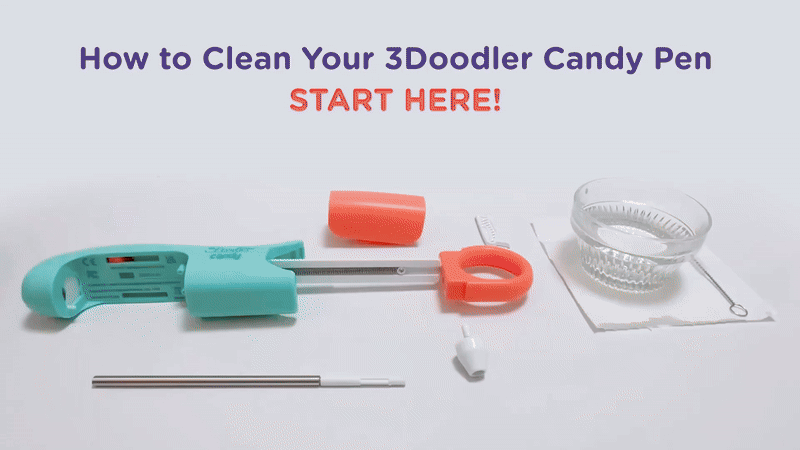
Getting Started

Not sure where to begin with your 3Doodler Candy? You’re in the right place. The 3Doodler Candy is the first 3D pen made for kids and families to craft yummy candy creations, designed for ages 8+. Let’s jump into the essentials so you can start creating sweet works of art!

What’s In The Box

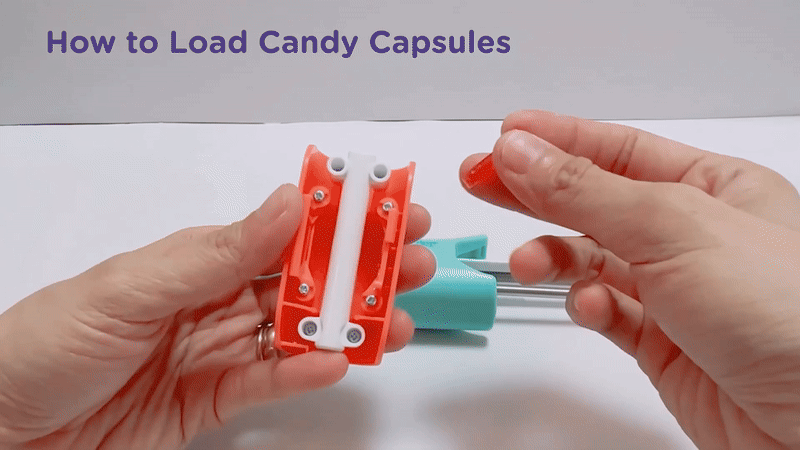
Create A Smiley Face Cookie

Basics

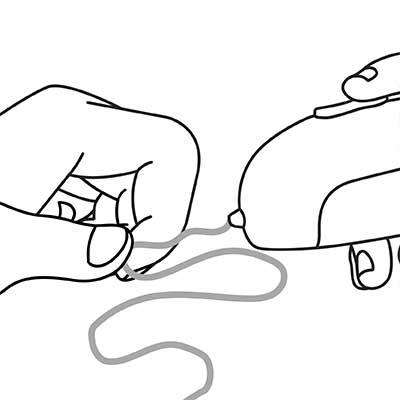
1. Remember to always prepare parchment/baking paper and the candy pieces you want to join before powering on your 3Doodler Candy.

2. Power on, insert Candy Capsules, and wait for the green light.

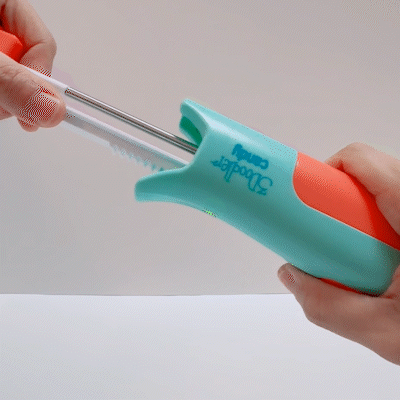
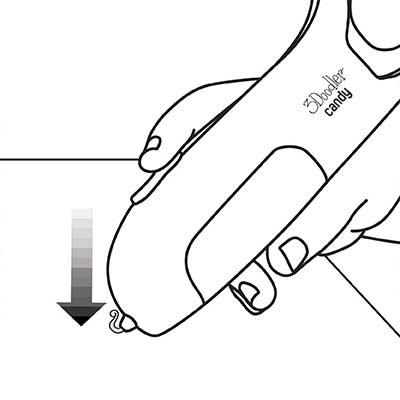
3. Press and hold the Forward Button to extrude candy.

4. Work quickly — the candy sets in about two to three seconds.

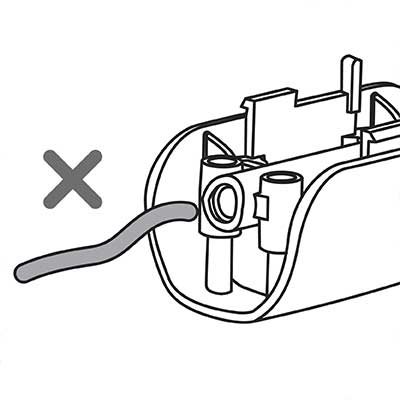
5. If a joint hardens, reapply candy and try again.

6. Use sturdy snacks like cookies, crackers, or pretzels for best results.

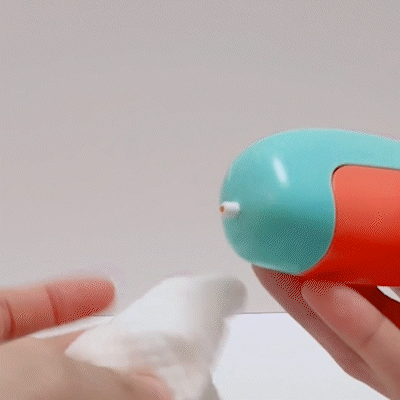
7. Remember to always let the nozzle and candy cool before touching.

The Pen

Buttons & Parts

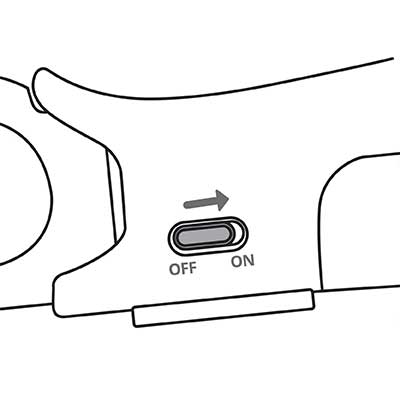
  • Power Switch: Slide to turn the pen on/off.
  • Forward Button: Press and hold to extrude candy.
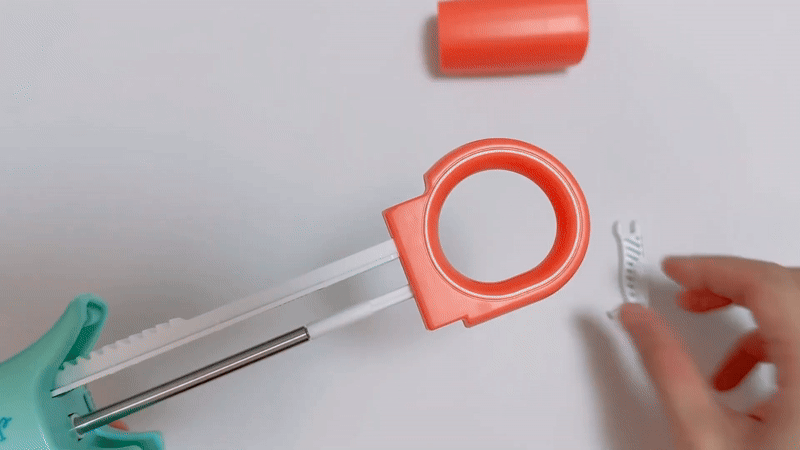
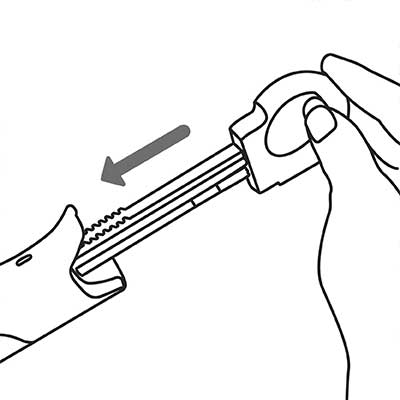
  • Pull Ring: Pull/slide to load and advance feed.
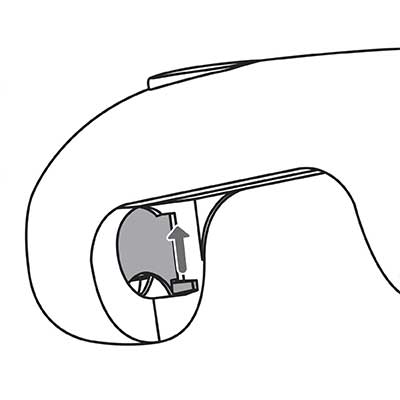
  • Hatch: Removable cover for capsules and nozzle.
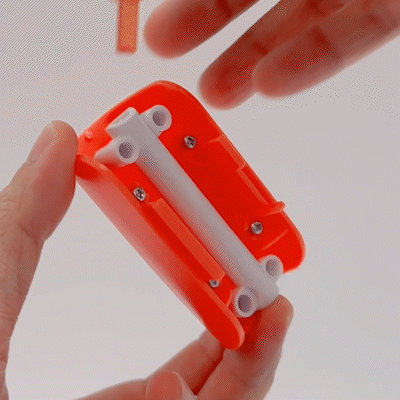
  • Candy Capsules: Isomalt pellets inserted to extrude.
  • Nozzle: Removable tip where candy is extruded.
  • Pushrod: Rod that pushes capsules forward.
  • USB-C Port: Connect cable to charge the battery.

Indicator Lights

  • Solid Red: Pen is warming up.
  • Solid Green: Fully heated and ready to use.
  • Slowly Flashing Orange: Battery level is low.
  • Quickly Flashing Orange: Pen is actively charging.
  • Solid Orange: Charging complete; battery full.

Operation

Turn it on

To turn on your 3Doodler Candy, slide the power switch from OFF to ON.

The LED light will turn SOLID RED to indicate the pen is warming up.Wait until the light turns SOLID GREEN. (fully heated)

Remove the Hatch

Pull back the PULLRING, to remove the HATCH, squeeze the sides and pull to release.

Add Candy Capsules

Install up to two (2) candy capsules. Reinstall the HATCH with the candy capsules inside.

Returning the pullring

While holding the PULLRING, press and hold the button. Gently push the PULLRING until you feel resistance. Once resistance is felt, release the PULLRING and use the button to begin extrusion.

Tips

Sticking Candy to a Surface

If you want your candy to stick to surfaces (e.g., paper) or other Doodles, press the pen tip into the surface or Doodle while extruding.

Smooth Doodling

To ensure smooth candy extrusion, gently apply pressure to the end of the pen’s handle.

Capsules can only be used once

Doodled candy cannot be reused.

Shape your Candy

To shape your candy precisely, wait a few seconds after extrusion, then mold the Doodles before they harden.

Troubleshooting

To remove the nozzle

  • Turn on the pen and allow it to cool.
  • Pull back the PULLRING and remove the HATCH.
  • Use the included wrench tool to gently push the nozzle tip into the pen. The removed nozzle will be accessible in the hatch cutout.

To clean the nozzle

  • Soak the nozzle only (not the pen) in hot water for 2–3 hours for best results.
  • Rinse the HATCH with hot water.
  • Use the included brush to loosen and remove any residual candy.
  • Rinse and dry the nozzle. Do not submerge the pen.

To reinstall a cleaned nozzle

  • Ensure the device is turned off.
  • Use one hand to raise the heater door for access, and with the other hand, insert the nozzle.

To clean the pushrod

  • Pull back the PULLRING and remove the HATCH.
  • Use the wrench tool to loosen the PUSHROD.
  • Slide the PUSHROD into the HATCH opening.
  • Carefully wipe the tip clean with a damp paper towel.

How-To Video Playlist

Still Struggling?

Take a look at our 3Doodler pro troubleshooting guide.
Help Me