Transforming Nature into 3D Art with Cornelia Kuglmeier

Woman with glasses doodling 3D pen art

Who is Cornelia Kuglmeier?

Cornelia (or Connie for short) is no stranger to the 3Doodler community. Crowned the “2016 Doodler of the Year”, Connie has created so many stunning 3Doodled pieces that we have lost count of exactly how many there are. In October this year, Connie took her hobby a step further and hosted her very own exhibition in Germany, titled “Metamorphosis”.

Why Metamorphosis?

Butterflies have always fascinated Connie. As an Art teacher, Connie has an exceptional eye for beauty and details, and Butterflies had always been one of the themes she wanted to work on. Being delicately small, it’s easy to overlook the extraordinary beauty of these creatures. Connie decided that she wanted amplify this beauty for the world to see, and so, “macro” became the theme of her exhibition.

Connie’s exhibition spanned over 3 storeys with a red thread leading through the exhibition. It was a perfect layout for telling a story. And what better story to tell but the magical transformation of a humble caterpillar to a majestic butterfly?

Take a walk with me

Photo Credit: Doron Sieradzki
  • 3d pen art caterpillar insect by Cornelia Kuglmeier
  • 3d pen art caterpillar insect by Cornelia Kuglmeier
  • 3d pen art caterpillar insect by Cornelia Kuglmeier

1/F: The Caterpillar Room

Welcome to the Caterpillar Room. Here you’ll be greeted by a giant caterpillar with plants that it feeds on, such as dandelions, nettles, daisies, and so on. The supersizing of the caterpillar and the dandelion head gives you a closer look at some astonishing details of its short-lived beauty, details which normally go unnoticed.

DANDELION HEAD: Made of Nylon and PLA plastic using the 3Doodler PRO.
CATERPILLAR: Made of ABS for the structure and PLA for the details using the 3Doodler Create.

Photo Credit: Doron Sieradzki
  • 3d pen art cocoon insect by Cornelia Kuglmeier
  • 3d pen art caterpillar insect by Cornelia Kuglmeier
  • 3d pen art caterpillar insect by Cornelia Kuglmeier

2/F: The Cocoon Room

This floor holds the second stage of the Metamorphosis cycle – the cocoon! Drawn completely free-hand, the fine strands perfectly illustrate real-life cocoons spun from layers of silk. The incompleteness of the cocoon hints that this is merely a temporary phase, to hide the mystery of the transformation. A beautiful butterfly swarm and a wall decorated with daffodils adds to the natural habitat scene. Now slow down, take a look around and enjoy the view.

COCOON: Made of Silver ABS plastic using 3Doodler Create.

Photo Credit: Doron Sieradzki
  • 3d pen art butterfly insect by Cornelia Kuglmeier
  • 3d pen art butterfly insect by Cornelia Kuglmeier
  • 3d pen art butterfly insect by Cornelia Kuglmeier
  • 3d pen art butterfly insect by Cornelia Kuglmeier

3/F: The Butterfly Room

Finally we are at the most stunning part of the exhibition, the Butterfly Room! These three gorgeous species are the Peacock butterfly, the Swallowtail, and the White Admiral. You can also see a huge swarm of majestic butterflies flying across the room in the background. Take a minute to appreciate the mesmerizing beauty and colors of these creatures.

BUTTERFLIES: Made of PLA plastic using the 3Doodler Create and the Nozzle Set (mainly the ribbon tip).

Red dress woman holds butterfly with red wing 3D pen art.

“I felt very proud and uplifted – and am still feeling very proud weeks after. The exhibition opened during an event called “Art Night” and the place was packed with people looking at my work. It was overwhelming (but in a good way) standing amidst that crowd and seeing the reactions on their faces. I couldn’t help but also eavesdrop on their conversations about my work (shhh…don’t tell anyone!).

Without the encouragement from my family and friends (including you guys at 3Doodler!), I would never have dared to set this exhibition up. Never. "Because when you are showing your art, you’re also showing yourself. That’s a very personal thing to me, and seriously, I was scared out of my wits!" Share

It’s a very different experience when complete strangers approach you and tell you how much they like what you do, ask you how you made it, and tell you that they’ve never seen anything like it. I also loved hearing people tell me which is their favourite piece – it seemed like every piece in the exhibition was someone’s favourite!

I definitely want to keep this work up and am looking for my next exhibition space already! I’m constantly looking for new ways to use the 3Doodler pens and have not yet failed to find something new to do with it.” back to top image

5 3D Pen Craft Activities Your Kids Will Actually Love!

Become the coolest parent in the neighborhood with these easy 3D printing pen projects!

We all know that spending some quality playtime with the family is crucial for kids to build better bonds with their parents, spark creativity, and more importantly for everyone to have lots of fun! Having said that, enticing kids to put down their digital devices and willingly take part in some good old craft projects can often be a challenge… Here’s a tried and tested tip: bring up the magic words “3D printing pens!” and voila, you’ve got their attention.

  • 3d pen kids flashlight activity
  • 3d pen kids flashlight activity
  • 3d pen kids flashlight activity
  • 3d pen kids flashlight activity

1. Bring bedtime stories to life!

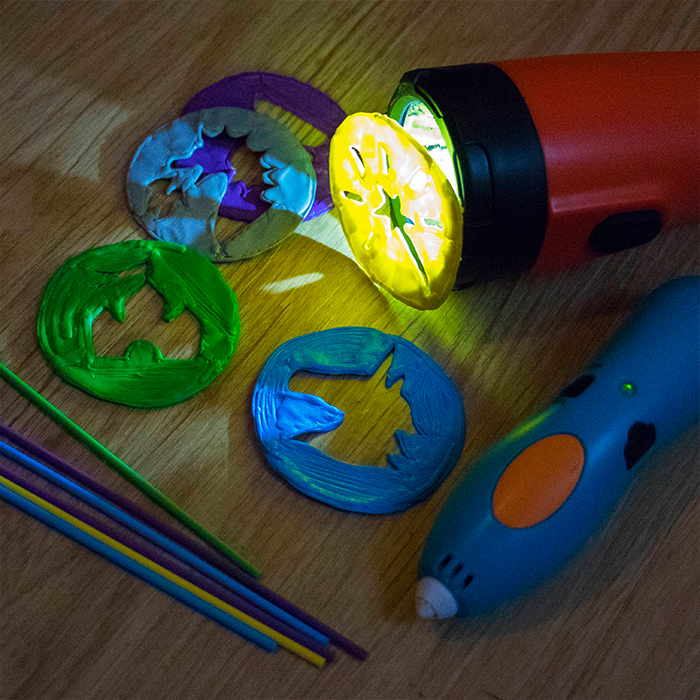
Let your child be the creator of their own bedtime stories with these DIY flashlight stencils. The end result creates beautiful visuals that make storytelling so much more captivating and fascinating!

Download Stencil

Steps

  1. Print out the Stencils or find/draw your own.

  2. Doodle the outer shape and keep Doodling to fill it in, but leave the desired shape (e.g. the dragon’s head) empty.

  3. Position your Doodled Flashlight Stencil against a flashlight, turn it on and voila you have your shadow art!

Materials:
Tips:
  • We recommend Doodling inversely in the stencils.

  • Customize your stencils based on themes, such as Halloween, Christmas, favorite book characters, etc.

  • 3d pen kids food activity
  • 3d pen kids food activity
  • 3d pen kids food activity

2. Bake sweet-looking treats

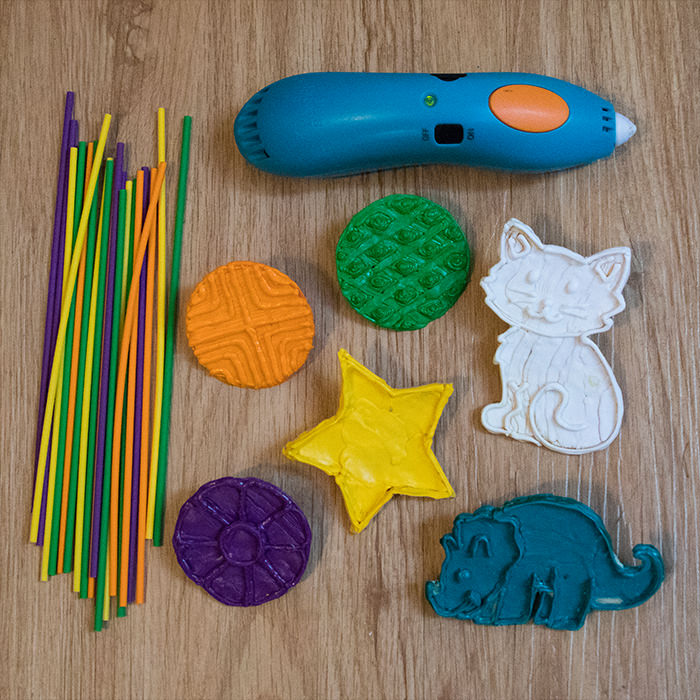
Baking is a great opportunity to engage everyone in the family. Involve your child in every step of the process, from Doodling your own customised cookie stamps to placing the imprinted treats in the oven. What better way to make fun memories and have a sweet result?

Download Stencil

Steps

  1. Print out the Stencils or find/draw your own.

  2. Doodle the shape first. Next, follow the lines of the pattern and Doodle several layers on top of the lines to create a protruding surface.

  3. Create a variety of stamps with different shapes and patterns using the same method.

  4. Roll out and flatten your dough, then imprint them using the cookie stamps.

  5. Carefully remove the extra bits of dough on the edges. Place your dough on a tray and bake!

Materials:
Tips:
  • Start Plastic is completely safe to use with food!

  • Doodle handles to the back of the cookie stamps to make stamping easier.

  • This project idea works best with sugar cookie dough.

3. Bring all the birds to your yard!

Build the best bird feeder in the neighborhood with this fun family-project. Did you know that bird feeding relaxes, educates, and is an excellent way to increase outdoor recreational activities for kids?

Watch Kelley Powerpuff Herself here:

Download Stencil

Materials:
Tips:

4. Make customized prints

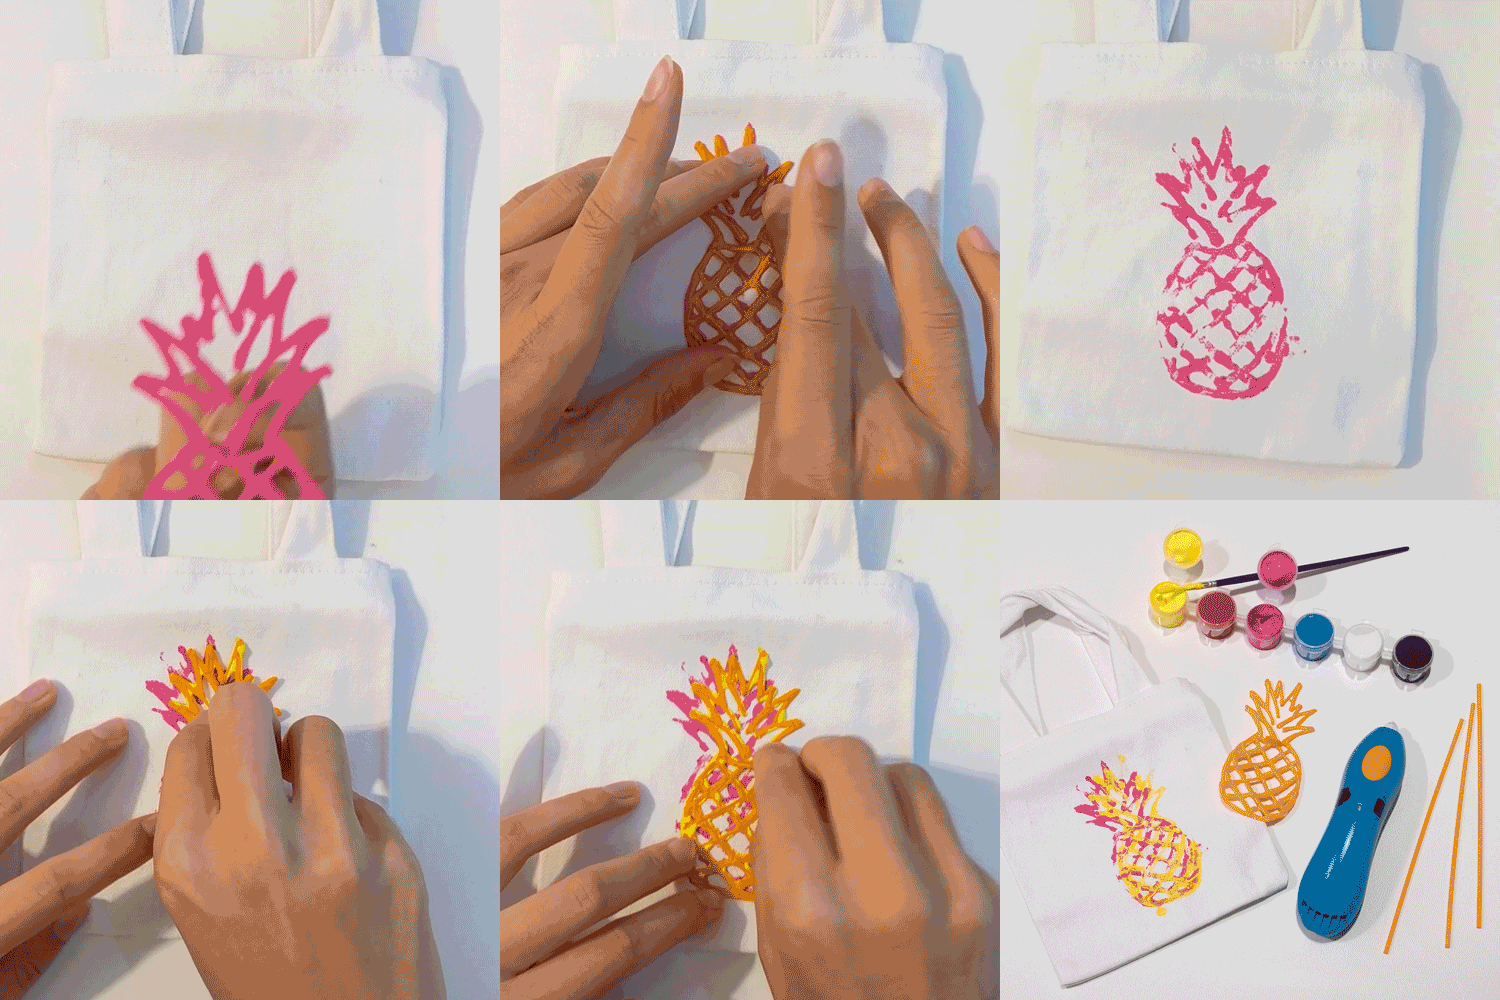
Decorate your child’s t-shirt, bag and more with your own Doodled symbols, characters and phrases! With the versatility of the 3Doodler pen, the personalization possibilities are endless.

Download Stencil

Steps

  1. Print out the Stencils or find/draw your own.

  2. Doodle and fill in your desired shape (e.g. a star) to create a stamp.

  3. Dip your stamp in some fabric paint, then carefully stamp the shape onto your t-shirt/bag.

  4. Wait for the paint to dry.

Materials:
Tips:
  • It’s always best do some test prints on paper first.

  • If you decide to do a line drawing instead of filling your stencil in completely, make sure your Doodled lines are thick enough, to get a cleaner printed result.

  • Wash your stencils when you’re done and reuse them for other crafty projects.

  • 3d pen stars science activity
  • 3d pen stars science activity
  • 3d pen stars science activity

5. Reach for the stars (and more)!

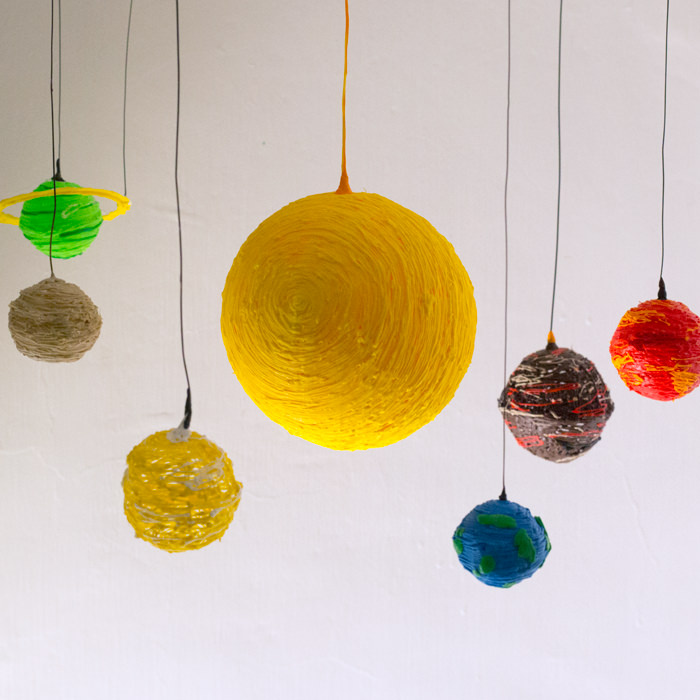
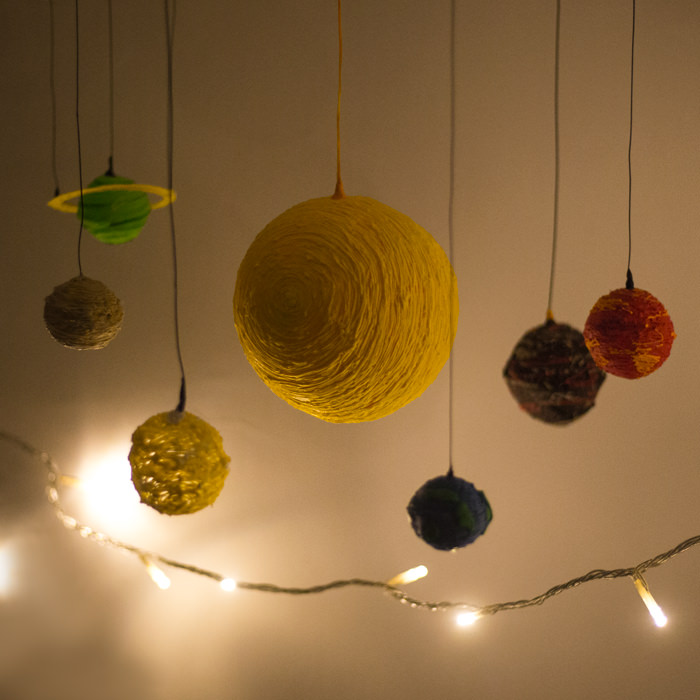
This DIY solar system project is not just educational, it’s also a great way to decorate your child’s bedroom. With Glow-in-the-Dark stars and Doodled planets, you’ll find your child marvelling at the beauty of the universe at night!

Steps

  1. Blow up some balloons into different sizes, to match the relative sizes of the planets in the solar system.

  2. Take one balloon, using a marker draw a line along the center and go all the way round the balloon.

  3. Doodle half of the sphere up to the line you’ve drawn, then peel off the plastic. Repeat with the other half of the sphere.

  4. Doodle to join the two halves together.

  5. Doodle some stars with Glow in the Dark plastic .

  6. Connect the star and the planet by Doodling a line.

  7. Repeat steps 2 – 6 with the other planets.

  8. Use Blu-Tack or Command Strips to attach the stars to the ceiling.

Materials:
Tips:
  • Play a space themed trivia quiz with your child. For every question they get right, they get to add another Doodled star to the ceiling!

We hope these projects sparked some inspiration for activities to do with your family! The most important thing is to use this opportunity as a way to spend more quality time with your children. Being entirely present with them and using these everyday moments as a way to help your children grow and learn will create priceless memories and a stronger bond between you and your child. The possibilities are endless.

Happy Doodling!back to top image