5 Lifesaving DIY Doodles for the Home

When it comes to the things we use most around the home, small breaks are bound to happen with the general everyday wear and tear of life. It’s unavoidable, but that doesn’t mean it’s not fixable!

With your 3Doodler in hand, you can DIY your own fixes and repairs for all sorts of breaks and damages that can happen around the house.

1. Broken Scissors Just Won’t Cut it

It’s tragic when an otherwise great tool is wrecked by one little bit of broken plastic. That’s what happened to these scissors. While the blades are still fine, they won’t work properly when the plastic handles are broken.

Fortunately that’s a quick fix with the 3Doodler! To fill in the cracks, PLA will create a strong, solid hold. You can also weld the plastic together with the Create’s hot tip. Using a combination of both will give a lasting solution that will make your scissors stronger than ever.

A bit of extra plastic and a little welding keeps your scissors snipping A bit of extra plastic and a little welding keeps your scissors snipping

2. Saving a Stand for the Kitchen

When this cutting board stand started to crack, it looked like the end for this handy storage unit. What good is a stand that won’t hold up?

Luckily all it took was a bit of repair work with the 3Doodler to make it like new – and possibly even stronger than before! With added PLA plastic which welded and reinforced the stress points of the stand, it can now continue to hold up under constant kitchen use.

3. Zapping a Problem Zipper

There’s nothing more frustrating than a broken zipper. Whether on a bag, jacket, purse or any other zip-able item, you need that zipper to do it’s job!

Fortunately, there’s this handy fix and video tutorial from Creative World to help you Doodle your way back to a fully functional zipper.

4. A Doodle DIY for Your Deck

A quick Doodled replacement makes this home repair a snap! A quick Doodled replacement makes this home repair a snap!
The plastic ring that hold the umbrella in place on this deck table kept breaking. And a wobbly umbrella can upset the whole balance, and ruin an afternoon outdoors!

Fortunately, all it takes is your 3Doodler and a bit of measuring, and you can create your own custom ring that withstand even more wear and tear than the original. You can use ABS or PLA to create the ring, and could even add some FLEXY around the bottom and inside to give it a non-slip upgrade!

5. A 3DIY Fix for Your 3D Prints

It’s the repair that sparked the whole idea for the 3Doodler: what do you do when your 3D printer misses a line, or a 3D print breaks or cracks? Fill it in using your very own hand-held 3D printer, of course!

The 3Doodler is perfect for fixing damages or accidents that can happen to your 3D prints. Don’t waste the time and effort involved in 3D printing, just make a quick repair and you’re good to go.


With so many options to fix and repair, the 3Doodler can save not only your tools and home items, but can also save you lots of money by avoiding costly replacements!

Not sure where to start when it comes to using your 3Doodler around the house? Check out our Hot Tips section to get insider ideas on how get the most out of your 3Doodler, and have you Doodling like a pro.back to top image

Show us your 3Doodler DIY fixes by tagging us @3Doodler and using #3Doodler and #WhatWillYouCreate

7 DIY 3D Pen Hacks to Doodle for Your Camera

Whether you’re a professional photographer, photo-hobbyist, or like getting the perfect shot for your Instagram, you’ve probably invested time and money in your cameras and equipment. As with any investment, you want to protect your kit and make sure you get the most out of it.

With that in mind, we’ve put together these lifesaving hacks that you can DIY with your 3Doodler to extend the life of your gear. From top-of-the-line gear or a single point-and-shoot, we’ve got the fixes for you!

1. Repair a Cracked Lens Cap

A Doodled fix can save a cracked lens cap A Doodled fix can save a cracked lens cap
One of the most important components of any camera – and often the most expensive part – is the lens. Keeping your lens as pristine as possible is a necessity, but the lens cap can too often be lost or broken.

A cracked cap that no longer grips onto your lens is just as bad as a lost lens cap. That’s where adding plastic with the 3Doodler, while holding the pieces together saves the day – and possibly hundreds to thousands of dollars for a new lens.

2. Replace a Lost Lens Cap

Lost your lens cap altogether? Doodle a new one to custom fit your lens!

Steps
  • Hold the lens flat on a piece of paper and trace the circular outer edge.

  • Using ABS or PLA, fill the inside of the circle with 3Doodled plastic.

  • Tip: Make it smooth and solid by moving your hand in slow, steady, and consistent lines. Hold it up against a light when you’re done to see if there are any gaps or holes that need to be filled in.

  • Place some aluminium foil over the end of the lens and Doodle around the outer edge using FLEXY plastic. Make sure that there are no gaps or holes in the cap so that no dust or dirt can get in.

  • Hold the flat circular piece you’ve created to the FLEXY ring and use some more FLEXY and Doodle the two pieces together. Add some FLEXY further down the sides of the lens to make sure that it stays in place.

  • Tip: Be sure to add lots of plastic when connecting the pieces together, as you want them to be very solid and sealed up nice and tight.

  • 3D pen DIY hack to fix camera cap
  • 3D pen DIY hack to fix camera cap
  • 3D pen DIY hack to fix camera cap
  • 3D pen DIY hack to fix camera cap

3. Doodle Yourself a New Tripod

With a bit of patience there’s no reason why you can’t create a whole new custom tripod using the 3Doodler! We recommend ABS plastic for the best rigidity. We whipped up this smartphone tripod, with adjustable legs and FLEXY feet to keep it standing right in place.

A custom tripod matches any model phone. A custom tripod matches any model phone.

4. Repair a Broken Tripod Adjustment Knob

Repair the grip, reattach the knob, or Doodle a new one. Repair the grip, reattach the knob, or Doodle a new one.

Whether you’re using a DSLR with a telephoto lens or your smartphone, the tripod is an invaluable asset. With all the adjustable parts, a broken knob can be a real pain! With your 3Doodler and your choice of ABS, PLA, or FLEXY, you can fix a broken knob, repair the rubber grip like in the photo below, or if it’s fallen off just Doodle a completely new one right on to the end of the screw. If your new Doodled piece is loose, simply add a little extra plastic and adjust your tripod to the perfect angle for your next great shot.

5. Replace a Missing Tripod No-Slip Bed

FLEXY is perfect for creating a non-slip surface. FLEXY is perfect for creating a non-slip surface.

Got an old, but quality tripod with just a minor issue? Make it new again with a few Doodled repairs! The one below lost the rubber bed that the camera rests on – without it, the mounting screw won’t tighten and the camera remains loose. A fix that’s quick but lasting is to create a small washer with ABS or PLA plastic which works as a perfect spacer to hold the camera firmly in place.

Want to take this fix a bit further? Using FLEXY, recreate the original piece and affix it back onto the tripod for good!

Tip: Place a piece of paper over the top of the tripod and sketch a stencil outline to work from.

6. Replace a Strap Adjuster

If you’ve got one camera, two cameras, or a whole bag full of them, chances are you’re dealing with a few straps, each one of them with at least one clip or adjuster. Breaking one can seem like the end of the line, but with your 3Doodler you’ve got an easy way to DIY your strap as good as new.

It's as easy as 1, 2, 3
  • Doodle a letter “E” with horizontal lines as long as the width of your strap.

  • Slide the “E” over the strap so the prongs are arranged like they were with the original piece.

  • Doodle a straight line down, connecting the the three points of the “E” and securing your straps in place.

  • Tip: Make sure to Doodle this piece nice and thick, and ensure that the plastic really melts to itself so that it is sturdy and holds the straps in place.

  • 3D pen DIY hack to fix camera strap adjuster
  • 3D pen DIY hack to fix camera strap adjuster
  • 3D pen DIY hack to fix camera strap adjuster
  • 3D pen DIY hack to fix camera strap adjuster

7. Repair or Reinforce Cables

Cables, cables, everywhere! Whether charging cables or the cords for your lighting setup, these are the veins that power your gear. Your gear can’t work without cables, and neither can you!

That’s why it’s crucial to give them support when they show any signs of wear and tear. A bit of FLEXY around the stem of a damaged cable can reinforce it and make it even stronger than before.

A bit of fLEXY does the trick to keep your cables from cracking. A bit of fLEXY does the trick to keep your cables from cracking.

Repairing and replacing parts with the 3Doodler also serves as a way of customizing and identifying your gear in no time at all! Then again if you’re looking to keep things on the down low, you can match colors or use black filament so that your repairs won’t even be noticed.back to top image

Show us your DIY hacks by tagging us @3Doodler and using #3Doodler and #WhatWillYouCreate

3Doodler for DIY

While the 3Doodler can be used to make incredible sculptures and works of art, it’s practical applications can’t be overlooked.

With a tool as diverse as this, the DIY options are endless. Here’s eight examples of simple fixes or DIY ideas for your 3Doodler.

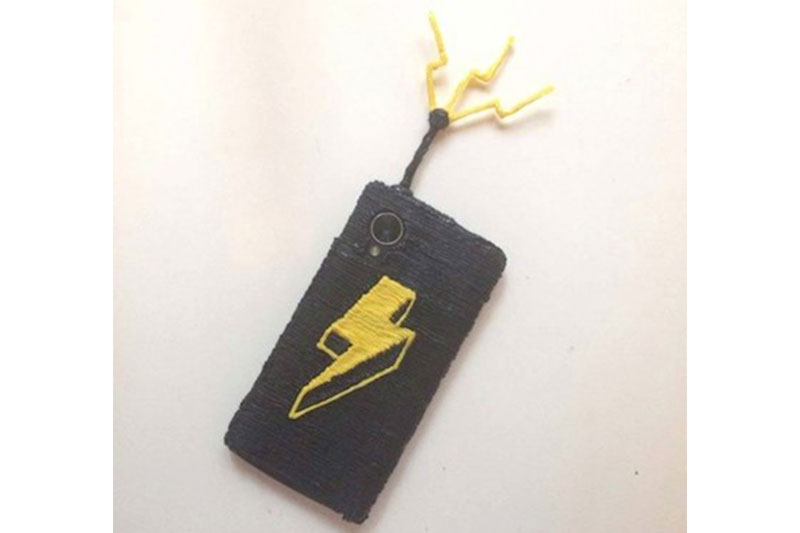
1. Give Your Phone an Upgrade

Looking for a style switch up? Doodle yourself a new phone case. No need to look like everyone else, make yourself a case that will give your mobile phone some personal flair while keeping it safe.

2. Make Your Own Doodled Clock

Make a statement with your home decor and create your own interior design pieces with personal flare. For wall pieces, hard-setting PLA works great, and will help you Doodle pieces that will last.

3. Repair Snaps in a Snap

Instead of buying a new pair of glasses, fix them with your 3Doodler. PLA adheres to metal better than ABS, so it works great for quick fixes like this one. Simply join the two pieces and Doodle around the break point. This little fix makes for quite the talking point too!

4. A DIY That Holds Water

Repairing cracks in plastic cups or soap dishes is easy with your 3Doodler. Both ABS and PLA work well for this kind of quick fix. ABS is excellent for plastic-on-plastic Doodling because of its higher melting point which helps weld plastics together, and PLA has naturally strong bonding properties. The PLA Clearly range also makes for more discreet fixes!

5. Doodle Your Own Wallet

Use FLEXY to create a hand-made plastic wallet of your very own! For a more fabric-like look, push the nozzle of your 3Doodler flush with the surface you are Doodling on, moving it quickly to form a thin film of Doodled plastic.

6. Repairing Your Home Appliances

3Doodler came to the rescue to fix the shell of this broken vacuum cleaner. A simple repair saves time and money, and gets your back on track with minimal fuss!

7. Lighten Things Up

Get creative and make your own lampshade. This lampshade was constructed for our display window at the MoMA Design Store. Made from over 50 small triangles, the pieces were welded together like a mosaic to produce this stunning lampshade. Pick your own colours and style – it’s simply a matter of joining the pieces.

8. Mix Doodling for Dynamic Projects

Louis DeRosa was able to combine a passion for electronics and the 3Doodler by using it to help make his own Hexacopter. As you can see, when you start to apply your imagination to 3Doodling, the sky really is the limit!


With so many options to fix and repair, the 3Doodler is your go-to DIY tool for any occasion!

Not sure where to start when it comes to using your 3Doodler for DIY? Check out our Hot Tips section to get insider ideas on how get the most out of your 3Doodler, and have you Doodling like a pro.back to top image

Show us your 3Doodler DIY fixes by tagging us @3Doodler and using #3Doodler and #WhatWillYouCreate