ISTE 2023 Key Takeaways and Promising Practices

What a week we had in Philadelphia! 3Doodler was thrilled to join educators from across the country and around the world at ISTE 2023.

This annual event pulls together the brightest minds in education. It offers educators a deep dive into areas that interest them, with solutions and ideas to make progress.

While discussion around AI unsurprisingly took center stage, the breakout sessions focused more on boosting accessibility, play, and collaboration in schools. Catch a brief overview of this year’s event here and read on for our key takeaways from the educators we met with and sessions we attended.

Accessibility & Social-Emotional Learning as a Priority

Educators continue to prioritize social-emotional learning in the classroom. The strategies they rely on encourage students to develop emotional intelligence, resilience, build empathy, and create positive relationships.

One classroom example for younger students included Build Me “Emotions” by Lego Education, enabling students to share their emotions through hands-on building and play. Older students may enjoy an opportunity to introduce themselves to their peers at the beginning of the year. This can be a small, but valuable step towards getting to know each other (and how to pronounce names!) while also building a classroom community.

Accessibility tools are a game changer for many students. Unique tools by Apple and Microsoft make learning much more approachable for various audiences, including built-in tools for those who need visual, hearing, cognitive, or mobility support.

Melissa Stark, a Special Education Teacher and Instructional Technology Coach in New York City’s Department of Education, shared these tools and other critical tips to make learning more accessible during her ISTE presentation.

Importance of Play

A common theme that emerged as the event progressed was the importance of play-based activities, especially given the last few years of disruption brought on by the pandemic and distance learning.

One glance around the ISTE Playground, and it was clear to see how play could boost learning outcomes. Gamification was a clear focus, which adds gamelike elements to increase motivation and engagement.

Teachers are creating interactive and immersive learning experiences and boosting play with a host of learning tools like Class VR, Book Creator, and KinderLab Robotics, to name a few.


  • 3D pen artist sketching giraffes, man in red shirt, and paper
  • Group standing at convention table with laptop & phone doing 3d pen art
  • Crafting with 3D pens and string
  • Creative 3Doodler sketch using paper and cell phone

Collaboration Through Industrial Design Labs & Makerspaces

Several educators we spoke with explained their role in organizing maker spaces, fab labs, and industrial design labs. No matter what it’s called in your school, these spaces and the people who lead them are incredible. They provide students with an area at school that offers a break from the pressure of strict academic work and allow for more creative, hands-on learning.

Johanna Marshall, a teacher at Ridley High School in Pennsylvania, shared a session with her students to explain how they took an outdated industrial design lab and transformed it into a welcoming, student-centered maker space where everyone could contribute.

Students formed a Girls Who Code club and worked collaboratively to create working mazes. Later in the year, students made functional interlocking stools that tested their skills.

Lessons shared for those looking to create their own maker space included starting where you and your students are, only accepting useful donations, buying equipment with product support, and asking for help when you need it.

Inspirational as always, ISTE 2023 was a great reminder for all of us to focus on what’s possible and to celebrate student achievement at every opportunity.

What were your key insights from ISTE 2023? Tell us how we can support your goals to reach students and encourage their creativity. Share your thoughts with us @3Doodler or #3Doodler #WhatWillYouCreate.

Artist Spotlight: Anela Ming-Yue Oh

Anela Ming-Yue Oh is a multidisciplinary artist who loves curry and the ocean! Anela partnered with 3Doodler on our latest guest artist feature to share her approach to 3D artwork.

She uses materials that have a life of their own such as clay, paper, and fiber, with her 3D pen creations. Anela recently completed a year as an artist in residence at the Arrowmont School of Arts and Crafts. She will be traveling to Malaysia as a School of Museum of Fine Arts at Tufts University Traveling Fellow in 2023.

Finding Artistic Inspiration

Anela relies on her imagination and also draws from the resources around us to inspire her creativity.

“For me, I draw strength to move through the world from my identity as mixed race-Malaysian-Chinese, lessons from the natural world, and people close to me who have passed on,” said Anela.

In this piece, Anela uses the 3Doodler 3D pen to speak to Malaysian batik, a lost wax process where wax is painted or stamped on fabric and then dyed. She also incorporated a plant from both sides of her mixed-race heritage: okra. It’s a plant that Anela believes both her white Southern family members and her Malaysian-Chinese members would have intimately known through food.

“A huge part of using vibrant colors for me is being unapologetic in taking up space,” said Anela. “As an Asian American you are often viewed and shaped by culture to be as small and unobtrusive as possible.”

The bright color in this piece represents reclaiming spaces as an active agent in the world. The colors draw from the traditional Malaysian dress she grew up with and family members who wore such patterns and colors as batik sarongs.

Surprising Ways with Mixed Media

“As an artist who is mixed race dealing with world building I believe it is important that my work reflects a meeting of materials, soft fiber and hard plastic or ceramic meeting in ways that create beautiful complexity,” said Anela. “This interdisciplinary approach reflects the strength and commonalities between the different worlds I inhabit every day.”

She started this project using the 3Doodler Pro+ to draw the central okra stalk element and the other floral patterns. She continues to create until she has enough in varying colors and styles to lay out the design. Next, she begins the papermaking processes to transform the PLA drawings.

“I work with a fiber called overbeaten abaca which is a plant fiber that I beat for 8 hours in a machine called a hollander beater,” said Anela. “I use it because it is extremely strong and connects seamlessly to the 3Doodler drawings.”

She used a papermaking tool called a deckle box to “pull” the sheet using the unpigmented abaca to create the base sheet of paper. Then, she dips each 3D drawing into a pigmented abaca container before placing it on the base sheet. Finally, she removes the abaca base sheet once the 3Doodler designs are placed.


  • Hand holding 3d pen art: green waxed coin
  • Colorful 3D pen string art hanging on wall
  • Vibrant yarn hanging on white wall in 3D pen art (53 characters)

Experimenting & Creating in 3D

During her undergraduate program, Anela used the 3Doodler Pro+ in a metals class and fell in love with the process. The objective was to use the 3D pens to think through modeling before casting. Anela found herself making rings and other jewelry directly with the pen and ABS material.

“I found it very accessible to start working very creatively,” said Anela. “I was building three dimensional forms, flat forms and building them up, and ended up making forms combining those ways of working with the pen that were used in my thesis show.”

She explains that it’s essential to use materials that spark excitement. Trying out new materials encourages the imagination. A new technique may transform an artistic approach.

“I think a huge part of any artistic practice is joy and experimentation,” said Anela. “When you integrate different materials it provides endless problem solving and opportunity to play with how the materials work together.”

Anela advises budding 3D artists to experiment and play. She finds that the more you experiment and add new tools and skills to your toolbelt, the more you will find the things that resonate.

“It took me quite some time to figure out how the 3Doodler Pro+ would function in my larger practice in a meaningful way,” she said. “Now, I’m working with clay in similar ways due to my experience with the 3Doodler pen. I can’t wait to see how all of this learning keeps expanding the relationships between my materials.”

Experiment and play with your 3D pen. Test different materials to see what works best for you. Take inspiration from Anela’s unique approach to art and her tips. Share what inspires you and tell us about it at @3Doodler or #3Doodler #WhatWillYouCreate.

Dive Under the Sea with a 3D Pen Mermaid

Guest artist Cornelia Kuglmeier helped explore the topic of mermaids this month. Dive into the history of mermaids and learn a few fun facts about their origin.

Disney’s live-action version of The Little Mermaid will be out in theaters later this month. Hear how it inspired Connie and discover the techniques that enabled her to bring her vision to life!

Diving Into an Underwater World

Mermaids and mermen appeared in folklore with the upper body of a human and the tail of a fish. These mythical beings appeared in many different cultures and were considered magical creatures who loved music and often sang.

Early stories about merpeople suggested they brought harm to humans in the form of floods, shipwrecks, or other disasters. However, mermaid and mermen sightings exploded during the early 1500s as explorers took to the seas and made their way across the ocean.

In fact, as early explorers traveled through the Caribbean they claimed they saw mermaids. It was likely manatees that they were spotting in the ocean, but the legends continued.

In 1873, Hans Christian Anderson wrote The Little Mermaid as part of a collection of fairy tales for children. The story shares the journey of a young mermaid willing to exchange her life in the ocean to gain a human soul. Over the years, the tale was adapted to theater, film, ballet, and even opera. The most well-known adaptation is that of the animated Disney film that was released in 1989.

“I loved the character of Ariel. She’s such a curious, lively girl, who loves to explore, to learn new things, and expand her horizon,” said Connie. “What intrigued me the most, though, was that beautiful underwater world. It was a completely new world to me, as was ours to Ariel.”


  • 3d pen figurine of a mermaid by 3Doodler
  • 3d pen figurine of a mermaid by 3Doodler
  • 3d pen figurine of a mermaid by 3Doodler
  • 3d pen figurine of a mermaid by 3Doodler
  • 3d pen figurine of a mermaid by 3Doodler

3D Design Process Explained

In sketching this latest project, Connie explains that her drawings continue to evolve throughout the project, and the final design may differ slightly from the original sketch. The next time you sketch, consider using a 3D pen to create a scene or add detail to a particular project.

“Once I start, the ideas start to flow,” said Connie. “As you draw one thing, another crosses your mind, but it doesn’t quite fit with what you’re sketching at the moment. Then, there’s a second idea, and so on.”

She explains that creating is an ever-evolving and living process. Sketching is an essential part of the process. Connie describes it as taking notes and putting them into a picture. That picture quickly becomes a 3D design as the process unfolds.

Connie draws from various angles to help in her three-dimensional planning. This process enables her to firm up the design’s dimensions, proportions, and details.

“The result is often a mixture of different ideas, but seldom just one specific sketch I made previously,” said Connie. “Even though the sketch is important to the design process it doesn’t determine the final result. It mostly serves as a visual note.”


  • 3d pen figurine of a mermaid by 3Doodler
  • 3d pen figurine of a mermaid by 3Doodler
  • 3d pen figurine of a mermaid by 3Doodler
  • 3d pen figurine of a mermaid by 3Doodler
  • 3d pen figurine of a mermaid by 3Doodler
  • 3d pen figurine of a mermaid by 3Doodler

Surprising Details & Techniques

Connie admits that creating something truly unique can take time and patience. Some elements, like the scales, were planned, prepared, and applied. But others, like the pearls and bubbles, were added as a finishing touch.

“The result is so rewarding,” she says. “I love the light reflecting on the multi-colored scales. I like the varying hair color. The details breathe life into things.”

A surprising material created the look of the skin on this mermaid. Connie used wood filament to make the skin and body. She doodled the pieces and then used the flattening tip to smooth them and create an even surface.

“Wood is such a good filament for sculpting,” said Connie. “If you use the angled tip, you can carve into the plastic, as I did for lips and eyes. If you want to speed up the process, change the setting from PLA or Wood to ABS. It makes a big difference, but you need to be careful not to press too hard or the plastic will melt away.”

Regarding the new live-action Little Mermaid, Connie is excited to see how Ariel’s sidekicks and the underwater kingdom come to life on screen.

“I’m really interested in all aspects of the story,” says Connie. “I’m mesmerized by modern film technology and enjoy seeing what artists are capable of creating. Entire new worlds to literally dive into!”

Sketch and design in 3D and take inspiration from Connie’s latest tips. Share your 3Doodler projects by tagging @3Doodler or #3Doodler #WhatWillYouCreate.

Celebrate National Library Week!

We often think of a library as a place to find books of all kinds — from picture books to large print or ebooks and audiobooks. But there’s so much more to the story.

Discover all that libraries have to offer during National Library Week, April 23-29, 2023! Libraries provide a space for community events, guest speakers, crafting classes, STEM activities, and book clubs. In addition, librarians are there to help you find what you need. They lend movies, musical instruments, games, and museum passes. At a library, you might be surprised to find courses that support local businesses, job seekers, or entrepreneurs.

This week, take a moment to explore how libraries support the local community with tips we rounded up. While you’re at it, use your 3Doodler tools to design a flipbook or trace your favorite storybook character. Read on!

There’s More to the Story

It’s easy to participate in National Library Week! Explore these suggestions and discover something new at a library near you.

A few ideas
  • Visit a library: Stop in and visit your local library to explore books or participate in a new activity. Take a moment to talk with your librarian and learn more about your library story. You might be surprised by what you discover!

  • Share #MyLibrary Story: Now that you know more about your library, share what you’ve learned. Was it a new book? Help to start a new activity or craft? A museum pass or a book club? Participate by writing about your library experience and sharing with the hashtag #MyLibraryStory.

  • Build community: Follow the American Library Association on Facebook, Instagram, or Twitter. There’s so much more to learn when you stay in contact year-round.

Storybook Projects

Libraries are also an excellent resource for STEM/STEAM clubs and maker spaces. In addition, you may find tools you can borrow, like a 3Doodler 3D pen or activity clubs, that you can join for weekly project ideas.

No need to delay. We’ve got a few project ideas that will get you started as you celebrate National Library Week. So enjoy these creative projects you design to support your love of reading, storytelling, and more with 3Doodler!


Purple flower on small card, 3D pen art.

3D Flipbook

Create a small book with a series of images in different positions to create the illusion of movement when the pages flip quickly.

Make It


3D pen art: Green string sculpture in hand.
Bookshelf Doodling

Bring storybook characters to life! Use a favorite book from home or check out new books at a local library. Once you’ve settled on your favorite, we’ll teach you how to take any picture book and create a stencil for doodling!

Try It

Share your library discoveries with us or your new 3Doodler projects by tagging @3Doodler or #3Doodler #WhatWillYouCreate.

Finding Inspiration Through Street Art, 3D Glasses, and a Mexican Artist

Street art is created in public locations and is usually unsanctioned. Still, it covers a wide range of media and is generally more connected with graphic design than graffiti art, according to Tate.

3Doodler took inspiration from this art form in our latest collaboration with artist Ricardo Martinez. Creating this street art design, Ricardo took inspiration from 3D glasses, engraving, and a late Mexican artist.

3D Glasses & Pop-Culture

Ricardo admits that inspiration for his latest piece initially took a lot of work to find. Although the ideas were there, they took time to coalesce into a design.

“I knew I wanted to create an anaglyph. I kept thinking about 3D glasses that had one red and one blue lens,” said Ricardo. “The images were layers and when you viewed them through the glasses, your perception would change making the image pop off the page or the screen.”

Joseph D’Almeida experimented with anaglyphs, a Greek term meaning again and sculpture, in the 1850s and is often credited with inventing a new way to view 3D. Anaglyph uses a motion or still picture in which two composite images, usually one red and one blue, are superposed one over the other to produce a three-dimensional effect when viewed through correspondingly colored glasses.

The Power of Love, released in 1922, was the first movie to use anaglyph technology and require the audience to wear 3D glasses. It grew in popularity, and more films were released in the 1950s. One of the more well-known films of the time was Creature From The Black Lagoon in 1954.

A more current example of the technique that Ricardo referenced is this Daily Motion video that shows street mural art with two designs in one, depending on how you view it.


3D drawing: Man with bow & arrow

Late Mexican Artist Inspires Modern Design

Despite having chosen his technique, Ricardo struggled to find inspiration for the piece itself. As he attempted different designs, nothing looked quite right. Ricardo wanted to create a transparent image with plexiglass panels. He started with a heart, but the idea refused to take shape.

Ricardo looked for a piece of art or another idea to inspire his design. He decided to focus on a Mexican artist he greatly admired, Saturino Herrán. Born in Aguascalientes, Mexico, on July 9, 1887, Herrán attended the Academy of San Carlos in 1904. His artistic career flourished from 1912-1914, inspiring the Mexican modernist movement.

“I’ve always admired Herran’s figurative art,” said Ricardo. “He is not really well known and I wanted to pay tribute to him using new technology. It felt especially powerful given I’m working with a drawing that is easily 100 years old and reviving it in a modern way.”

The work that inspired Ricardo is an unnamed illustration that Herran drew for Pegaso magazine in 1917. Herrán’s more famous works include Our Ancient Gods, which celebrates the strength, dignity, and beauty of the indigenous people who are part of Mexico’s history. Through this painting and several others, Herrán established himself as a champion of indigenismo, a movement to elevate and show respect for Indigenous people and their culture.


  • Creating 3D art with a 3D pen on paper
  • Grass 3D pen art: Fake animals in vibrant display
  • 3D drawing: Woman with bow
  • 3D pen art: woman picture on wall
  • 3D pen artist sketching by window with knife

Creating Street Art

Now that Ricardo had his idea for the drawing and the technique he would use, he was ready to create. First, Ricardo would trace the sketch and then use his artistic design elements to fill in the back of the portrait.

“What many people don’t realize is that with a 3Doodler 3D pen, you don’t have to be a great artist or designer to create something beautiful,” said Ricardo. “You can find inspiration in drawing or sketches you see and use a DoodlePad to trace them and create art.”

The bright pink and blue palettes he used were classic street art shades. The final design is something that Ricardo is pleased to share.

“When you have an idea, you should see it through to the end. As I was working on this piece, I wasn’t happy with it at all. I even stopped at one point as it just wasn’t making sense,” said Ricardo. “Seeing it through to the end paid off as I was able to realize my initial vision.”

Ricardo’s advice to other artists is to stick with it.

“Even if the skills aren’t there, you can trace. Do whatever you can to produce something and your own style will start to emerge as you put pen to paper,” said Ricardo.

Test Ricardo’s latest techniques and share your 3D art by tagging @3Doodler or #3Doodler #WhatWillYouCreate!

Upcycling for Earth Day!

Explore Earth Month projects and learn inventive techniques to maximize your creativity while keeping your environmental impact low by reusing everyday items.

We’re sharing how creators celebrate the planet by upcycling everyday materials to create impactful art. Turn ordinary objects and things around the house into cool, one-of-a-kind creations with 3Doodler project ideas.

Working for the Environment

The celebration of Earth Day began in April 1970 to push the federal government to tackle environmental issues. The response from the public was overwhelming, and in just a few short months, Congress authorized the creation of the Environmental Protection Agency (EPA).

The EPA serves a vital mission to protect human health and the environment. The agency does so by developing and enforcing regulations, giving grants, conducting research, creating partnerships, and educating people about the environment.

In seeking to educate the public, the EPA provides several resources for teachers and students to explore. For example, there are tips on conserving energy at home, becoming a food waste warrior, understanding our connection to groundwater, or even making a disaster readiness plan.

These resources are a fantastic way to bring environmental issues to the forefront and bring about change.

Repurpose & Reuse Everyday Items

3Doodler is committed to inspiring creativity while working with the environment, not against it. Our plastics promise outlines our work to ensure our plastics are completely safe to use. 3Doodler Start+ plastics are biodegradable, and ALL of our plastics are certified as recyclable.

Now that you know the materials you’re using are safe for you and the environment, let’s get doodling. This round-up of projects encourages you to reuse or repurpose things around you as you create in 3D.


Flower pot with flowers - 3D pen art

Give New Life To An Old Planter

Plants and greenery are a natural way to contribute to environmental efforts. Adding them to your home can add a beautiful natural element. Pick up an old pot or vase and give it new life with a 3D design. Add simple flowers along the outside or trim with polka dots, vines, or other creative symbols. It’s a wonderful opportunity to refresh an older item for a new use!

Repurpose a Pot


Table with two 3D pen art baseball hats

Turn Cardboard Scraps Into Speaker

Cardboard is an amazing material to work with to augment your 3D creations. It’s recycling in action. Find a few pieces of cardboard and make a DIY phone speaker that rocks. Use your 3D pen to add details to the speaker in colors that complement your space. It’s a unique way to reuse cardboard and amplify the music on your phone. Time to turn up the volume!

Make a Speaker


Small blue flower on green leaf - 3D pen art

Transform Leftover Plastic

Collect doodled scraps as you create and learn to make new art with a few quick tips. From coasters to bowls and other eye-catching creations, there’s no end to what you can come up with using your plastic scraps. It’s a fantastic way to make the most of all your plastic. Play with different color combinations for your own truly unique recycled creations!

Create Beautiful Decor

Share your creations with us and tell us how you participate in Earth Month by tagging @3Doodler or #3Doodler #WhatWillYouCreate!

Gear Up for Major League Baseball’s Opening Day

Baseball teams are returning to parks across the country, preparing for 2023 Opening Day on Thursday, March 30, 2023.

All 30 teams will play in 15 games which will be the first time since 1968 that every Major League Baseball team starts the season on the same day!

Opening Day will mark the start of the 162-game regular season played over 213 days. So as you’re preparing to root for the home team, grab your 3D pen and doodle a team baseball hat!

America’s National Pastime

The National Baseball Hall of Fame explains that while Abner Doubleday – a decorated Union Army officer who fired the first shot in defense of Fort Sumter at the start of the Civil War and later served at the Battle of Gettysburg – is credited with inventing baseball in 1839 in Cooperstown, NY, there is still debate about the origins of the game.

Regardless of how baseball started, it evolved with the country and became known as America’s national pastime by the last half of the 19th century. Through the years, baseball played a role in the two world wars, civil rights, equal access and opportunity on and off the playing field, and much more, as described in the book Baseball: The National Pastime in the National Archives.

Even if you can’t travel to Cooperstown, you can explore the sport’s rich history through several online exhibits. Check them out and understand more about the players, the uniforms, and critical events in American history!

Swing, batter, batter!

Babe Ruth Batting, courtesy of New York World-Telegram. Babe Ruth Batting, courtesy of New York World-Telegram.

Baseball began as an amateur sport. The first known professional team was the Cincinnati Red Stockings, who played their first game in 1869 as members. The Reds recruited cricket players and developed their skills to become one of the more successful National Association of Base Ball Players (NABBP) teams. As competition heated up, baseball clubs were in a hurry to attract the most valuable players. From there, clubs and teams evolved quickly.

By 1870, the cost of employing professional ballplayers became challenging. As a result, the Cincinnati club’s board elected to refrain from fielding a team for 1871. Instead, many of the players left Cincinnati for Boston. They formed the Boston Red Stockings, who went on to win four straight league championships (1872-1875) before becoming part of the National League. Today the franchise is known as the Atlanta Braves.

The New York Yankees started in 1903 as the New York Highlanders. The Yankees have won 27 World Series titles and 40 American League pennants. However, the team wasn’t always this successful. Their stroke of luck came when they acquired Babe Ruth in 1920 from the Boston Red Sox.

The history of the sport is long and storied. Explore the origins of your hometown team — you might be surprised by what you learn.

Seventh-Inning Stretch

Table with 3D pen art: 2 baseball hats.

Cheer on your favorite team and take a creativity break by making a custom baseball hat. So naturally, with 3Doodler based in New York City, we created a Yankee’s hat and a Mets’ hat using the 3Doodler Start+ and Create+ 3D pens.

With a few simple tips, a 3D pen, plastic, and our free stencil, you’ll be on your way to creating baseball hats for all the MLB fans.

Use your DIY baseball hats as decor for an office or bedroom shelf or perhaps as a cake or cupcake topper. 3Doodler’s tutorial and stencil library is full of fantastic sporty designs from soccer to football or basketball. The choice is yours!

Make a Baseball Hat

Share your thoughts about America’s favorite pastime along with your doodled baseball hat by tagging @3Doodler or #3Doodler #WhatWillYouCreate!

Experiment with Color: Viva Magenta

Creators use colors in unique and exciting ways to draw attention and spark conversation. The Pantone Color Institute announces a color of the year to inspire the design community and open a dialogue about color.

Viva Magenta, the 2023 color of the year, is a dynamic, vibrant hue that exudes joy and optimism. Explore the shade and grab your 3Doodler 3D pen to experiment with a bright, futuristic color palette.


Pantone Pantone

Color of the Year

Pantone began featuring the color of the year in 1999. New colors are announced in early December for the subsequent year. In choosing the color of the year, a group of collaborators and designers take input from various sources, including entertainment, fashion, travel destinations, new technologies, social media, and even sporting events that attract worldwide attention.

In addition, the team considered the public appreciation of nature represented by lifestyle trends, such as bringing natural elements into our homes, at work, and creating vital outdoor spaces. The color choice also reflects a celebratory atmosphere and our renewed enjoyment of traveling, sporting events, and other outdoor activities.

According to Pantone, Viva Magenta’s organic origins hail from the cochineal beetle. The insect produces cochineal extract and carmine. For centuries, the substances colored food, textiles, and even cosmetics.

Viva Magenta is a bright, celebratory color that connects us to nature. Colors like this inspire the imagination and help bring ideas to life. The color of the year typically influences fashion, beauty, interior design, and graphic design.

Spark Bright Ideas

Heart charm bracelet with 3d pen art

Exploring the uses of color and testing new techniques is all part of the design process. This week we’re sharing a gorgeous charm bracelet in bright pink to reflect the color of the year. Make the bracelet and add a selection of charms that reflect your personality.

Charm bracelets have evolved but always stay in style, given their versatility. Test out different colors and make a monochromatic style with all pink, or design the bracelet in one color and charms in other shades to make them pop.

Create one for yourself or gift one to a friend or family member. Follow the tutorial to see how easy it can be to create in 3D!

See the Tutorial

Share your creations with us and tell us how you are experimenting with color in your 3D designs — @3Doodler or tag #3Doodler #WhatWillYouCreate!

Artist Spotlight: Cornelia Kuglmeier

Cornelia Kuglmeier is an amazing 3D pen artist and educator whose talent and techniques are some of the most creative and unusual.

She’s a highly knowledgeable 3D pen art community member who shares her doodling tips freely. Connie’s design approach turns fantasy into reality. You’ve no doubt seen some of her incredible Doodles on our Instagram. In addition to the content she posts on her Instagram, she’s also shared some incredibly detailed and helpful tutorials on her YouTube channel that explore creative tips and tricks to test out with a 3D pen.

This week we’ve partnered with Connie to reimagine the Pisces symbol from an artist’s perspective. Learn how she designed the piece and explore her 3D pen art tips and tricks!

Finding Creative Freedom

As Connie explains it, designing in 3D offers her artistic freedom. She can create anything she can dream up. And, if she’s working on a project and doesn’t care for something or is struggling to get the exact look she wants, she finds the plastic is easy to heat and remove to remold.

“Creating in 3D gives me infinite freedom. There’s just no limit,” said Connie. “You can draw lines into thin air if you like drawing, you can design pieces flat and assemble them if you’re into modeling and architecture, you can mix techniques, you can bend the plastic pieces with hot air, you can smudge the plastic with your pen’s nozzle, or you can bake and melt it into sheets. The creative possibilities are endless.”

Connie also likes to see where the process takes her. While designing, she never knows what might happen. So she takes every opportunity to try a new idea or test a new technique.

“I look forward to seeing where the experience will take me, and what I’ll discover next,” said Connie. “I love to delve into small things, try not to overlook things, and create pieces that give my audience many things to discover.”

  • 3D dog drawings on two paper pieces
  • Purple flower on paper with 3D fish and man
  • 3Doodler art: Fish, purple/yellow flowers, ruler
  • Colorful fish design created with 3D pen
  • 3D pen art: Paper plate with red and green flower

Pisces Design Inspiration

Connie doesn’t follow zodiac signs closely, but she enjoys reading her horoscope from time to time. She’s an Aries and enjoys reading about the traits related to her sign to see if any match her personality, and some do.

“When I began working on the pisces piece, I looked up the astronomical sign and when I saw it was a fish I immediately had something colorful in mind,” said Connie. “I envisioned a fish with long fins, to show the floating, waving, weightlessness of those animals. I imagined them swimming in the air just like they do under water.”

Connie thought about using a coy or betta fish. When she was younger, she had a betta fish and was already familiar with it. Bettas also have long fins and come in a wide variety of colors. Connie knew she had a winner!

Aspiring Doodlers Take Note

Connie is a phenomenal 3D artist whose techniques and creativity inspire a community of Doodlers. Her suggestions for anyone looking to gain skills with a 3D pen are pretty simple.

“Work with the 3D pen. Seriously, if you browse my Instagram, I posted one of my first creations there, said Connie. “It was a clumsy little birdie, made with the first 3Doodler 3D pen. I was so extremely proud of it that day.”

Connie explains that working with hot plastic and getting a feel for a 3D pen can be daunting. But, the more you work with it, the less afraid you will be about what could go wrong and the more intrigued you become to see what more you can do. She recommends starting small by picking something simple or something you can try to recreate.

“It’s really important to use the 3D pen,” said Connie. “The more you use it, the more comfortable you are with its shape in your hand, the way it functions, the plastic and different filaments. You’ll gradually find the technique that suits you best.”

Once you become comfortable with the pen, Connie recommends trying the nozzle set. She used it for this project to create the fins and scales. Next, she attached the scales by melting them onto the body with the hot pen tip.

“For these fish, I used the angled nozzle to draw those ultra-thin, almost see-through fins, and the shiny scales,” said Connie. “The nozzle set is a great way to spice up your projects, if you find yourself looking for something new!”

As far as what to expect next from Connie, she’s happiest when experimenting and learning something new. In addition, she enjoys creating hyper-realistic pieces, like giant butterflies, and makes a nice piece of fan art now and then.

“Currently, I am working on detailed, monochrome pieces,” said Connie. “I’m mixing plants with animal traits and supersizing small things. My artistic style is always evolving as I learn new things.”

  • Colorful paper flowers on a 3D pen drawing board, fish 7.
  • Red and green fish 3D pen art on white surface

More artist features coming up. We can’t wait to see what you create with all these fantastic tips. Share your creations with us on Instagram or tag #3Doodler #WhatWillYouCreate.

Artist Spotlight: Ricardo Martinez

3Doodler is delighted to work with a range of artists this year to invite curiosity and spark the imagination as we design and create in 3D.

Each month, the 3Doodler team shares ideas and tutorials to help kick-start the design process. We were curious to see what our artist community would create with the same inspiration.

Last week, we explored the artistry of ice castles. 3Doodler shared a version that is easy to replicate with our free stencil and tutorial. This week, guest artist Ricardo Martinez (riikc) shared his version of an ice castle. See where he found his inspiration and how the sculpture came together.

Creating with riikc

Ricardo is a sculpture artist, painter, and photographer who explores a variety of materials and techniques in his work. Ricardo has extensive experience creating art with 3D pens and often shares his approach with the 3Doodler community.

Ricardo’s latest installation, Memento Vivere, gained worldwide attention as an interactive multi-disciplinary project using light, technology, and science to express an idea. This larger-than-life exhibit consists of a series of electroluminescent cables arranged in a skull structure that Ricardo designed with a 3D pen. The sectors of the installation light up as people interact with the display.

Ricardo lives in Brussels and travels extensively. He takes inspiration from nature, landscapes, geography, architecture, and much more. We were delighted to connect with him about his experience creating an ice castle in 3D.


  • 3D pen art: Large white castle with clock on top
  • White lace castle sculpture in 3D pen art.
  • 3D pen art: Castle with glass sculpture and bird
  • 3D pen art: Ice and rope sculpture on table - Castle 1

3D Design Approach

Ricardo had an idea for this design and took inspiration from fantasy video games he’s played over the years, like Final Fantasy. From his home in Brussels, he looks at a large church with a castle-like appearance and eight pillars. Mixing these concepts, he began to sketch the design on paper.

“It seems like a different part of your brain kicks in and starts working as you start building,” said Ricardo. “The design evolves as you go. The castle resembles the sketch but evolved as I sculpted it in 3D.”

Ricardo used existing shapes to begin the sculpture and found it easy to keep adding material to get the form he wanted for the design. For example, he used a glass cylinder to create the pillars’ base. He could continue this process to get the length he wanted for the towers.

To design the castle, Ricardo used the 3Doodler PRO+ 3D pen and PLA, nylon, wood, and bronze filament.

“I love the smell of the wood while I’m creating. It makes me feel like I’m in a woodshop,” said Ricardo. “For this design, the wood and bronze add texture and stand in contrast to the rest of the design, which is the effect I was hoping to achieve.”

Advice for the Community

Ricardo is an experienced artist who shares his success tips freely to encourage others to pick up a pen, paintbrush, or other tool and begin creating.

“It’s important to share that you don’t need to create shapes out of thin air,” said Ricardo. “I recommend starting by using existing shapes. Then, you can find inspiration and doodle anything with objects around you.”

For new 3D pen artists, Ricardo recommends starting with a speed setting of three and gradually working up to faster settings. In this design, Ricardo found he could work effectively with a speed setting of seven or nine.

“I was impressed with the speed settings on the pen. It’s incredible how adjusting those settings can change things and make the experience much more enjoyable, given how quickly you can cover a large surface,” said Ricardo. “The PRO+ pen is much more comfortable and easier to use over long periods.”

Ricardo notes that the PRO+ makes it easier to swap materials and see what’s happening, which saves a great deal of time. He was especially pleased with how the wood detail came out on the ice castle and enjoyed adding contrast with different materials.

When working in bronze, Ricardo recommends keeping a bit of distance from the tip to the surface as the material smudges easily.

“Working in 3D evolves whatever idea you think you have, and it goes into many different directions that you can’t experience with just 2D drawing. It opens your mind to new possibilities and thinking in ways you’ve never thought before,” said Ricardo.

It’s incredible to see creators at work and watch designs come to life in 3D. Expect more artist and creator collaborations in the months ahead. Share your ideas with us. What would you like to see 3Doodler and our collaborators create? Tag 3Doodler or use #3Doodler #WhatWillYouCreate.

Celebrating Creators, Makers, Artists

3Doodler is kicking off 2023 by celebrating our community of creators, makers, and artists. Over the years, a highlight of our work is to share 3D printing ideas and art that comes directly from you.

As we head into a new year, 3Doodler will look to collaborate with artists, educators, and entrepreneurs to explore ways we elevate creativity. But, of course, it’s also important to inspire new creators. With that in mind, we’ll share accessible stencils, tutorials, and more to support budding artists.

Let’s take a quick look back to revisit the projects and artists who inspired you the most. Plus, we’ll share a quick project to jump-start creativity in 2023.

"I found I could say things with color and shapes that I couldn’t say any other way – things I had no words for."-Georgia O'Keeffe Share

Dina Velikovskaya

Two men standing by tree with rope - creative 3D pen drawing.
Dina is an animation artist and director who produced “Ties,” an animated short film that debuted in 2019. The film, released to the public in 2022, explores the connection between parents and their children. A young woman leaves home to see the world. Her parents are left behind, and their world changes without her.

Dina also shared a behind-the-scenes look at creating the film using a 3D pen. First, all the characters were created using a 2d digital drawn animation technique and then outlined with a 3D pen. The result was sets of flat plastic figures. Next, the director filmed the figures frame by frame in a stop-motion set, along with wire objects.

Rick Martinez

Man sculpting human head with 3D pen art
Rick works in sculpture, painting, and photography and frequently shares his insights on working in 3D. Rick’s latest installation, titled “Memento Vivere,” gained worldwide attention as an interactive multi-disciplinary project that uses light, technology, and science to express an idea. This larger-than-life exhibit consists of a series of electroluminescent cables arranged in a skull structure that Rick designed with a 3D pen. The sectors of the installation light up as people interact with the display.

Rick continues to push the boundaries of art and technology with his creative use of materials. Keep an eye out for a 3Doodler collaboration with Rick later this month!

Cornelia Kuglmeier

3D pen art: Snowflake, dragonfly, and flower on white surface

Connie is a 3D pen artist who shares her passion for 3D art and tips of the trade freely with the community. She is constantly exploring new creative techniques with outstanding results. Her work has been featured often with the 3Doodler community to provide insight and guidance on using a 3D pen to its full potential. For example, we recently shared Connie’s tips for achieving the perfect petal. To see her mastery of 3D application, look no further than a multidimensional snowflake. The use of color, layering, and overall technique are incredible.

See more of Connie’s helpful tips and tutorials on her YouTube channel, where she shares loads of doodling advice.

Edwin Ramirez

Blue sea creature sculpture with fish, 3D pen art

Edwin is a multimedia artist who shares incredible wearable 3D creations. Each is a delicate piece of art, from jewelry to theatrical masks and other accessories. Edwin exhibited at a range of galleries in Kentucky, including recent shows at Kore Gallery (“The Education of Desire” and “Unknowns: Artists you Should Know”), as well as part of the ongoing traveling exhibition “Our Kentucky Home: Hispanic/Latin American art in the Commonwealth” curated by The Kentucky Arts Council. Musicians, models, and entomologists have all worn his designs. It is a delight to see his creations take form in 3D. Be sure to explore more of his work in the year ahead!

Spark Creativity in 2023

Now that you’ve seen a small sample of our vibrant community, we invite you to make this your year of 3D creativity. Get started by creating a custom work of art for home using our go-to phrase. What will you create?

Get the Stencil


Doodling a quote on canvas with a 3D pen art

We want to hear from you. How can we support you in your 3D journey? What tools and tips do you need to kick off a year of creativity? Tell us. Tag #3Doodler.

A Creative Wedding with a Personal Touch

When it came time for Geert de Coninck and Michelle Mortelmans to choose their wedding rings, they ran into a major problem.

None of the rings they saw were right for them. “We visited some jewelry designers but every visit ended the same,” Geert says. “They all only had standard rings that didn’t reflect our personality.”

As a creative designer, Geert and Michelle wanted their rings to be unique, and to symbolize their passion for creativity. “As creative people, we wanted to have a less conventional ring,” he says. And that’s when inspiration struck.

“I’d started to use the 3Doodler Create pen after getting it as a new year’s gift,” Geert says. “It’s a nice way to play around with shapes. Clients love to see the creations standing on my desk and play with them.”

"As creative people, we wanted to have a less conventional ring." Share

Looking at the creations he had made, Geert had an idea. “Michelle was following a course in jewelry design. I asked her if her course master could help us to translate a 3D-sketched ring into a gold version,” he explains.

The concept was to create their own rings in plastic using the 3Doodler pen, which could then be cast in gold using the lost-wax technique.

“We did not have any guarantee that this would work,” Geert admits, “but we all got excited about this and took the risk of not having the rings finished before the wedding.”

The couple used a cylindrical ring holder to create tests of their rings in the correct size. “We made a lot of prototypes because the idea was to avoid sharp edges and not have double layers to keep the size from getting too thick,” Geert says.

The result was perfectly cast rings that matched the couple’s personality, and were—quite literally—made with love.

“My ring is a little more chaotic and has more ripples,” says Geert. “My wife’s has multiple smaller rings and a more simple and clean look.”

The rings were ready on schedule, and provided the perfect symbol for a union built on creativity.back to top image

A Power Up for the 3Doodler Community

We began with a Kickstarter. Four years later, we’ve grown into an international community.

When we first launched 3Doodler, there was no way we could have anticipated the creative passion our backers would have. Before we knew it, Doodlers from all over were sharing their creations, experimenting with the pens in ways we had never thought of, and pushing the innovation to new heights with projects that left us inspired and awestruck.

Launching the way we did, directly to our users, community became an inevitable part of our DNA from Day 1. We’ve kept our ear as close to the ground as we could since then. Four years later, that community stretches across the globe, and continues to find new ways of reminding us how limitless creativity can be with the right tool. Some members of the community have even become full-time members of the 3Doodler team!

As Doodlers took on bigger and more ambitions projects—like complete basilicas, full-size cars, and high-end fashion—we wanted there to be a way for artists to share their expertise and help each other improve and innovate, while also helping the wider community.

And so we established the Power Doodlers. This group of creative thinkers are as passionate about Doodling as we are, and have shown they have the innovation and skill to bring their ideas and creations to life.

Our Power Doodlers are dedicated to art and creativity, and see Doodling as the perfect outlet—whether as a hobby, an educational tool, or even at a professional level. And they want to share their skills with the world through tutorials, workshops, and exhibitions to help bolster and expand the 3Doodler community.

Here’s a closer introduction to four of our amazing Power Doodlers, each with their own unique vision for creativity:

Grace Du Prez

Grace is a veteran Doodler based in London who hosts regular workshops for beginner Doodlers.

3d Pen artist Grace DuPrez

“The first thing I ever Doodled was a hat. A company called Maplin commissioned me to make something for Ladies Day at Royal Ascot in 2014. Designing it was a challenge as I wasn’t sure how strong or flexible the plastic would be, but it was also exciting to be trying something new.

"Doodling allows you to work in a very experimental and organic way. You can have an idea and then immediately try it out." Share

I think I have improved since then by exploring different techniques and trying to push the boundaries of what’s possible.

I like that Doodling combines modern technology with something hand made. My background is in textile design and I have always enjoyed the making process as well as designing. Doodling allows you to work in a very experimental and organic way. You can have an idea and then immediately try it out.

I’ve been described as a ‘Marathon Doodler’ which I think sums me up quite well. My projects often take a long time to make and can involve lots of preparation.”

See more of Grace’s incredible work by following her on Instagram.

  • 3d pen home decor by Grace Du Prez
  • 3d pen home decor by Grace Du Prez
  • 3d pen fashion by Grace Du Prez
  • 3d pen fashion by Grace Du Prez

Judith Tarrés

Hailing from Barcelona, Judith won the 2016 3Doodler Micro Award with a trio of adorable Doodled squirrels.

“As an artist, Doodling in 3D has changed my perspective of creating. Everything is possible with a 3Doodler in your hands—whatever you can think of, it can be made.

"As an artist, Doodling in 3D has changed my perspective of creating." Share

My first Doodle was so easy to do because I started with some basic projects that 3Doodler offers on their site, and with a few steps I learned a lot. Later on, when I knew how to use the 3Doodler better, I let my creativity fly and now I’m finally able to Doodle everything my mind is capable to create.

This tool has given me lots of opportunities to create, and I love how quickly you can shift your art from 2D to 3D. It’s also really easy to learn to use, and I am very happy with all the possibilities it has.”

Follow Judith on Instagram to see more of her projects.

  • 3d pen artist Judith Tarrés 3d pen design
  • 3d pen artist Judith Tarrés 3d pen design
  • 3d pen artist Judith Tarrés 3d pen design

Heather Baharally

Based in Canada, Heather’s masks and her unique Doodling style certainly turned heads.

“After receiving my first 3Doodler from the Kickstarter campaign, I was delighted by the immediacy of the plastic extruding pen. I can think of something and minutes later create a model of it. The variety of materials has such possibilities for wearable art, cosplay, sculpture and adds incredible dimensions to my 2D artwork.

"The 3Doodler has opened up so many options to express my ideas." Share

I have a connection with the great Rocky Mountains and nature, as seen in my work which largely consists of animals made with variety of techniques.

I’ve been studying different materials for use in my artwork. It has been an amazing experience to use the 3Doodler to enhance my existing style of work and it opened up so many options to express my ideas.

I fell in love with the medium and I am excited to see where this artistic journey takes me next.

Follow Heather on Instagram to see more of her incredible masks and nature-inspired artwork.

  • 3d pen costume art by Heather Baharally
  • 3d pen costume art by Heather Baharally
  • 3d pen costume art by Heather Baharally

Sydnee Davidson

Californian Syd impressed us with her entries in our regular Doodle-Offs where she combined Doodling with other design skills.

“I am a graphic designer by day, and mixed media artist by night.

"The biggest struggle I encounter is having the perfect plan built inside my head, but then having to improvise and let the pen tell you how it should be built." Share

I’ve been using the 3Doodler since the day it was shipped after its first Kickstarter campaign in 2014. Once I saw what it could do I knew I had to have one.

Ever since then, I’ve made several figurines based on my favorite animals and pop-culture characters. It’s a great tool to experiment with, and recently I have been incorporating Doodles into my mixed-media art pieces, which have also included use of LED lights.

My light-up beehive is a good example of how Doodled additions fit in with other media. It features 13 Doodled bees (including a queen), 96 3D printed honeycombs (some filled with Doodled honey), and 100 LED lights.

The biggest struggle I encounter is having the perfect plan built inside my head, but then having to improvise and let the pen tell you how it should be built. The results still surprise me!”

Follow Syd on Instagram to see more of her mixed-media creations.

  • 3d Pen insect art by Sydnee Davidson
  • 3d Pen insect art by Sydnee Davidson
  • 3d Pen insect art by Sydnee Davidson

Do you have what it takes to be a Power Doodler? If you’re interested in joining our team of dedicated Doodlers, contact us for more details. Be sure to follow us on Instagram and subscribe to our mailing list for regular updates!back to top image

Fan Creations: Fabricating Your Own Figurines

For some, the adventure doesn’t end when the book closes or the credits roll. Fan Creators take inspiration from their favorite movies, games, comics, and cartoons and make incredible things. To see what that passion can produce, we gave some hardcore fans the latest 3Doodler Create for two weeks.

Finding a 6-foot tall panther with alligator scales and an 8-foot tale that ends in a stinger is tough.

Jon Giordano should know, he’s looked pretty hard. Fortunately, he isn’t searching the wilds for a nightmarish cryptid, he’s looking for a miniature for his roleplaying game.

At work, Giordano is a “numbers guy.” He teaches math and is working on a PhD in the subject. But while roleplaying games are known for their dice rolls and probability tables, what attracts him to the hobby is the ability to tell stories. Creating and exploring fantastic worlds with friends is the heart of the hobby, and as he has ventured into more obscure role playing games, Giordano has run into a minor hurdle that has nothing to do with storytelling or imagination: a lack of miniatures.

Miniatures are an important part of many role-playing games. Conflict and combat are common themes in these games. “Players will often get into situations and have to fight their way out of it, and make use of markers to keep track of the complexities of positioning in combat. That way you can look at the board and immediately tell that those two people are fighting against the giant robot in the corner, and those two are ducking behind trees.”

“If I were playing a standard medieval fantasy game,” Giordano says, “I’d be able to find tons of useful figurines. Ditto for sci-fi.”

That’s why Giordano was excited to get his hands on a 3Doodler. He wanted to be able to create custom figurines that heighten the experience for players in his role-playing games, like one campaign based on Native American mythology. The 3Doodler struck him as particularly useful for games that feature obscure monsters and creatures that may not be sold in stores. With the original 3D printing pen in his arsenal, Giordano believes that he can create fantastical beings that are even more obscure than the dragons found in your typical dungeons.

One of the major advantages of table top roleplaying games is that players can encounter anything that the game master can imagine. Personalized galactic warrior? Magical talking flowers? Mystic double-headed swan? All things that could appear as adversaries, or allies, in a tabletop game. Unfortunately, finding figurines for the more outlandish creatures can be just as hard as defeating them in combat.

"You’ll get that wow moment that a description just can’t give, the 3Doodler will really let me show players what I’m imagining for them without relying on theater of the mind." Share

Giordano was able to produce three figures with his 3Doodler. The first was a corrupted bird god, shaped like an egret but with plumage darkened by negative energies. As a sort of a counterpart, he also fashioned a Buffalo minotaur who watches over a herd. The Buffalo spirit was attached to a spare base from a standard miniature to provide more stability, but the bird could stand on its own. Lastly, Giordano created a mercurial river spirit by letting the “flow” of plastic from his 3Doodler define the initial shape.

Giordano was really happy with how the figurines came out, and is looking forward to incorporating them into a future campaign.

“You’ll get that wow moment that a description just can’t give, the 3Doodler will really let me show players what I’m imagining for them without relying on theater of the mind.”

The 3Doodler is a great solution for anybody who wants to add a bespoke character to an encounter, or even modify an existing figurine. With imagination and a steady hand, almost any small-scale figurine can be crafted. The potential for crossovers, custom variations on existing figures, or anything else a game master dreams up are almost endless.

A 3Doodled figurine also has a few unique advantages over other miniature options. Imagine the personal connection you can form with a figurine you or a friend crafted by hand compared to a store-bought one. While paper cutouts are another way to create one of a kind representations of fantastic creatures, they aren’t very durable compared to solid plastic. Combining pieces from multiple figurines in a kit-bash is another fun alternative, but if that’s your preference, being able to extrude extra plastic from a 3D printing pen may come in handy as well.

Even mainstream tabletop game masters might want to consider using a 3Doodler. Dungeons and Dragons has over 40 years of published materials describing various monsters and enemies for players to encounter. Even without getting into many of the supplemental bestiaries published by other companies, there are hundreds of different creatures and monsters described in official materials. Some of the more obscure variations have figurines that are almost impossible to find, if they were ever made at all.

So next time you are planning an adventure and want to show off an obscure monster you found in a forgotten bestiary, the 3Doodler might be the perfect way to wow your players by conjuring one by hand. Or better yet, create something entirely new and give it a physical presence to match your own description.back to top image

5 Careers That Didn’t Exist 10 Years Ago

Technology is changing the world, sometimes faster than education can keep up! With new career options developing, students now have a wider selection than ever before.

We believe in the importance of getting kids used to new tech and educational advancements early on. After all, this is what will shape the landscape for future career and job possibilities later on.

This week, we take a look at five new in-demand career options for STEM and tech-savvy students to consider.

Genetic Counselor

One field that has seen great benefits from new advancements in technology is medicine. New understandings of genetics and the data now available has opened up specialized opportunities for jobs that would have sounded like science fiction not too long ago.

Genetic Counselling can cover everything from cancer treatments to prenatal care and family planning. Some Genetic Counselors even specialize in specific fields like cardiology, neurology, or fertility.

Counselors look at each individual patient’s genetics, and examine the data to try and predict and prevent medical disorders. But the main part of the job, of course, is the patient. Genetic Counselors need to know how to connect and support each patient, and help explain the complicated medical side of things in ways that are easy to understand.

To be a Genetic Counselor, you’d need a Master’s degree in genetics, and likely would also need some certification in counselling as well. For students who love science and data, but are also very people-focused, this would be a perfect field to explore.

Nuclear Medicine Technologist

The job title alone seems daunting, but the actual job is less scary than it sounds. This is another new field that has sprung up alongside technological advancements in medicine—specifically all the new machinery that modern medicine relies on.

Nuclear Medicine Technologists operate all specialized medical equipment, like CT and PET scanners, gamma cameras, and other imaging tools used to help diagnose medical issues. The technologists need to know how to care for and operate the machines, a vital task considering how closely technology and medicine are tied.

And as medical technology continues to grow and improve, so will this career field. Continual developments and innovation means a need for technologists who understand and can work alongside doctors and patients to help reach a diagnosis.

The job doesn’t require a medical degree, but does take good interpersonal skills and attention to detail, as the machines are often delicate and complicated. An interest in robots and engineering is important, and there are accreditation programs available for students looking to enter this field.

Sustainability Manager

When it comes to business, everyone knows it’s all about the green. No, we’re not talking about money! The new trend for businesses is environmentalism and sustainability, and more and more companies are realizing that going green is the way forward.

That’s where Sustainability Managers come in. This role means making sure a company is doing all it can to enforce the most environmentally-friendly practices possible, but at the best price for the company. This takes a lot of creativity, and excellent communication skills to get everyone on board and make your ideas a reality.

And it’s not just companies that are looking to fill this new role. Everything from corporations to universities, and even large cities need Sustainability Managers to create long-term plans to help them go—and stay—green.

A degree in Environmental Science and a passion for saving the planet is the way to go for students interested in pursuing a career in this field.

Drone Operator

Unmanned Aerial Vehicles sounds more like a code name for flying saucers rather than a new career field. But UAVs and drones are flying us into the future, with major companies like Amazon, Google, and Facebook looking to expand their drone teams.

Drone Operators are in high demand, and for a large variety of purposes. While Amazon is looking to expand drone use for package delivery, news and media companies are looking for operators with more artistic talent to capture aerial footage in photos and videos.

For this new job field, the sky is the limit when it comes to possibilities. Some experts expect drones to be used in everything from agriculture to public safety, oil and gas exploration, and even in the film industry.

Some universities are already beginning to offer specialized courses in drone operation and manufacturing, but as it’s still a new field there are a lot of different backgrounds that students can explore. Drone Operators should have an interest in robotics and engineering, but can supplement this with skills in photography and videography, or other personal passions and interests.

Data Miner

What’s more precious that rubies and diamonds? Data—for companies, at least. In our new digital age, customer information and behavioral patterns are crucial for businesses to stay on top of the game, and they need experts to make sense of all the data they collect.

Data Miners help companies deal with “Big Data”. They predict future trends based on current and past consumer behavior, all extracted from the world of data that businesses collect. Everything from transactions to complaints and even social media reviews gets picked through by Data Miners to find patterns and make sense of it all.

And there’s plenty of related jobs within this data-driven career field. Digital Marketing and Social Media Management are new roles that are also becoming increasingly necessary as consumers take to online platforms for everything from shopping to costumer service. Businesses are finding that having an online presence is vital, and they need people familiar with how social media works in order to get the job done.

As a brand new field, there are lots of educational paths students can take if they’re interested in a Data Mining or other digital careers. A degree in Library Sciences is great for Data Miners, while a background in marketing or writing is useful for other jobs within the social sphere.

For students looking for new career opportunities, imagination is really the only limit. We are constantly seeing new fields open up, often in places we never even thought of.

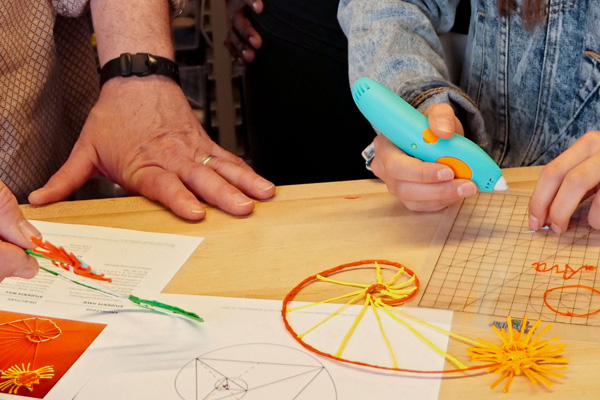
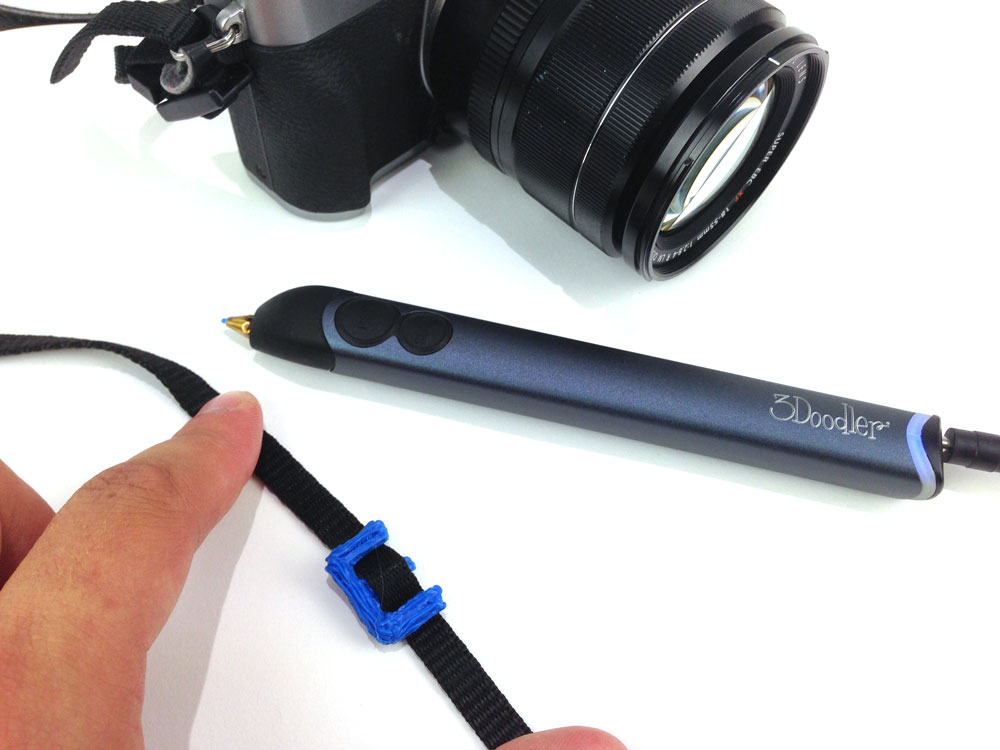
And of course, students always have the option to invent something completely new! After all, the 3Doodler didn’t even exist five years ago.back to top image

Looking for more ways to bring 3Doodler into your classroom?
Check out our dedicated EDU section for classroom tips, lesson plans, and exclusive EDU bundles for educators.

DIY Accessories to Customize Your Bicycle

At 3Doodler we’re always looking for new and innovative ways to try and DIY—Doodle it yourself. For our latest exploration into Doodled additions, we decided to take our show on the road.

Avid cyclist (and 3Doodler Marketing Director) Kelley Toy teamed up with 3Doodler Product Development Engineer Samson Wong to conceptualize and road test a series of Doodled solutions for two common cycling needs: a drink bottle cage, and an action camera handlebar mount. While these solutions were prototyped and tested on a road bike, all of the designs could easily be adapted for a mountain bike, touring bike, or daily commuter.

The Prototyping Process

“I started by borrowing a bottle cage from Kelley,” Samson says. In order to start the design process, Samson needed a jumping off point. Using common accessories that any cyclist might need was the first step to getting an idea for a customized design.

While a water bottle cage attachment may seem like a simple enough design concept, Doodling one from scratch is a more complicated task. Getting the tension and strength just right while having it fit the bottle snugly is important, all the while making a sturdy enough design that would hold up to actual use.

It was also important for Samson to understand how the piece would be attached to the bike. “I needed an actual bottle cage to trace the holes used for mounting it to the bike,” Samson explains. “I made a template based on the original so I could Doodle the holes at exactly the right measurements.”

For his first prototype, Samson used the same design concept as Kelley’s old bottle cage, with two “arms” coming from the mounting to grip the bottle. “After the first Doodled trial, I found that the arms were a bit too weak,” Samson says. His Doodled version needed the right balance of strength and flexibility.

"After the first Doodled trial, I found that the arms were a bit too weak." Share

In his next prototype, he knew better what improvements he needed to make. “The second design focused on reinforcing the two arms,” he says. “To make it strong enough I Doodled three layers of ABS, building up the plastic to be roughly 5mm thick.”

When choosing which filament to use, Samson had to consider the different properties of ABS and PLA. “ABS is a bit more flexible,” he explains. “PLA is strong, it’s rigid, but it’s a little bit brittle. So for this type of project, ABS is a better choice, because the cage has to flex a little bit to get the bottle in and out.”

Testing and Re-working

Once Samson had a prototype in hand, it was time for biking veteran Kelley to test it out. After taking the new Doodled bottle cage through a variety of terrains, Kelley was pleased with the results, but still felt there were more improvements to be made. “The cage performed well and there was no sign the bottle was going to launch at any point, and it was very easy to get the bottle in and out while riding,” she says. “But I heard a small crack the first time I loaded the bottle into the cage, and the fit around the bottle was not snug and this reduced contact area with the bottle.”

As an end result, Kelley felt a sturdier design was necessary. “The bottle flexes the plastic cage a lot, and I would ultimately not feel confident about the durability of the design,” she says. It was back to the drawing board for Samson. “I did some research, checking how other bottle cages look,” he says. “I found a few designs that had a whole ring around the bottle instead of the two arms.”

"At first I thought this design was going to be a fail, as off the bike it was tough getting a bottle in and out." Share

With Kelley’s feedback in mind, Samson thought this new design could provide the stability and tighter fit around the bottle that the first prototype lacked. “Molding the cage to the bottle, this one has got a lot of gripping power and a lot of friction, so the bottle won’t move anywhere when you’re riding,” he says.

“At first I thought this design was going to be a fail,” Kelley admits, “as off the bike it was tough getting a bottle in and out.” But Samson was confident this new design would be an improvement.

And Kelley was pleasantly surprised. “It is totally rock solid!” she says. “Once loaded on the bike—and with a small adjustment on my part on the angle—I loaded and unloaded the bottle while riding easily.” Kelley also found another bonus of the new prototype: “I also like the minimal look of this design on the bike.”

Creating concepts for practical DIYs requires a continual process of prototyping and testing, but Samson says that in the end you can wind up with some great results.

The first step, he recommends, is to copy. “Copy existing products, and then go from there,” he explains. “Modify it to fit your needs.”

Innovation for Creative Solutions

Samson used this same principal when creating an action camera mount for Kelley’s bike. After researching existing mounting solutions, he was able to better understand how he could begin to construct his own. “Some mounts have a hinge on one side for opening and closing,” he says, “but it’s kind of hard to make a hinge out of Doodled plastic, so I made a whole ring in one piece, and made it a little flexible.”

Adapting a commercial design for custom use was exactly what Kelley was looking for. “While camera mounts for round handlebars such as mine are commercially available, I liked that the mount was custom designed for my handlebars and therefore I could place it exactly where I wanted so it didn’t get in the way,” she says. “Also the Doodled mount is considerably less bulky and lighter than the commercial ones available, which is always important for weight-conscious roadies.”

When designing the mount, Samson was faced with a new array of issues and problems to overcome. During the prototyping process, he says it’s important to experiment and take risks to find solutions. In this case, Samson found that mixing materials was the best fix for the mount. “I had to use FLEXY on the inside of the ring to provide grip,” he explains. “The inside surface was too smooth, and when it grabbed the handlebar it would still move a little bit even when you screwed the bolt really tight.” When faced with a problem, finding creative solutions is key. “I put the FLEXY inside basically to act like a tire tread to grip onto the handle bar,” he says.

And road-testing confirmed his mixed-filament experiment. “The addition of FLEXY provided excellent grip, and meant there was no rotation even when riding on rough bumpy surfaces,” Kelley says.

With DIY projects like this, Samson says it’s all about adapting designs to fit what you can do, while getting the results you want. “It might not be the best looking product, or be good for selling to the public,” he says, “but if it works, then it’s a good DIY project.”back to top image

Home is What You Create

“Change. Change is always hard, but good,” explains Leah Wyman, Head of EDU at 3Doodler. “I think mentally preparing for the stress and struggles and accepting that they will come but be worth it is key.”

The 3Doodler team knows a thing or two about change. With nine nationalities represented across our team, most of 3Doodler knows what it’s like to create a new life and find home in a different country.

Leah has called many countries home. She’s lived and worked in Germany, Iceland, Jamaica, Canada, and the Netherlands, and has now returned to the USA to join 3Doodler in our New York office.

In each place she has found ways create a sense of home, the same as many members of our team.

Daniel Cowen, Co-President and COO of 3Doodler, is a UK native who has lived in over six countries. “You start to look forward and work out how changes in your life will fit with the place you are in,” he explains. “In short, it’s about adapting, which at first is about friends, and eventually is about the deeper meaning of ‘home’.”

That deeper meaning and personal concept of “home” can mean something different to everyone, but in the end it all comes back to the basic senses. When finding familiarity, we rely on what we can see, feel, smell, touch, and perhaps most importantly, taste.

Food creates a strong sense of cultural identity, and is a major aspect of what we consider part of home. The smells and tastes of our childhood are often what connect us the strongest to that sense of nostalgia we associate with home.

"Like many people, taste and smells always trigger my best memories. I do my best to try and recreate my mom’s classic dishes." Share

“The first thing I try and do when I move to a new country is find the best Indian restaurant,” says 3Doodler Creative Director Faraz Warsi. Faraz holds Canadian citizenship, but still identifies closely with his Indian heritage. Having lived in the Middle East, India, Canada, Hong Kong, and the USA, he’s used to the shuffle and change of relocation. “They call us Third Culture Kids,” he says. “Identity crisis is sometimes more fitting.”

But through various countries and continents, Faraz has discovered a sense of home can always be found in the kitchen. “Like many people, taste and smells always trigger my best memories,” he says. “I do my best to try and recreate some of my mom’s classic dishes—the keyword being ‘try’. Sadly it’s never as good.”

Erin Song, 3Doodler Junior Designer, shares the same sentiment. A South Korean national who grew up in Hong Kong, Erin now works in the 3Doodler New York office. “In all honesty, I really miss the food,” she says. “I incorporate the food I would eat in Hong Kong by cooking a familiar dish whenever I feel homesick.”

“I am what I eat,” agrees 3Doodler E-Commerce Manager Jim Toernqvist, who emigrated from Sweden to join the 3Doodler team. “Sweden is very much a part of what I consider good in the culinary world.” Jim says he brings a bit of “home” into his new life by creating meals that remind him of Sweden. “Swedish cuisine is mostly simple and quick to make; my dinners are something to look forward to.”

But as Daniel said, change is all about adaptation. While the smells and tastes of home inspire nostalgia and make us feel more at ease in a new place, soon new foods become familiar and start to create a new sense of what it means to feel at home.

3Doodler Marketing Director Kelley Toy is a New Zealand native who now lives in Hong Kong. She says the new foods and tastes were the first things she found herself incorporating into her everyday life.

“Asian food is a pleasure to explore and experience,” she says, “and the convenience, all-hours availability and on-demand nature of food in Asia is something that is easy to adopt.”

But creating a sense of home doesn’t begin and end with what you eat, of course. Whether we’re aware of it or not, what we see every day ends up creating a pattern that we associate with home.

“For New Zealand, it’s a specific color palette combining sky, water, sand or dried grass, and green pastures,” says Kelley. “It’s a unique color palette that you don’t see anywhere else so I can always pick a New Zealand sky or landscape from these colors.”

“Yellow and blue is always my association with Sweden,” says Jim. “It’s the colors of the Swedish flag, and IKEA.”

“Grass. Green manicured grass,” says Dan. “It’s calm, trimmed, reliable, and there’s so much access to it through the incredible parks of London, which are what I miss most.”

“I really don’t want to sound cliché, but Chinatown really reminds me of home,” says Erin. “New York’s Chinatown has a very similar architecture and essence to the old areas of Hong Kong.”

For most of us who have moved our lives abroad, the concept of home is often oddly combined with reminders of change. Both become part of daily life as we continue to adapt and create something new.

Sometimes all it takes is one building to remind us of this. “When it comes to New York, it’s all about the Empire State building,” says Erin. “As much as I love the Chrysler building, the Empire State Building is the building I see every day when I walk to and from work. It is a constant reminder of how much my life has changed.”back to top image

How tactile technology can help those with learning disabilities

One (teaching) size fits all? Experienced educators know that’s not how it works— especially when it comes to teaching students with learning disabilities. Not every student responds well to traditional, classroom-based teaching methods, and what makes one student’s eyes light up in understanding, might leave another as confused as they were before the start of class.

One in five children and adults in the US are affected by learning or attention issues, and approximately 8% of children aged 3-17 are reported as having been diagnosed with a learning disorder. While personalized learning for those with learning disabilities might be the ideal, adapting teaching methods to individuals can be difficult in a large classroom, and teachers don’t want students with learning disabilities to feel singled out.

Moving towards tactile technology

Many teachers are turning to tactile learning and evolving technologies as a way to engage students across different learning styles and needs. As part of a multi-sensory learning approach, tactile technology can help students across a range of skill development areas and a broad range of subjects. Such an approach is especially helpful for students with learning difficulties like dyslexia and similar impairments such as dyscalculia and dysgraphia—which affect math and writing understanding and abilities.

Assistive technology that plays to the student’s strengths and works around their challenges has already been making its presence known in the classroom—from interactive white boards, to the more recent addition of 3D printers.

More schools for students with learning disabilities are embracing technology, and makerspace tech like 3D printers, cameras and robotics kits can now be found in educational facilities across the USA and around the world. The results are clear: hands-on learning with physical tools helps students to understand ideas and concepts that are otherwise hard to grasp, enables interest in industries related to technology, and can be particularly effective in cultivating interest in STEM subjects. And there’s plenty of successful examples of this in practice.

The Benefits of Hands-on Learning

Tactile teaching—using physical, demonstrative, auditory or visual objects—can help keep students engaged and helps them focus their minds on the present. Tech that encourages people to physically be involved like the Raspberry Pi, 3D printers, and of course 3Doodler bring a new or relatively unexplored aspect of learning into the classroom.

Students who struggle with ADHD may vastly prefer tactile learning methods over auditory or visual learning styles. Having to create a diorama or a model might mean students understand better than if they were asked to simply imagine a spatial arrangement, the concept of geometry, or complex equations in their head. "When students are given the tools to physically create a model, they can see exactly how all the parts come together to function as a whole." ShareAsking a student to create a model of the Eiffel Tower, for example, demands much more due diligence than just getting them to sketch it out. It may be difficult for someone who has dyslexia or ADD to concentrate long enough on understanding why the tower’s structural integrity relies on many different factors, but physical tools would help engage them enough to grasp why certain shapes work better than others, how math factors into construction, and why some materials work better than others.

Teachers have found that using tactile teaching methods in subjects like biology can reap better results than when students are asked only to visualise a concept. When students are given the tools to physically create a model of a cell, for example, they can see exactly how all the parts come together to function as a whole. Consider if students who have dysgraphia are asked to explain why a beetle looks the way it does—if they can create their own beetle and physically point out why it has adapted to its environment, they stand a better chance of being able to contribute to a class discussion than if they are forced to fall back on writing it out.

Dyslexic students, who may have visual or auditory deficiencies, may find that they excel when they apply tactile or kinesthetic methods to their learning. People who have trouble reading words, letters or numbers could benefit from creative solutions such as making their own words, letters or numbers (handy for those with dyscalculia) on plastic blocks helps them process sequences or equations better.

Across the board, in subjects that range from the arts to hard sciences, tactile technology has proven tremendously beneficial. When it comes to adapting for students with learning disabilities, it’s time to put down those pens and pencils and pick up a tool of a different sort. With new tactile tech, your students can have their hands (quite literally) full with tools to help them grasp the practical skills and knowledge that comes from innovative learning.

Get out there, and be creative. Your students will thank you for it.back to top image

Looking for more ways to bring 3Doodler into your classroom?
Check out our dedicated EDU section for classroom tips, lesson plans, and exclusive EDU bundles for educators.

Tiny Doodles Breathe Life into Tiny Spaces

Breathing life into an otherwise static scene is a challenge faced by every designer, architect or engineer in their daily work. “How can I convince my client that this town layout, building, museum or gallery will be enjoyed by real people going about their everyday business? And how can I bring hallways, auditoriums, and city streets to life with little more than an uninhabited scale model?”

To answer this question, Nikka Francisco, undergraduate at the Savannah College of Art and Design and 3Doodler design intern, takes us on a tour of a gallery teeming with Doodled life.

Blank Space

The gallery was created as a part of a course in 3D Design Form & Space, essentially a foundation course in how to think in 3D. The aim of the course is to think in different ways about installations and sculpture, creating models for presentation to others. Students have struggled to show how their ideas would work in reality, which prompted me to think a little differently, adorning the walls with the works of American Artist Alex Grey, and filling the gallery with a series of unique Doodled people.

Thinking Differently

Most of the time people purchase small sculpted models, but I wanted to make this my own personal work, even the people inside the gallery. The other problem with pre-made sculptures is that you can’t really change them – they are fixed and they aren’t designed for your specific space or experience.

  • 3d pen figurine easy doodle
  • 3d pen figurine easy doodle
  • 3d pen figurine easy doodle

Using the 3Doodler, things happen that you don’t always expect. You can’t always control the way the plastic flows, but that lack of predictability can often be more realistic. In some parts of the gallery it looks like the people are actually in motion, reacting to things, and it gave a better sense of relationship between the person and the artwork they were looking at.

  • 3d pen figurine easy tiny doodle
  • 3d pen figurine easy tiny doodle

All the right moves and all the right places

I didn’t plan out who would go where at the start. Instead I Doodled a small army of people and then placed them in different parts of the museum, in positions that fit best, moving them around until it felt right. On placing the people inside, it started to feel like an actual gallery, and that the space itself was possible.

  • 3d pen figurine mixed media
  • 3d pen figurine mixed media
  • 3d pen figurine mixed media

You have the two people in the lift peering out through the glass; your typical gallery poses – some people striding by, while others sit and stare at a painting for hours; and then those taking a time out out in the Cafe. Most of the people actually look like they’re dancing!

When I presented the work the reaction was surprise, but positive surprise.back to top image

7 DIY 3D Pen Hacks to Doodle for Your Camera

Whether you’re a professional photographer, photo-hobbyist, or like getting the perfect shot for your Instagram, you’ve probably invested time and money in your cameras and equipment. As with any investment, you want to protect your kit and make sure you get the most out of it.

With that in mind, we’ve put together these lifesaving hacks that you can DIY with your 3Doodler to extend the life of your gear. From top-of-the-line gear or a single point-and-shoot, we’ve got the fixes for you!

1. Repair a Cracked Lens Cap

A Doodled fix can save a cracked lens cap A Doodled fix can save a cracked lens cap
One of the most important components of any camera – and often the most expensive part – is the lens. Keeping your lens as pristine as possible is a necessity, but the lens cap can too often be lost or broken.

A cracked cap that no longer grips onto your lens is just as bad as a lost lens cap. That’s where adding plastic with the 3Doodler, while holding the pieces together saves the day – and possibly hundreds to thousands of dollars for a new lens.

2. Replace a Lost Lens Cap

Lost your lens cap altogether? Doodle a new one to custom fit your lens!

Steps
  • Hold the lens flat on a piece of paper and trace the circular outer edge.

  • Using ABS or PLA, fill the inside of the circle with 3Doodled plastic.

  • Tip: Make it smooth and solid by moving your hand in slow, steady, and consistent lines. Hold it up against a light when you’re done to see if there are any gaps or holes that need to be filled in.

  • Place some aluminium foil over the end of the lens and Doodle around the outer edge using FLEXY plastic. Make sure that there are no gaps or holes in the cap so that no dust or dirt can get in.

  • Hold the flat circular piece you’ve created to the FLEXY ring and use some more FLEXY and Doodle the two pieces together. Add some FLEXY further down the sides of the lens to make sure that it stays in place.

  • Tip: Be sure to add lots of plastic when connecting the pieces together, as you want them to be very solid and sealed up nice and tight.

  • 3D pen DIY hack to fix camera cap
  • 3D pen DIY hack to fix camera cap
  • 3D pen DIY hack to fix camera cap
  • 3D pen DIY hack to fix camera cap

3. Doodle Yourself a New Tripod

With a bit of patience there’s no reason why you can’t create a whole new custom tripod using the 3Doodler! We recommend ABS plastic for the best rigidity. We whipped up this smartphone tripod, with adjustable legs and FLEXY feet to keep it standing right in place.

A custom tripod matches any model phone. A custom tripod matches any model phone.

4. Repair a Broken Tripod Adjustment Knob

Repair the grip, reattach the knob, or Doodle a new one. Repair the grip, reattach the knob, or Doodle a new one.

Whether you’re using a DSLR with a telephoto lens or your smartphone, the tripod is an invaluable asset. With all the adjustable parts, a broken knob can be a real pain! With your 3Doodler and your choice of ABS, PLA, or FLEXY, you can fix a broken knob, repair the rubber grip like in the photo below, or if it’s fallen off just Doodle a completely new one right on to the end of the screw. If your new Doodled piece is loose, simply add a little extra plastic and adjust your tripod to the perfect angle for your next great shot.

5. Replace a Missing Tripod No-Slip Bed

FLEXY is perfect for creating a non-slip surface. FLEXY is perfect for creating a non-slip surface.

Got an old, but quality tripod with just a minor issue? Make it new again with a few Doodled repairs! The one below lost the rubber bed that the camera rests on – without it, the mounting screw won’t tighten and the camera remains loose. A fix that’s quick but lasting is to create a small washer with ABS or PLA plastic which works as a perfect spacer to hold the camera firmly in place.

Want to take this fix a bit further? Using FLEXY, recreate the original piece and affix it back onto the tripod for good!

Tip: Place a piece of paper over the top of the tripod and sketch a stencil outline to work from.

6. Replace a Strap Adjuster

If you’ve got one camera, two cameras, or a whole bag full of them, chances are you’re dealing with a few straps, each one of them with at least one clip or adjuster. Breaking one can seem like the end of the line, but with your 3Doodler you’ve got an easy way to DIY your strap as good as new.

It's as easy as 1, 2, 3
  • Doodle a letter “E” with horizontal lines as long as the width of your strap.

  • Slide the “E” over the strap so the prongs are arranged like they were with the original piece.

  • Doodle a straight line down, connecting the the three points of the “E” and securing your straps in place.

  • Tip: Make sure to Doodle this piece nice and thick, and ensure that the plastic really melts to itself so that it is sturdy and holds the straps in place.

  • 3D pen DIY hack to fix camera strap adjuster
  • 3D pen DIY hack to fix camera strap adjuster
  • 3D pen DIY hack to fix camera strap adjuster
  • 3D pen DIY hack to fix camera strap adjuster

7. Repair or Reinforce Cables

Cables, cables, everywhere! Whether charging cables or the cords for your lighting setup, these are the veins that power your gear. Your gear can’t work without cables, and neither can you!

That’s why it’s crucial to give them support when they show any signs of wear and tear. A bit of FLEXY around the stem of a damaged cable can reinforce it and make it even stronger than before.

A bit of fLEXY does the trick to keep your cables from cracking. A bit of fLEXY does the trick to keep your cables from cracking.

Repairing and replacing parts with the 3Doodler also serves as a way of customizing and identifying your gear in no time at all! Then again if you’re looking to keep things on the down low, you can match colors or use black filament so that your repairs won’t even be noticed.back to top image

Show us your DIY hacks by tagging us @3Doodler and using #3Doodler and #WhatWillYouCreate

How the Living World Inspires Creativity

Nature has been a source of inspiration for artists, writers, architects and designers for centuries. As Henry David Thoreau once stated, “we can never have enough of nature.” And it’s clear that our 3Doodler community feels the same!

The entries for the Living World category for our 2016 3Doodler Awards showed us not only the diversity of our community, but also how each person can take different inspiration from the same concept. From the ocean to the air, our Doodlers showed us the best of what the Living World has to offer, and the variety of ways the spirit of each creature can be shown through artistic expression with the 3Doodler.

Under the Sea

Inspired by the hundreds of different fish species that can be found at the Great Barrier Reef in Australia, our Living World Award winner Yuval Mor showcased the thriving ecosystem that can be found beneath the waves.

  • 3D Pen design Great Barrier Reef fish display by Yuval Mor
  • 3D Pen design Great Barrier Reef fish display by Yuval Mor
  • 3D Pen design Great Barrier Reef fish display by Yuval Mor

Yuval wasn’t the only one who dove deep to find creative inspiration. Mindy Nam’s wireframe octopus took a more minimalist and abstract approach to capturing the spirit of her subject. With clean lines and the stunning addition of glow-in-the-dark details, Mindy’s octopus shows off the sometimes hidden side of nature’s beauty.

  • 3d pen octopus design by Mindy Nam
"… I have nature and art and poetry, and if that is not enough, what is enough?"-Vincent Van Gogh Share

All Creatures Great and Small

Our community of Doodlers showed us that size isn’t what matters when it comes to inspiring subjects. Even the smallest spider, like the one below from Yuval Mor, or this grasshopper and lady bug from Eduardo Pires can be a source for creativity!

  • 3d pen designed spider by Yuval Mor
  • 3d pen designed lady bug by Eduardo Pires

But larger creatures can also leave a big impact. We saw many incredible creations inspired by the variety of life on land, like this elephant from Jonathan Breibart with artistic Doodled details.

  • 3d pen elephant designed by Jonathan Breibart
  • 3d pen elephant designed by Jonathan Breibart
  • 3d pen elephant designed by Jonathan Breibart
"Look deep into nature, and then you will understand everything better."-Albert Einstein Share

Fowl is Fair

But our community couldn’t be limited by gravity of course, and many chose to let their creativity take flight with winged subjects.

Diogo Nunes de Sousa chose two iconic birds of the rainforest to celebrate the colorful diversity found with our feathered friends.

And Levittown Public Library showed us the power of creativity in education with a carefully constructed peacock, which they named Rajiv.

  • 3d pen peacock designed by Diogo Nunes de Sousa
  • 3d pen peacock designed by Diogo Nunes de Sousa
  • 3d pen peacock designed by Diogo Nunes de Sousa
"Art is the child of nature in whom we trace the features of the mothers face."-Henry Wadsworth Longfellow Share

Gone but not Forgotten

Our world has been around for billions of years, and has seen creatures that may not be living now but were an important part of the history of life on our planet.

Paul Mahoney chose to take inspiration from the living world of long ago, with this Allosaur which he named “Allie”.

  • 3d pen dinosaur designed by Paul Mahoney
  • 3d pen dinosaur designed by Paul Mahoney
  • 3d pen dinosaur designed by Paul Mahoney
"To an artist, there is never anything ugly in nature."-Auguste Rodin Share

Inspiration is all Around

When looking for your next creative project, simply look to the world around you. From the ocean to the skies, our living world is filled with inspiring animals and creatures both in the present and the past.

Get creative, and find new ways to show the spirit of your subjects!

"It is the marriage of the soul with Nature that makes the intellect fruitful, and gives birth to imagination."-Henry David Thoreau Share

Getting Creative with Tanner Lamm

For the next few weeks, we will feature members of our community with a creative passion who have made the 3Doodler a part of their lives – whether as an outlet for creative energy, use as an artistic tool, or to create large-scale projects as part of a brand collaboration.

Every day at 3Doodler we get members from our Community posting or sending us the incredible artwork they have created. Whether on our Instagram, Twitter, or Facebook feed, or sent directly to us, we love seeing the creativity in our Community.

This week, we’re featuring Tanner Lamm, a longshoreman from Everett, Washington.

Tanner Lamm Tanner Lamm

“About four years ago, I got rid of my TV and became quite the YouTube nut,” says Tanner. “While on YouTube, I came across a video using the original 3Doodler. I instantly fell in love with the tool and needed to have it.”

The 35-year-old longshoreman from Everett, Washington donated to the 3Doodler Kickstarter campaign to get his first 3Doodler pen. “After messing around with the pen a little, I got straight to work and loved it.”

As with any new art medium, the 3Doodler took some getting used to. “I think I started with a few stick figures to get the flow down, then I made a small tree – which kinda fell apart,” Tanner admits.

But once he got the hang of things, Tanner’s imagination and his artwork took off. “I see inspiration everywhere and have more ideas than plastic strands to use,” he says.

"I love to Doodle because it allows me to pull my drawings off the page and into the real world." Share

From wriggling octopi inspired by his work as a longshoreman, to geometric trees emerging from intricate skulls, Tanner has used his 3Doodler pens as an outlet for his creativity and imagination. “I love to Doodle because it allows me to pull my drawings off the page and into the real world,” he says.

“My favorite Doodle so far is my Hang Glider Island,” he says. “It’s a big purple tree on a floating island with tiny wooden platforms for tiny hang gliders. It also has bigger hang gliders that fly around the island on fishing string.”

Hang Glider Island Hang Glider Island

“My inspiration was my love for drawing trees and my old paragliding days,” Tanner says. “It took me about 20 hours to make, and I used about 75 strands of plastic.”

Tanner says that when Doodling, it’s what’s inside that counts. “The best tip I can give is to make sure to pay attention to the inside structure of your Doodles,” he explains. Using a 3D pen is similar to 3D printing in this regard. “The bigger your Doodle, the more important structure becomes.”

As he continues to expand his creative work, Tanner plans to bring his Doodles to the next level with mechanical moving parts. “I want to see about getting some Doodles to move through wind power and cranks,” he says.

“The 3Doodler has been great for me,” he says. “I’ve used it no differently then if I were using a pencil. It feels like I’ve pulled my drawings right off the paper and then have the option to make them into so much more.”back to top image

90’s Back In Style

Last week we looked at how 90s Nostalgia is in full swing, and could also be contributing to a new wave in creativity.

So we decided to get creative as we look at 90s inspired trends making it big in 2016! The 90s are back in style, and we’ve put together three Doodled outfits combining the best of 90s-chic, and modelled by our stylish trio of mannequins.

Just Jelly

Get The Look: killer shades, cropped sweater, mom jeans, and jelly shoes

Man with sunglasses, 3D pen art

“Mom jeans” got a bad rap after their heyday in the 90s, but 2016 is bringing comfy-lazy-chic back into fashion! Get creative and pair your mom jeans with a cropped sweater, baby-doll T or spaghetti-strap tank. Finish off the look with a shimmery pair of jelly shoes and killer shades for a total 90s throwback.

Blue-shirted man with a yellow tie - 3D pen art

Overall Fashionista

Get The Look: striped shirt, overalls, platform shoes

3D pen art: Wooden mannequin in blue overalls and sandals.

Every 90s cool kid remembers rocking overalls. Now the fashion world’s most utilitarian way to dress is back on trend! This is easily the most creative trend to get behind. Overalls are an artist’s dream, making easy cover-up for paint splatters and still showing your easy-going nature! Slouchy style, easy to match, and loads of pockets – overalls are leaving last year’s romper trend by the wayside.

Man with frisbee 3D pen art in grass

Grunge Chic Cute

Get The Look: fabric bow headband, Ray Bans, plaid shirt, ripped jean shorts, Dr. Martens

Wooden mannequin with sunglasses and plaid shirt - 3D pen art

The 90s were when fashion-conscious grunge rockers discovered that Dr. Martens are the perfect shoe for ANY outfit! Tortured musicians and other creatives know that whether it’s a plaid skirt, cute sundress, or even ripped jean shorts – there’s no better shoe for bringing back that 90s grunge style. Pair with a plaid shirt, and make it cute with a scrunchie or fabric headband!back to top image

Small doll with shoes beside wooden stick 3D pen art

Doodle up your favorite 90s trends in 2016 and be sure to tag us @3Doodler and use #3Doodler and #WhatWillYouCreate!

The Doodle is in the Detail with Grace Du Prez

“I’m always drawn to trying new materials and I love creating tactile surfaces,” says Grace Du Prez. A mixed media designer based in London, England, Grace was drawn to the 3Doodler as an experimental new medium.

Grace is no stranger to using unconventional materials in her design pieces. “My previous work has involved lots of surface design techniques including digital embroidery and fabric manipulation,” she explains, “as well as the use of many unusual materials from leather to human hair, and even Mini Cheddars!”

With the wide range of colors available, and having the ability to control the final texture of the plastic, Grace was immediately drawn to the 3Doodler. “It was really interesting to start working with plastic as a medium and exploring all the different effects you can create,” she says.

"It was really interesting to start working with plastic as a medium and exploring all the different effects you can create." Share

Her very first project—a Peacock Hat for Ladies’ Day at Royal Ascot—was certainly a head-turner, and earned her multiple headlines and accolades. “This was the very first time I had used 3Doodler,” Grace says, “so I learnt a lot in a very short amount of time!”

Peacock Hat for Ladies' Day at Royal Ascot Peacock Hat for Ladies' Day at Royal Ascot

The completed hat took over 60 hours, all Doodled in the span of a week. “There were also a couple of days spent doing the initial designing,” Grace says. “The hat was made up of three different size feathers, all with three colours in them. Each one varied from around 15-30 minutes to make.”

Whether Doodling fanciful hats or fancy jewelry, Grace says it’s not as simple as picking up a 3Doodler and drawing away. “My design process is quite experimental and there is always an element of trial and development,” she explains. “I often start with a mood-board and a brainstorm of ideas.”

Then Grace moves on to drawing out her concepts. “I will draw a few basic sketches of the silhouette and then work out the templates using CAD,” she says. “Designing on the computer works well for me as I can easily make alterations and work out the exact scale. I can also try out different colour options.”

From those plans, Grace then creates a paper model by printing the templates from the computer models. “At this point I can see if it will work logistically,” she says. “For the final part of the planning process, I Doodle a test piece to see how it will look and make adjustments where needed. This step can be repeated several times so that each part works perfectly.”

The results are stunning pieces that reflect her careful planning and meticulous execution.

  • 3D Pen fashion design by Grace Du Prez
  • 3D Pen fashion design by Grace Du Prez
  • 3D Pen fashion design by Grace Du Prez
  • 3D Pen fashion design by Grace Du Prez
  • 3D Pen fashion design by Grace Du Prez

Sometimes, Grace says, ideas from one project will inspire something completely different. “I’ve just finished a vase that is totally waterproof,” she says. “It’s made of multiple circular layers all joined together—the same principle as a bracelet I previously made.”

After creating the bracelet, Grace says she was inspired by the clear plastic and the circular shapes. “It’s functional and the clear plastic looks really beautiful through the water,” she says. “I applied a layer of clear silicon to the inside surface to make it watertight.”

  • 3D Pen sculptures and fashion design by Grace Du Prez
  • 3D Pen sculptures and fashion design by Grace Du Prez
  • 3D Pen sculptures and fashion design by Grace Du Prez
  • 3D Pen sculptures and fashion design by Grace Du Prez
  • 3D Pen sculptures and fashion design by Grace Du Prez

For Grace, the 3Doodler seems the perfect tool for her artistic and design ideas. “I like that the 3Doodler combines modern technology and yet is still very hands on,” she says. “The making process is integral to me as a designer and I like my work to have a hand made quality.”

And while Grace is now an expert at using the 3Doodler to its highest potential, she says there’s always more to learn. “I’m always getting new ideas for projects,” she says, “and there are still lots of techniques I’d like to try!”back to top image

See more of Grace’s work on her website.

Exploring Space with the 3Doodler

“In my artistic work I am primarily concerned with the question of space,” explains design undergraduate Oktavia.

For Oktavia, the concept of “space” is at once familiar and nebulous. What she really wanted to focus on was how to create a clearer definition. “Is our environment created only with our perceptions in mind,” she asks in her undergraduate thesis, “or does it exist independently of us?”

“In my work I am looking for ways to visualize spatial ideas and create a wide range of works on this topic,” she explains. “Materiality and abstraction play just as important a role as variety and spontaneity do.”

When looking to expand on this concept and delve deeper for her thesis, Oktavia looked for new tools to help demonstrate her line of thinking. “When dealing with space, which is generally defined as consisting of at least 3 dimensions, the question arises, where do the limits between 2 and 3 dimensions lie?” she says. “Through this specific question, I came across the 3Doodler as a futuristic tool that could help me further.”

Unlike other more precise drafting or modeling tools, Oktavia was drawn to the imperfect nature of Doodling. “I determined relatively quickly that it was not always possible to draw with exact precision with the 3Doodler,” she explains. “But that’s exactly what makes the objects created with the 3Doodler so exciting. The small elements of coincidence make the difference. So I deliberately tried not to be the best technical Doodler, but to let myself be guided by the characteristics of the tool, making those elements the focus of my thesis.”

As she experimented, she found the 3Doodler was able to add structure and variation to her concept in a way no other tool had. “Because the lines of the plastic thread seem uncertain, the 3rd dimension works to ‘dreamify’ the space-filled graphics,” she says. “The jump between drawing on the wall or canvas and drawing in space creates something fantastical and offers the viewer the opportunity to dream about further dimensional jumps.”back to top image

3Doodler for DIY

While the 3Doodler can be used to make incredible sculptures and works of art, it’s practical applications can’t be overlooked.

With a tool as diverse as this, the DIY options are endless. Here’s eight examples of simple fixes or DIY ideas for your 3Doodler.

1. Give Your Phone an Upgrade

Looking for a style switch up? Doodle yourself a new phone case. No need to look like everyone else, make yourself a case that will give your mobile phone some personal flair while keeping it safe.

2. Make Your Own Doodled Clock

Make a statement with your home decor and create your own interior design pieces with personal flare. For wall pieces, hard-setting PLA works great, and will help you Doodle pieces that will last.

3. Repair Snaps in a Snap

Instead of buying a new pair of glasses, fix them with your 3Doodler. PLA adheres to metal better than ABS, so it works great for quick fixes like this one. Simply join the two pieces and Doodle around the break point. This little fix makes for quite the talking point too!

4. A DIY That Holds Water

Repairing cracks in plastic cups or soap dishes is easy with your 3Doodler. Both ABS and PLA work well for this kind of quick fix. ABS is excellent for plastic-on-plastic Doodling because of its higher melting point which helps weld plastics together, and PLA has naturally strong bonding properties. The PLA Clearly range also makes for more discreet fixes!

5. Doodle Your Own Wallet

Use FLEXY to create a hand-made plastic wallet of your very own! For a more fabric-like look, push the nozzle of your 3Doodler flush with the surface you are Doodling on, moving it quickly to form a thin film of Doodled plastic.

6. Repairing Your Home Appliances

3Doodler came to the rescue to fix the shell of this broken vacuum cleaner. A simple repair saves time and money, and gets your back on track with minimal fuss!

7. Lighten Things Up

Get creative and make your own lampshade. This lampshade was constructed for our display window at the MoMA Design Store. Made from over 50 small triangles, the pieces were welded together like a mosaic to produce this stunning lampshade. Pick your own colours and style – it’s simply a matter of joining the pieces.

8. Mix Doodling for Dynamic Projects

Louis DeRosa was able to combine a passion for electronics and the 3Doodler by using it to help make his own Hexacopter. As you can see, when you start to apply your imagination to 3Doodling, the sky really is the limit!


With so many options to fix and repair, the 3Doodler is your go-to DIY tool for any occasion!

Not sure where to start when it comes to using your 3Doodler for DIY? Check out our Hot Tips section to get insider ideas on how get the most out of your 3Doodler, and have you Doodling like a pro.back to top image

Show us your 3Doodler DIY fixes by tagging us @3Doodler and using #3Doodler and #WhatWillYouCreate

Making Patterns with Plastic

Fashion-forward creatives have been finding new and exciting ways to incorporate 3D aspects into their designs. But Hong Kong fashion art house SHIGO went beyond Doodled additions and constructed an entire dress made entirely with the 3Doodler.

SHIGO love to break from traditional thinking and try new things. Led by two young Hong Kong fashion designers, SHIGO is meant to serve as a platform to express creativity and ideas through fashion. “No one has used the 3Doodler to produce clothing made completely from plastic,” say SHIGO’s co-founders, who set out to do what no one had done before—make Doodled clothing a reality.

The duo began with a concept based from seashells. Taking two types of shell patterns, they wove the spiralling designs together to create an intricate design.

  • patterns used to make clothes with 3d pens
  • patterns used to make clothes with 3d pens
  • patterns used to make clothes with 3d pens

With this textile-like pattern, SHIGO then adapted the design to create a lace-like concept for the dress. The pattern was printed and applied to a base layer of heavy paper to test and fine-tune the form and placement before beginning work with the 3Doodler.

  • clothes made with 3doodler 3d pens
  • clothes made with 3doodler 3d pens
  • clothes made with 3doodler 3d pens

Using Blue Steel PLA and Diamonds & Pearls PLA, the final dress had a subtle shimmer which added elegance, sophistication, and enhanced the impressive 3-dimensional nature of the construction.

The final Doodles were peeled away from the paper base, leaving an intricate lace-like shell made of fine strands of surprisingly sturdy plastic.

The dress was left split down one side, with buckle attachments to make it easier to put on and take off.

  • clothes made with 3doodler 3d pens fashion
  • clothes made with 3doodler 3d pens fashion
  • clothes made with 3doodler 3d pens fashion
  • clothes made with 3doodler 3d pens fashion
  • clothes made with 3doodler 3d pens fashion
  • clothes made with 3doodler 3d pens fashion

The end result was something completely new in both the worlds of fashion and 3D printing. With the free-hand nature of the 3Doodler, SHIGO had created the world’s first entirely Doodled dress.back to top image

Breaking Free of 2D with Niki Firmin

Self-taught artist Niki Firmin had just finished a detailed realistic drawing of a calf in colored pencil. The piece was for an exhibition with the U.K. Coloured Pencil Society, and Niki was pleased with the result. But she still felt it wasn’t quite perfect.

“I just felt it was lacking depth,” Niki says. “So I decided I would try Doodling the nose to give the piece that depth.”

Niki had been working for a 3Doodler distributer, and was already familiar with how the pen could be used to bridge the line between the second and third dimensions.

The Doodled nose pushed her drawing into a new realm of mixed media art. “I was over the moon with the result!” Niki says. “I had been looking to find ways to combine the 3Doodler with fine art and the final result blended in so well!”

Niki created the nose of the calf with black and white PLA, and added some paint at the end to blend the colors and make the nose look more realistic.

"I don’t think I’m going to be able to go back to 2D anymore.”" Share

“The calf is looking through a fence, so I found a couple of pieces of wood to put at the top and bottom for the fence and then overlapped the nose over the top of the bottom fence,” Niki explains. The final result was an engaging and entertaining piece which Niki playfully named “Moodle.”

Since the creation of “Moodle”, Niki has explored more animal portraiture with Doodled additions.

“I don’t think I’m going to be able to go back to 2D anymore,” Niki says. “2D-3D is the way forward for me, and I’m hoping it will make my work stand out in a very competitive market.”back to top image

Ram-a-Doodle Ram-a-Doodle

Exploring Doodling with Louis DeRosa

“One of my favorite things about the 3Doodler is that every time I use it I come up with new methods to get the results I’m looking for,” says Louis DeRosa. “I don’t anticipate that exploration ever ending with this product.”

After only a few days after receiving his pen, Louis caught the eye of 3Doodler when he posted an adorable Doodle of his dog Bindi on social media. Impressed by how easy Louis made Doodling look in such a short time-frame, "The freehand ability offered by the 3Doodler makes it even more versatile than a conventional 3d printer." Sharethe company reached out to him for further collaboration. Louis has now helped the team with several projects including the MoMA Window Display, and has also led the way to discovering new tricks and techniques to use the 3Doodler to its fullest potential.

Louis says using the 3Doodler did take some getting used to, as it was an experience like none he’d had before. “When I first got the 3Doodler I wanted to use it like a regular 3d printer, building up layer at a time,” he explains. “But I soon realised 3d printers have to work that way. With the 3Doodler you’re free to work on whatever part of your creation you want without being limited to working from the bottom up.”

This realization encouraged Louis to experiment more with the pen and what it could do. “The freehand ability offered by the 3Doodler makes it even more versatile than a conventional 3d printer,” he says.

Experimentation has led Louis to discover new techniques that have surprised even the 3Doodler team. “I’ve found that combining techniques leads to the most interesting and intricate doodles,” he says. “Laying out structural elements flat on a sheet of paper and then peeling those up and putting them together and fleshing them out in midair has resulted in some of the coolest things I’ve made so far.”

Louis says sometimes the simplest solutions are best when it comes to Doodling. “Paper works as a really great under structure for creating all sorts of things,” he explains. “For example, I’ve made "We have only just begun to see what creative minds can do with the 3Doodler." Sharecustom rings by rolling paper around my finger to get the desired size then taking it off and taping it in place so I have the perfect size template to then doodle around. Once you’ve got your ring the right size you can doodle anything on top of it and get as wild as your imagination will allow.”

Louis says that ultimately the 3Doodler is a new creative tool that can inspire anyone with drive and imagination. “Like the many different ways people have used the paintbrush over the centuries, we have only just begun to see what creative minds can do with the 3Doodler, and we are not limited by canvases!” he says. “Truly, imagination is the limit, and when that’s the case anything is possible.”back to top image

3Doodler MoMA Window Display

When 3Doodler was first approached by MoMA to be featured in their Design Store window displays in New York City, the whole team was thrilled. But everyone soon found out how much work goes into a window display—especially one as involved as this!

Here’s a closer look at the process of designing, building, and installing the display, along with spotlight on the incredible Doodles that featured in it.

Creating a Display

The 3Doodler team only had 60 days to dream up a concept, get the display built, and install everything at both the 53rd Street and Soho MoMA Design Stores. The aim was to showcase the accessibility, simplicity and creative potential of the 3Doodler.

The team went through several rounds of late-night brainstorming, finally settling on a final rough sketch before racing to get everything built in time. The design features a wave that goes across the window and four uses for the 3Doodler: Build, Design, Teach, and Play. The wave itself is meant to represent extruded plastic, while the lines in the back are giant strands of filament.

  • 3Doodler 3D Pen Art Displayed at MOMA in NYC
  • 3Doodler 3D Pen Art Displayed at MOMA in NYC

To build the display, 3Doodler joined forces with Chad Lynch and his team at Heywood Productions in Red Hook, Brooklyn.

The waves were made from laminated wood and coated with several layers of shiny white plastic, while the background tubes were painted PVC pipes. The giant 3Doodler tip was made using foam and wood, and then coated with resin and paint.

Once the pieces were built, installing everything turned out to be the easiest part. The team converged on the MoMA Design Store windows, and put on quite a show for passersby with all the miming, pointing, and photo snapping that it took to get things just right.

But the final result was well worth the effort.

  • 3Doodler 3D Pen Art Displayed at MOMA in NYC
  • 3Doodler 3D Pen Art Displayed at MOMA in NYC
  • 3Doodler 3D Pen Art Displayed at MOMA in NYC
  • 3Doodler 3D Pen Art Displayed at MOMA in NYC
  • 3Doodler 3D Pen Art Displayed at MOMA in NYC

Hero Doodle: Metamorphosis Lamp

The window display featured several Hero Doodles to showcase the diverse uses and creative scope of the 3Doodler. The first was the Metamorphosis Lamp by Broolyn-based artist Rachel Goldsmith.

“My artwork is inspired by two sets of contrasts,” Rachel explains. “In my environment, the contrast is between the man-made and nature; and in materials, the contrast is between the control I have over the media and how the media naturally interacts. This inspiration manifests itself in my final pieces through contrasts in color, in line, shape and form, and in textures.”

3D Pen Lamp by Rachel Goldsmith

Rachel explains that she is constantly reacting to how the plastic lands on the canvas, often not in the way that she originally intended: “I definitely have some control over the material, for example I choose the colors, but I certainly do not have total control. It’s almost like every other move has to be a ‘beautiful oops.'” This is why she refers to what she creates as “painting with plastic”, because for Rachel, it is much less like drawing or Doodling and much more like painting. It’s about pushing an artistic piece until she has a complete composition that has both balance and movement.

Hero Doodle: The Boat

Measuring two feet long and about 1.5 feet high, this was certainly an epic achievement and a labor of love by 3Doodler’s own co-founder Daniel Cowen.

Dan began by Doodling the deck of the boat flat on a large piece of paper to get the size and shape right. He then propped up up deck at the right height and Doodled the ribbed hull downwards to create a frame. “I used the existing skeleton to effectively weave a mesh surface,” Dan explains, “and then used that surface as a base to create a thick stable top layer.”

Then followed the complex process of adding the masts and finer details for the water and waves. “I lined up plastic tubes on the table top to act as rollers,” says Dan, “and proceeded to drape melted plastic over them to form the shape of the wave.”

  • 3D Pen designed boat by 3Doodler founder Daniel Cowen
  • 3D Pen designed boat by 3Doodler founder Daniel Cowen
  • 3D Pen designed boat by 3Doodler founder Daniel Cowen

For final details, Dan added a dolphin, starfish, anchor and life saver ring. “I had to Doodle the rope very slowly in mid-air to get that ‘cast out to sea’ look,” he says.

Hero Doodle: Geometric Lampshade

“When I found out we were going to take over the windows at the Museum of Modern Art I wanted to do something new with the 3Doodler that would utilize it in a completely different way,” says 3Doodler’s own Creative Director Faraz Warsi.

“We always tell people you can use the 3Doodler to decorate your house or office,” Faraz says. “Taking inspiration from our new design intern’s passion for origami I wanted to build a lampshade made completely out of triangles.”

  • 3D Pen lampshade designed by 3Doodler
  • 3D Pen lampshade designed by 3Doodler
  • 3D Pen lampshade designed by 3Doodler

Faraz decided to use 3Doodler’s new transparent Clearly line of PLA filament to showcase the range. He began by designing a simple stencil with 12 triangles in eight different PLA colors—two clear colors and six lighter colors from the regular PLA line.

“Once we had all our triangles on the table we tried to figure out the best way to piece it all together,” Faraz says. “The possibilities were endless, with different color combinations, patterns, and angles to create depth.” Faraz ultimately decided to go with a classic cylindrical shape, with 16 triangles in each row.back to top image

3Doodler sign in MOMA window display in NYC
Close-up: 3D pen art cake with sticks design

Get Inspiration in Your Inbox

Sign up to be the first to have our latest 3D pen lessons, stencils, deals, and discounts (yay!) deposited directly in your inbox.

You have Successfully Subscribed!