Top Projects and Resources for your 3Doodler

With the Holiday hustle and bustle beginning to die down, now is the perfect time to sit down, relax, and start creating with your 3Doodler pens – new or old!

Why Doodle?

Doodling may be the perfect way to decompress after the holiday rush! Research has linked Doodling with stress reduction.

We have compiled some helpful resources to get you started, along with some exciting projects to inspire your creativity.

If you’re an educator, please reach out to us.
We’ll gladly help you kick off the new year with 3Doodler EDU, and offer tips and support tailored for your specific classroom needs.

Getting Started

More resources for 3Doodler Start here.

More resources for 3Doodler Create+ here.

Inspirational Projects

– BEGINNER DOODLES –


Make the sweetest homemade cookies with DIY stamps.

let's bake


Doodle a tree to hold your Jewelry.

treet yourself


Keep your headphones tidy with a Puppy Headphones Wrap!

Puppy Love

– INTERMEDIATE DOODLES –


Add some flowery flare to your ensemble with these Pearl Floral Earrings!

Flower Power


Craft a life-size Rhinoceros Beetle.

Take Flight

– ADVANCED DOODLES –


Create a beautiful atmosphere in your home with these Tiffany Candle Holders.

Bright Idea


Make a model of a V-Twin engine! It even has moving pieces!

Jump Start

Have a question? 3Doodler Customer Service is here for you.

Contact Us

“Should you ever need assistance, 3Doodler’s customer service is by far the most responsive we’ve encountered.” – The Wirecutter

How To Draw In 3D with a 3D pen

How do you make 3D objects with 3Doodler? The most obvious answer is to Doodle freehand in the air. But don’t stop there – there are also other techniques that you can try out to achieve the same, or even better, results. Who knows, you might even prefer these methods as you climb the learning curve towards becoming a 3D drawing expert!

In this guide to 3D drawing, we look at how you can assemble a three-dimensional object using Doodled 2D parts, a little like building with Lego blocks, as well as making your own molds, and more. Here are some basic techniques:

Build a cube

A great way to practice assembling your Doodles is by building a cube.
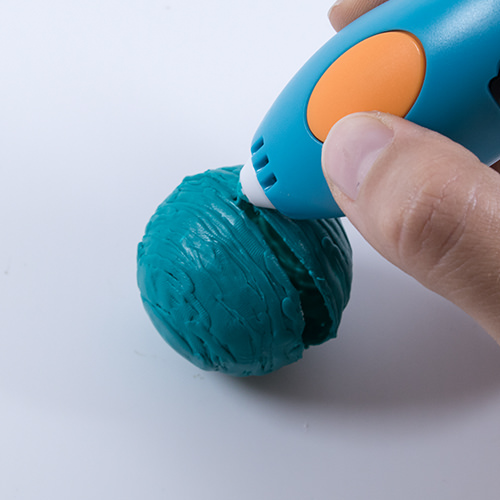
  • Step 1

    On a piece of paper, draw a 3x3cm square. Doodle to create six two-dimensional square pieces. If you are using a 3Doodler Start Pen, you can use a Start DoodlePad® as a Doodling surface.
  • Step 2

    Place the bottom piece flat on your work surface, then hold up a side piece so that it’s propped up against the bottom piece.
  • Step 3

    Apply a bit of plastic at the corners where the pieces meet to hold it in place. Then Doodle along the entire joint to secure it.
  • Step 4

    Repeat for each side of the cube, and you’re done! Now use the same technique to go beyond 3D cubes to create almost any structure.

Create a sphere

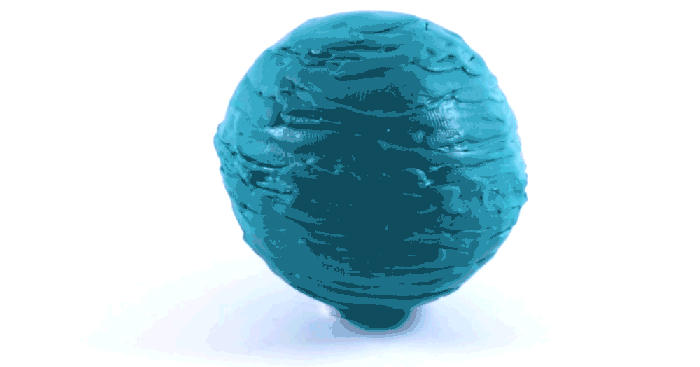
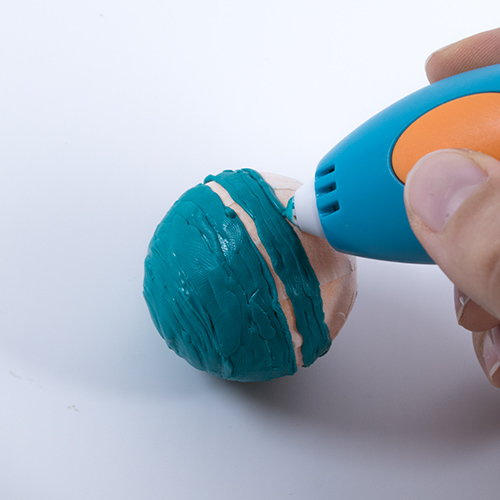
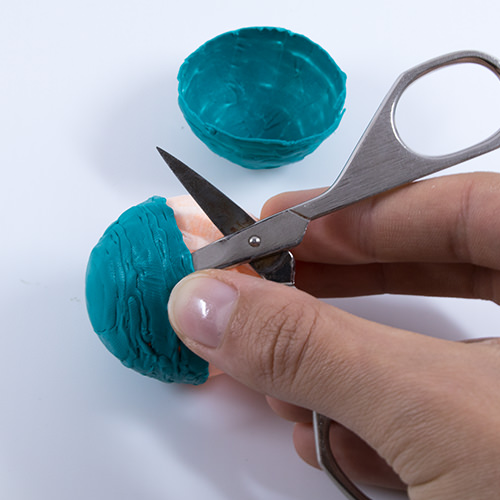
When creating a round shape like a sphere, we recommend using a mold to get that perfect 3D shape. Check out the 3Doodler Start Doodlemolds® Basic Set, make your own sphere mold out of some rolled up paper and masking tape, or use and recycle items you already have at home!

  • Step 1

    Get started by using your ping pong ball as your 3D mold and wrapping it with masking tape. Doodle a line around the middle of the ball, and work your way toward one end to create a semi-sphere.

    TIP: If you don’t have a ping pong ball, you can also use the balloon technique from this fairy lights tutorial instead.

  • Step 2

    Leaving a little space, Doodle another semi-sphere on the other side of the ping pong ball.
  • Step 3

    Use a nail file or small pair of scissors to slide around the inside of your semi-spheres and pop them off your ping-pong ball. They should come off easily once they’re a little loose!

    CAUTION: Adults should help children with this step!

  • Step 4

    Add some plastic to join the two semi-spheres together to form a whole sphere!

    Almost any object can be used to make a 3D mold for your creations. Try picking up a random household object and using it as a starting point for your next 3D masterpiece.

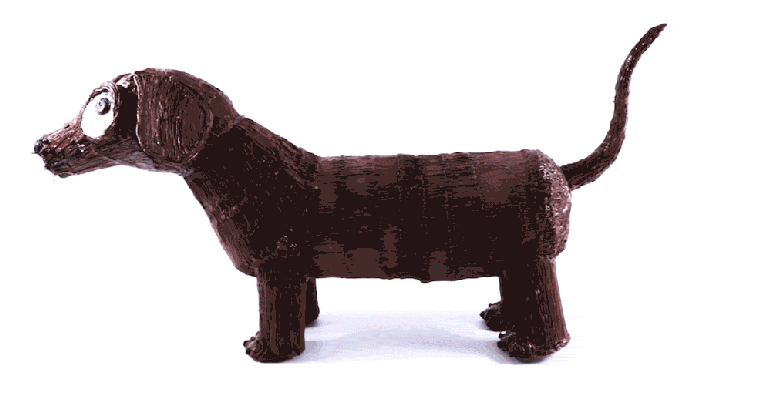
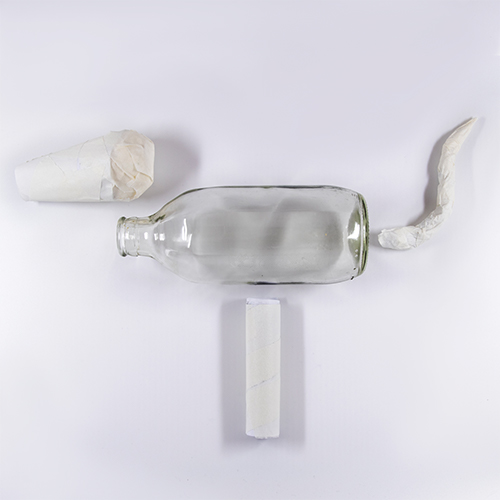
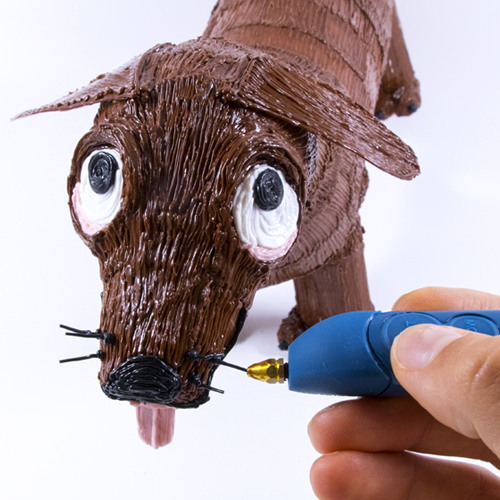
Make a figurine or animal

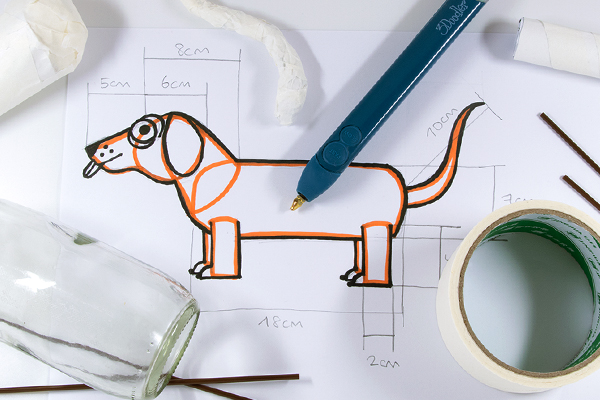
When making more complex structures like a figurine or animal, you can build your own molds with paper, masking tape, and a few household items.

  • Step 1

    Sketch out your character and draw simplified shapes onto each body part (e.g: a circle for the head, cylinders for legs, a rectangular prism for the body). Write down the rough measurements for each of these shapes.
  • Step 2

    Find objects that match these basic shapes (e.g. pencils or rolls of paper for legs, a ping pong ball for the head, a glass bottle for the body). If you can’t find the right objects, scrunch up some waste paper into the desired shape. Be sure to wrap each of your molds with masking tape before Doodling onto the surface.

    TIP: A 3Doodler Create pen can melt other plastics, so use surfaces like paper, glass, clay and wood to be safe. Always wrap them with masking tape to ensure easy removal of your finished Doodle. And you can also sketch out your Doodling onto the tape itself.

  • Step 3

    Doodle half of each shape and pop off the solidified plastic before Doodling the second half. Then join the two halves together using your 3Doodler to create each completed body part.

    TIP: If you are using scrunched up paper or other expendable material as a mold, you may want to completely cover the mold and leave the paper inside of your Doodle.

  • Step 4

    Assemble all body parts by Doodling them together. You can Doodle flat parts and attach them or simply add the basic shape to create protruding parts like ears and toes.
  • Step 5

    Add details like facial features directly onto your piece and play with textures for fur or hair. You can also use nozzle tips for fine details and finishing touches.

    TIP: Use the smoothing tool tip to scrape off mistakes and redoodle parts.

  • Step 6

    All done! Don’t forget to show off your Doodle by tagging #whatwillyoucreate!

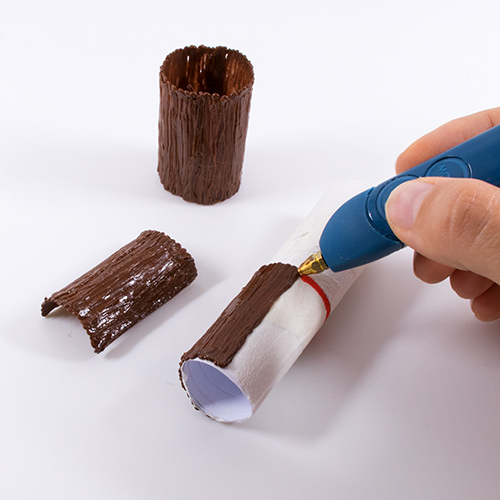
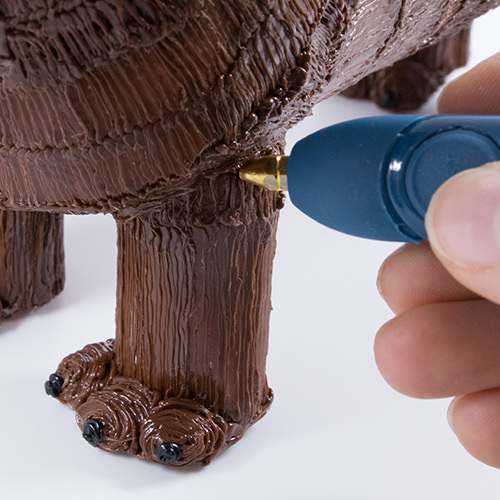
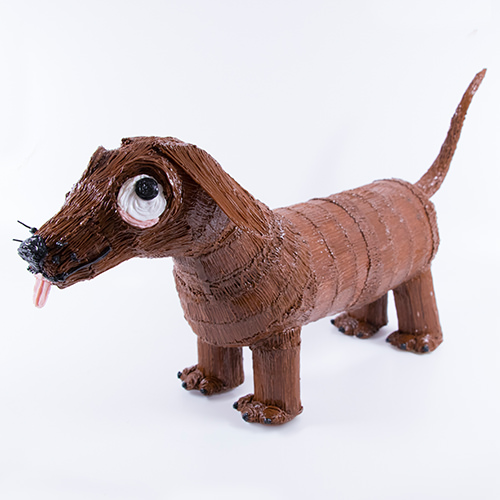
An even more advanced way to make the base structure is to use ABS plastic to create a frame. With the frame built out, you can Doodle over it using either PLA or ABS to complete the shape. For example, to make the shape of legs, simply Doodle rings of incremental sizes, then join the pieces together. Finally, fill up the gaps by connecting the rings. See how 3D pen artist Heather Baharally creates her frames with the 3Doodler Start Pen to create a beautiful, realistic octopus.

Ready to create more? You’re going to love these tutorials and stencils that we’ve prepared for you.
To purchase 3Doodler products, visit our store here.

Envelope

Get Inspiration in Your Inbox

Sign up to be the first to have our latest 3D pen lessons, stencils, deals, and discounts (yay!) deposited directly in your inbox.

You have Successfully Subscribed!