When 3Doodler launched the first 3D pen to the market in 2013, the concept was to provide creatives and professionals a new avenue to bring ideas to life. 3Doodler 3D pens are ideal for freehand drawing, creating whimsical doodles, or making quick repairs. We’re taking 3D pen creativity in a new direction with logic, rules, and mathematical thinking with parametric design and algorithmic art!
What is Algorithmic Art?
You’ve likely seen this type of artwork and didn’t even realize you were looking at mathematical thinking in an art form! The approach uses a system of rules and parameters to generate complex and often intricate forms.
Parametric design uses variables you set, instead of directly drawing every line, and it’s often used in architecture and engineering to create optimal structures. In this process, changing one parameter could alter the entire design. For example, imagine a spiraling tower where simple numbers control the radius of each level and twists or turns!
Algorithmic art, on the other hand, uses a set of instructions to generate unique patterns and create artwork. Natural patterns, mathematical equations, or even abstract concepts can help inform the direction of a particular design. As you expand your thinking, you could create intricate branching structures or fascinating geometric patterns, all based on mathematical sequences.
Instead of complex software, using a 3D pen for this process enables tangible artistic creation that is accessible, unique, and allows for experimentation!
Getting Started: Simple Algorithmic 3D Pen Creations
Let’s get those creative juices flowing with a few quick and easy ways to get started. Get your 3Doodler 3D pen and plenty of colorful filament, and find a clean surface.
Geometric Progressions: Create art with sequences where each term is found by multiplying the previous term by a constant factor! You can use geometric progressionto create repeating patterns where the size or scale of the elements decreases or increases. For example, draw the circles with your 3D pen, making each one incrementally larger. Connect the shapes to form an expanding structure like a cone.
Fractals: These are geometric shapes that exhibit self-similarity, meaning they have the same pattern at different scales. For example, the Koch Snowflakeis a fractal curve created using an equilateral triangle, and each successive stage is formed by adding outward bends to each side of the previous stage, making smaller equilateral triangles.
Mathematical Sequence: There are many mathematical sequences that you can apply to art. The most commonly referenced is the Fibonacci Sequence, which is used to create a spiral by drawing squares with side lengths corresponding to the Fibonacci numbers.
More Tips for Success!
Combining the creative outlet of 3D drawing with the logical nature of parametric and algorithmic design allows you to explore new dimensions of artistic expression — the only limit is your imagination.
Remember to start with simple patterns and basic rules before you increase the complexity. Sketch your ideas with intention and map out how your design will progress. And, most importantly, don’t forget to embrace imperfection. The beauty of art lies in its organic nature, and creating with a 3D pen is no different. Remember that slight variations in your design add character and interest.
Barbie is a fashion icon and inspires us all to dream big. Now you can make stylish Barbie accessories with a 3Doodler 3D pen and tutorial!
Over the years, Barbie’s encouraged girls and women worldwide to express their personal style and to be anything they want to be. Barbie held careers in many different industries and represented all kinds of women while breaking fashion barriers.
Now, Barbie is about to hit the big screen in a new adaptation by Greta Gerwig that debuts on Friday, July 21.
It’s the perfect moment to dust off your Barbie dolls and create one-of-a-kind accessories with a 3D pen. Find out how Barbie got her start and explore 3Doodler’s project ideas!
Fashion Icon is Born
Ruth Handler, the co-founder of Mattel, found inspiration watching her daughter, Barbara, and her friends play with paper dolls. She could envision the girls playing with a more lifelike doll but met with resistance at Mattel.
A trip to Europe rekindled the idea after seeing a German doll in a toy shop. Handler quickly created a prototype for an 11.5-inch (29 cm) doll with movable limbs. She named the doll Barbie after her daughter and presented it at the New York Toy Fair in 1959.
From the beginning, fashion played a big part in Barbie’s storyline. Handler envisioned girls playing with the doll to imagine a future where they could be whatever they wanted at a time when many careers were closed to women. Clothes could transform any doll into a flight attendant, doctor, astronaut, or actress. An outfit could create a new look, lifestyle, or career. Anything a teen could dream up was now possible to imagine playing with Barbie.
In the 1970s, Mattel introduced Barbie’s signature pink color to market the doll to young girls. Today the deep pink shade is part of the official Pantone Color Chart designers and artists use.
Make Accessories for Barbie
Whether you’re creating a bright pink accessory or adding to another outfit, one thing is for sure; you can design all sorts of interesting and unique items for Barbie with a 3D pen.
Try your hand at a headband, necklace, or purse with an easy-to-follow tutorial and stencil. Choose a color from a selection of PLA filament, grab your 3Doodler Create+ or 3Doodler Start+ pen, and get crafting.
If you’re feeling really creative, you could even design new clothes for Barbie and Ken. There’s no end to the possibilities.
And, if you’re looking to take the experience one step further, take a Barbie selfie and imagine yourself as part of the Barbie universe!
What a week we had in Philadelphia! 3Doodler was thrilled to join educators from across the country and around the world at ISTE 2023.
This annual event pulls together the brightest minds in education. It offers educators a deep dive into areas that interest them, with solutions and ideas to make progress.
While discussion around AI unsurprisingly took center stage, the breakout sessions focused more on boosting accessibility, play, and collaboration in schools. Catch a brief overview of this year’s event here and read on for our key takeaways from the educators we met with and sessions we attended.
Accessibility & Social-Emotional Learning as a Priority
Educators continue to prioritize social-emotional learning in the classroom. The strategies they rely on encourage students to develop emotional intelligence, resilience, build empathy, and create positive relationships.
One classroom example for younger students included Build Me “Emotions” by Lego Education, enabling students to share their emotions through hands-on building and play. Older students may enjoy an opportunity to introduce themselves to their peers at the beginning of the year. This can be a small, but valuable step towards getting to know each other (and how to pronounce names!) while also building a classroom community.
Accessibility tools are a game changer for many students. Unique tools by Apple and Microsoft make learning much more approachable for various audiences, including built-in tools for those who need visual, hearing, cognitive, or mobility support.
Melissa Stark, a Special Education Teacher and Instructional Technology Coach in New York City’s Department of Education, shared these tools and other critical tips to make learning more accessible during her ISTE presentation.
Importance of Play
A common theme that emerged as the event progressed was the importance of play-based activities, especially given the last few years of disruption brought on by the pandemic and distance learning.
One glance around the ISTE Playground, and it was clear to see how play could boost learning outcomes. Gamification was a clear focus, which adds gamelike elements to increase motivation and engagement.
Teachers are creating interactive and immersive learning experiences and boosting play with a host of learning tools like Class VR, Book Creator, and KinderLab Robotics, to name a few.
Collaboration Through Industrial Design Labs & Makerspaces
Several educators we spoke with explained their role in organizing maker spaces, fab labs, and industrial design labs. No matter what it’s called in your school, these spaces and the people who lead them are incredible. They provide students with an area at school that offers a break from the pressure of strict academic work and allow for more creative, hands-on learning.
Johanna Marshall, a teacher at Ridley High School in Pennsylvania, shared a session with her students to explain how they took an outdated industrial design lab and transformed it into a welcoming, student-centered maker space where everyone could contribute.
Students formed a Girls Who Code club and worked collaboratively to create working mazes. Later in the year, students made functional interlocking stools that tested their skills.
Lessons shared for those looking to create their own maker space included starting where you and your students are, only accepting useful donations, buying equipment with product support, and asking for help when you need it.
Inspirational as always, ISTE 2023 was a great reminder for all of us to focus on what’s possible and to celebrate student achievement at every opportunity.
Anela Ming-Yue Oh is a multidisciplinary artist who loves curry and the ocean! Anela partnered with 3Doodler on our latest guest artist feature to share her approach to 3D artwork.
Anela relies on her imagination and also draws from the resources around us to inspire her creativity.
“For me, I draw strength to move through the world from my identity as mixed race-Malaysian-Chinese, lessons from the natural world, and people close to me who have passed on,” said Anela.
In this piece, Anela uses the 3Doodler 3D pen to speak to Malaysian batik, a lost wax process where wax is painted or stamped on fabric and then dyed. She also incorporated a plant from both sides of her mixed-race heritage: okra. It’s a plant that Anela believes both her white Southern family members and her Malaysian-Chinese members would have intimately known through food.
“A huge part of using vibrant colors for me is being unapologetic in taking up space,” said Anela. “As an Asian American you are often viewed and shaped by culture to be as small and unobtrusive as possible.”
The bright color in this piece represents reclaiming spaces as an active agent in the world. The colors draw from the traditional Malaysian dress she grew up with and family members who wore such patterns and colors as batik sarongs.
Surprising Ways with Mixed Media
“As an artist who is mixed race dealing with world building I believe it is important that my work reflects a meeting of materials, soft fiber and hard filament or ceramic meeting in ways that create beautiful complexity,” said Anela. “This interdisciplinary approach reflects the strength and commonalities between the different worlds I inhabit every day.”
She started this project using the 3Doodler Pro+ to draw the central okra stalk element and the other floral patterns. She continues to create until she has enough in varying colors and styles to lay out the design. Next, she begins the papermaking processes to transform the PLA drawings.
“I work with a fiber called overbeaten abaca which is a plant fiber that I beat for 8 hours in a machine called a hollander beater,” said Anela. “I use it because it is extremely strong and connects seamlessly to the 3Doodler drawings.”
She used a papermaking tool called a deckle box to “pull” the sheet using the unpigmented abaca to create the base sheet of paper. Then, she dips each 3D drawing into a pigmented abaca container before placing it on the base sheet. Finally, she removes the abaca base sheet once the 3Doodler designs are placed.
Experimenting & Creating in 3D
During her undergraduate program, Anela used the 3Doodler Pro+ in a metals class and fell in love with the process. The objective was to use the 3D pens to think through modeling before casting. Anela found herself making rings and other jewelry directly with the pen and ABS material.
“I found it very accessible to start working very creatively,” said Anela. “I was building three dimensional forms, flat forms and building them up, and ended up making forms combining those ways of working with the pen that were used in my thesis show.”
She explains that it’s essential to use materials that spark excitement. Trying out new materials encourages the imagination. A new technique may transform an artistic approach.
“I think a huge part of any artistic practice is joy and experimentation,” said Anela. “When you integrate different materials it provides endless problem solving and opportunity to play with how the materials work together.”
Anela advises budding 3D artists to experiment and play. She finds that the more you experiment and add new tools and skills to your toolbelt, the more you will find the things that resonate.
“It took me quite some time to figure out how the 3Doodler Pro+ would function in my larger practice in a meaningful way,” she said. “Now, I’m working with clay in similar ways due to my experience with the 3Doodler pen. I can’t wait to see how all of this learning keeps expanding the relationships between my materials.”
Don’t worry if you missed out on the latest Crocs Collaboration. 3Doodler’s got you covered with custom 3D summer accessories, like clog charms, that you can design with a 3D pen!
Styles come and go quickly these days. That’s why creating custom charms, bike bling, or friendship bracelets could be the ticket to staying one step ahead of the trends and on budget.
Making unique 3D summer accessories or adding custom details with 3Doodler is easy. Check out our tips, and imagine what else you can create!
Fresh Fruit Clog Charms
Summer is right around the corner, so it’s the perfect time to create DIY clog shoe charms to celebrate the season. We took inspiration from summer fruits that will soon be available in farmers’ markets and fresh fruit stands. Design a lemon slice, strawberry, watermelon, grapes, or avocado following our tutorial and stencil. There’s no end to the amazing shoe charms that people design. Find more inspiration and create new versions to reflect your style!
Customize your bike with classic details or vary it up to personalize the look of your ride! Created in the 1980s, spoke beads or spoke dokes, as they are also called, add a bit of nostalgia to any bike wheel. The original beads clip to the spokes of your bike and often make noise as the beads travel up and down the spoke while the wheels are in motion. The faster you ride, the more noise they make. Follow 3Doodler’s tips to make decals you can add to your wheels, handlebars, and more. Check out 3Doodler’s earlier blog on bike accessories for more ideas!
Friendship bracelets are a classic simple craft that never falls out of fashion. If you are a lucky Taylor Swift fan who scored tickets to the Eras Tour, you’ll likely see attendees exchanging bracelets at the show. Learn how to make a friendship bracelet with your 3D pen using our free stencil, or try the more advanced charm bracelet to test your design skills. Find plenty of inspiration at 3Doodler to help get your creative ideas flowing!
Guest artist Cornelia Kuglmeier helped explore the topic of mermaids this month. Dive into the history of mermaids and learn a few fun facts about their origin.
Disney’s live-action version of The Little Mermaid will be out in theaters later this month. Hear how it inspired Connie and discover the techniques that enabled her to bring her vision to life!
Diving Into an Underwater World
Mermaids and mermen appeared in folklore with the upper body of a human and the tail of a fish. These mythical beings appeared in many different cultures and were considered magical creatures who loved music and often sang.
Early stories about merpeople suggested they brought harm to humans in the form of floods, shipwrecks, or other disasters. However, mermaid and mermen sightings exploded during the early 1500s as explorers took to the seas and made their way across the ocean.
In fact, as early explorers traveled through the Caribbean they claimed they saw mermaids. It was likely manatees that they were spotting in the ocean, but the legends continued.
In 1873, Hans Christian Anderson wrote The Little Mermaid as part of a collection of fairy tales for children. The story shares the journey of a young mermaid willing to exchange her life in the ocean to gain a human soul. Over the years, the tale was adapted to theater, film, ballet, and even opera. The most well-known adaptation is that of the animated Disney film that was released in 1989.
“I loved the character of Ariel. She’s such a curious, lively girl, who loves to explore, to learn new things, and expand her horizon,” said Connie. “What intrigued me the most, though, was that beautiful underwater world. It was a completely new world to me, as was ours to Ariel.”
3D Design Process Explained
In sketching this latest project, Connie explains that her drawings continue to evolve throughout the project, and the final design may differ slightly from the original sketch. The next time you sketch, consider using a 3D pen to create a scene or add detail to a particular project.
“Once I start, the ideas start to flow,” said Connie. “As you draw one thing, another crosses your mind, but it doesn’t quite fit with what you’re sketching at the moment. Then, there’s a second idea, and so on.”
She explains that creating is an ever-evolving and living process. Sketching is an essential part of the process. Connie describes it as taking notes and putting them into a picture. That picture quickly becomes a 3D design as the process unfolds.
Connie draws from various angles to help in her three-dimensional planning. This process enables her to firm up the design’s dimensions, proportions, and details.
“The result is often a mixture of different ideas, but seldom just one specific sketch I made previously,” said Connie. “Even though the sketch is important to the design process it doesn’t determine the final result. It mostly serves as a visual note.”
Surprising Details & Techniques
Connie admits that creating something truly unique can take time and patience. Some elements, like the scales, were planned, prepared, and applied. But others, like the pearls and bubbles, were added as a finishing touch.
“The result is so rewarding,” she says. “I love the light reflecting on the multi-colored scales. I like the varying hair color. The details breathe life into things.”
A surprising material created the look of the skin on this mermaid. Connie used wood filament to make the skin and body. She doodled the pieces and then used the flattening tip to smooth them and create an even surface.
“Wood is such a good filament for sculpting,” said Connie. “If you use the angled tip, you can carve into the filament, as I did for lips and eyes. If you want to speed up the process, change the setting from PLA or Wood to ABS. It makes a big difference, but you need to be careful not to press too hard or the filament will melt away.”
Regarding the new live-action Little Mermaid, Connie is excited to see how Ariel’s sidekicks and the underwater kingdom come to life on screen.
“I’m really interested in all aspects of the story,” says Connie. “I’m mesmerized by modern film technology and enjoy seeing what artists are capable of creating. Entire new worlds to literally dive into!”
We often think of a library as a place to find books of all kinds — from picture books to large print or ebooks and audiobooks. But there’s so much more to the story.
Discover all that libraries have to offer during National Library Week, April 23-29, 2023! Libraries provide a space for community events, guest speakers, crafting classes, STEM activities, and book clubs. In addition, librarians are there to help you find what you need. They lend movies, musical instruments, games, and museum passes. At a library, you might be surprised to find courses that support local businesses, job seekers, or entrepreneurs.
This week, take a moment to explore how libraries support the local community with tips we rounded up. While you’re at it, use your 3Doodler tools to design a flipbook or trace your favorite storybook character. Read on!
There’s More to the Story
It’s easy to participate in National Library Week! Explore these suggestions and discover something new at a library near you.
A few ideas
Visit a library: Stop in and visit your local library to explore books or participate in a new activity. Take a moment to talk with your librarian and learn more about your library story. You might be surprised by what you discover!
Share #MyLibrary Story: Now that you know more about your library, share what you’ve learned. Was it a new book? Help to start a new activity or craft? A museum pass or a book club? Participate by writing about your library experience and sharing with the hashtag #MyLibraryStory.
Build community: Follow the American Library Association on Facebook, Instagram, or Twitter. There’s so much more to learn when you stay in contact year-round.
Storybook Projects
Libraries are also an excellent resource for STEM/STEAM clubs and maker spaces. In addition, you may find tools you can borrow, like a 3Doodler 3D pen or activity clubs, that you can join for weekly project ideas.
No need to delay. We’ve got a few project ideas that will get you started as you celebrate National Library Week. So enjoy these creative projects you design to support your love of reading, storytelling, and more with 3Doodler!
3D Flipbook
Create a small book with a series of images in different positions to create the illusion of movement when the pages flip quickly.
Bring storybook characters to life! Use a favorite book from home or check out new books at a local library. Once you’ve settled on your favorite, we’ll teach you how to take any picture book and create a stencil for doodling!
Street art is created in public locations and is usually unsanctioned. Still, it covers a wide range of media and is generally more connected with graphic design than graffiti art, according to Tate.
3Doodler took inspiration from this art form in our latest collaboration with artist Ricardo Martinez. Creating this street art design, Ricardo took inspiration from 3D glasses, engraving, and a late Mexican artist.
3D Glasses & Pop-Culture
Ricardo admits that inspiration for his latest piece initially took a lot of work to find. Although the ideas were there, they took time to coalesce into a design.
“I knew I wanted to create an anaglyph. I kept thinking about 3D glasses that had one red and one blue lens,” said Ricardo. “The images were layers and when you viewed them through the glasses, your perception would change making the image pop off the page or the screen.”
Joseph D’Almeida experimented with anaglyphs, a Greek term meaning again and sculpture, in the 1850s and is often credited with inventing a new way to view 3D. Anaglyph uses a motion or still picture in which two composite images, usually one red and one blue, are superposed one over the other to produce a three-dimensional effect when viewed through correspondingly colored glasses.
The Power of Love, released in 1922, was the first movie to use anaglyph technology and require the audience to wear 3D glasses. It grew in popularity, and more films were released in the 1950s. One of the more well-known films of the time was Creature From The Black Lagoon in 1954.
A more current example of the technique that Ricardo referenced is this Daily Motion video that shows street mural art with two designs in one, depending on how you view it.
Late Mexican Artist Inspires Modern Design
Despite having chosen his technique, Ricardo struggled to find inspiration for the piece itself. As he attempted different designs, nothing looked quite right. Ricardo wanted to create a transparent image with plexiglass panels. He started with a heart, but the idea refused to take shape.
Ricardo looked for a piece of art or another idea to inspire his design. He decided to focus on a Mexican artist he greatly admired, Saturino Herrán. Born in Aguascalientes, Mexico, on July 9, 1887, Herrán attended the Academy of San Carlos in 1904. His artistic career flourished from 1912-1914, inspiring the Mexican modernist movement.
“I’ve always admired Herran’s figurative art,” said Ricardo. “He is not really well known and I wanted to pay tribute to him using new technology. It felt especially powerful given I’m working with a drawing that is easily 100 years old and reviving it in a modern way.”
The work that inspired Ricardo is an unnamed illustration that Herran drew for Pegaso magazine in 1917. Herrán’s more famous works include Our Ancient Gods, which celebrates the strength, dignity, and beauty of the indigenous people who are part of Mexico’s history. Through this painting and several others, Herrán established himself as a champion of indigenismo, a movement to elevate and show respect for Indigenous people and their culture.
Creating Street Art
Now that Ricardo had his idea for the drawing and the technique he would use, he was ready to create. First, Ricardo would trace the sketch and then use his artistic design elements to fill in the back of the portrait.
“What many people don’t realize is that with a 3Doodler 3D pen, you don’t have to be a great artist or designer to create something beautiful,” said Ricardo. “You can find inspiration in drawing or sketches you see and use a DoodlePad to trace them and create art.”
The bright pink and blue palettes he used were classic street art shades. The final design is something that Ricardo is pleased to share.
“When you have an idea, you should see it through to the end. As I was working on this piece, I wasn’t happy with it at all. I even stopped at one point as it just wasn’t making sense,” said Ricardo. “Seeing it through to the end paid off as I was able to realize my initial vision.”
Ricardo’s advice to other artists is to stick with it.
“Even if the skills aren’t there, you can trace. Do whatever you can to produce something and your own style will start to emerge as you put pen to paper,” said Ricardo.
Explore Earth Month projects and learn inventive techniques to maximize your creativity while keeping your environmental impact low by reusing everyday items.
We’re sharing how creators celebrate the planet by upcycling everyday materials to create impactful art. Turn ordinary objects and things around the house into cool, one-of-a-kind creations with 3Doodler project ideas.
Working for the Environment
The celebration of Earth Day began in April 1970 to push the federal government to tackle environmental issues. The response from the public was overwhelming, and in just a few short months, Congress authorized the creation of the Environmental Protection Agency (EPA).
The EPA serves a vital mission to protect human health and the environment. The agency does so by developing and enforcing regulations, giving grants, conducting research, creating partnerships, and educating people about the environment.
In seeking to educate the public, the EPA provides several resources for teachers and students to explore. For example, there are tips on conserving energy at home, becoming a food waste warrior, understanding our connection to groundwater, or even making a disaster readiness plan.
These resources are a fantastic way to bring environmental issues to the forefront and bring about change.
Repurpose & Reuse Everyday Items
3Doodler is committed to inspiring creativity while working with the environment, not against it. Our filaments promise outlines our work to ensure our filaments are completely safe to use. 3Doodler Start+ filaments are eco-friendly, and ALL of our filaments are certified as recyclable.
Now that you know the materials you’re using are safe for you and the environment, let’s get doodling. This round-up of projects encourages you to reuse or repurpose things around you as you create in 3D.
Give New Life To An Old Planter
Plants and greenery are a natural way to contribute to environmental efforts. Adding them to your home can add a beautiful natural element. Pick up an old pot or vase and give it new life with a 3D design. Add simple flowers along the outside or trim with polka dots, vines, or other creative symbols. It’s a wonderful opportunity to refresh an older item for a new use!
Cardboard is an amazing material to work with to augment your 3D creations. It’s recycling in action. Find a few pieces of cardboard and make a DIY phone speaker that rocks. Use your 3D pen to add details to the speaker in colors that complement your space. It’s a unique way to reuse cardboard and amplify the music on your phone. Time to turn up the volume!
Collect doodled scraps as you create and learn to make new art with a few quick tips. From coasters to bowls and other eye-catching creations, there’s no end to what you can come up with using your filament scraps. It’s a fantastic way to make the most of all your filament. Play with different color combinations for your own truly unique recycled creations!
Baseball teams are returning to parks across the country, preparing for 2023 Opening Day on Thursday, March 30, 2023.
All 30 teams will play in 15 games which will be the first time since 1968 that every Major League Baseball team starts the season on the same day!
Opening Day will mark the start of the 162-game regular season played over 213 days. So as you’re preparing to root for the home team, grab your 3D pen and doodle a team baseball hat!
America’s National Pastime
The National Baseball Hall of Fame explains that while Abner Doubleday – a decorated Union Army officer who fired the first shot in defense of Fort Sumter at the start of the Civil War and later served at the Battle of Gettysburg – is credited with inventing baseball in 1839 in Cooperstown, NY, there is still debate about the origins of the game.
Regardless of how baseball started, it evolved with the country and became known as America’s national pastime by the last half of the 19th century. Through the years, baseball played a role in the two world wars, civil rights, equal access and opportunity on and off the playing field, and much more, as described in the book Baseball: The National Pastime in the National Archives.
Even if you can’t travel to Cooperstown, you can explore the sport’s rich history through several online exhibits. Check them out and understand more about the players, the uniforms, and critical events in American history!
Swing, batter, batter!
Babe Ruth Batting, courtesy of New York World-Telegram.
Baseball began as an amateur sport. The first known professional team was the Cincinnati Red Stockings, who played their first game in 1869 as members. The Reds recruited cricket players and developed their skills to become one of the more successful National Association of Base Ball Players (NABBP) teams. As competition heated up, baseball clubs were in a hurry to attract the most valuable players. From there, clubs and teams evolved quickly.
By 1870, the cost of employing professional ballplayers became challenging. As a result, the Cincinnati club’s board elected to refrain from fielding a team for 1871. Instead, many of the players left Cincinnati for Boston. They formed the Boston Red Stockings, who went on to win four straight league championships (1872-1875) before becoming part of the National League. Today the franchise is known as the Atlanta Braves.
The New York Yankees started in 1903 as the New York Highlanders. The Yankees have won 27 World Series titles and 40 American League pennants. However, the team wasn’t always this successful. Their stroke of luck came when they acquired Babe Ruth in 1920 from the Boston Red Sox.
The history of the sport is long and storied. Explore the origins of your hometown team — you might be surprised by what you learn.
Seventh-Inning Stretch
Cheer on your favorite team and take a creativity break by making a custom baseball hat. So naturally, with 3Doodler based in New York City, we created a Yankee’s hat and a Mets’ hat using the 3Doodler Start+ and Create+ 3D pens.
With a few simple tips, a 3D pen, filament, and our free stencil, you’ll be on your way to creating baseball hats for all the MLB fans.
Use your DIY baseball hats as decor for an office or bedroom shelf or perhaps as a cake or cupcake topper. 3Doodler’s tutorial and stencil library is full of fantastic sporty designs from soccer to football or basketball. The choice is yours!
Creators use colors in unique and exciting ways to draw attention and spark conversation. The Pantone Color Institute announces a color of the year to inspire the design community and open a dialogue about color.
Viva Magenta, the 2023 color of the year, is a dynamic, vibrant hue that exudes joy and optimism. Explore the shade and grab your 3Doodler 3D pen to experiment with a bright, futuristic color palette.
Pantone
Color of the Year
Pantone began featuring the color of the year in 1999. New colors are announced in early December for the subsequent year. In choosing the color of the year, a group of collaborators and designers take input from various sources, including entertainment, fashion, travel destinations, new technologies, social media, and even sporting events that attract worldwide attention.
In addition, the team considered the public appreciation of nature represented by lifestyle trends, such as bringing natural elements into our homes, at work, and creating vital outdoor spaces. The color choice also reflects a celebratory atmosphere and our renewed enjoyment of traveling, sporting events, and other outdoor activities.
According to Pantone, Viva Magenta’s organic origins hail from the cochineal beetle. The insect produces cochineal extract and carmine. For centuries, the substances colored food, textiles, and even cosmetics.
Viva Magenta is a bright, celebratory color that connects us to nature. Colors like this inspire the imagination and help bring ideas to life. The color of the year typically influences fashion, beauty, interior design, and graphic design.
Spark Bright Ideas
Exploring the uses of color and testing new techniques is all part of the design process. This week we’re sharing a gorgeous charm bracelet in bright pink to reflect the color of the year. Make the bracelet and add a selection of charms that reflect your personality.
Charm bracelets have evolved but always stay in style, given their versatility. Test out different colors and make a monochromatic style with all pink, or design the bracelet in one color and charms in other shades to make them pop.
Create one for yourself or gift one to a friend or family member. Follow the tutorial to see how easy it can be to create in 3D!
A little time goes a long way to make social-emotional learning strategies stick!
Students benefit when they learn to manage their emotions, set and achieve goals, feel and show empathy for others, and create strong relationships.
As adults, we use these skills daily, so it makes sense to give students a chance to test their social-emotional strategies during the school day. And best of all, it’s often more manageable than it seems to incorporate a few social-emotional learning opportunities into a traditional lesson. Best of all, students walk away with more than just a good grade but tips they can use for life.
CASEL recommends three daily practices that help support students in their SEL growth. The signature practices are very straightforward and include the following:
Three Daily SEL Practices:
Welcome Inclusion Activity – Builds community to tackle the word ahead. Examples include whole group meetings, morning circles, and peer-to-peer work.
Engaging Strategies – Offering interactive and reflective moments. Examples include partner discussions, private think time, or brain breaks.
Optimistic Closure – Highlights a sense of accomplishment and supports forward thinking. Examples include a one-minute accolade or a shared takeaway.
Test out these social and emotional learning tips in recognition of National SEL Week from March 6-10, 2023. The week will culminate with SEL Day on Friday, March 10, to showcase these tools’ powerful impact in uplifting hearts and connecting minds — the theme for this year’s week of activities.
Doodling Activities to Support SEL
It’s easy to see how working in 3D could be leveraged to support CASEL’s three daily practices in unique and creative ways. For example, a class could work together on a large 3D printing project as a welcome activity, or students could create individual items to share with a larger group in a morning circle activity. Doodling also provides a fun outlet for students to enjoy while using interactive and reflective moments or even acting as a brain break. Lastly, it’s fantastic to wrap up a lesson, like the ones featured below, with a key takeaway or accomplishment.
This week, explore the following lessons and recognize the value of social and emotional learning!
Grade K-2: Stone Soup
Stone Soup is a classic children’s story in which a hungry stranger convinces people in a small village to contribute food to make a meal everyone enjoys and serves a moral regarding the value of sharing.
The class will hear the original tale and learn about the value of working together. Then, students will be able to create their own doodled stones using the chosen nouns. Working with a partner, they will create four different story stones. Finally, students will use their story stones as writing prompts, incorporating them into a simple story with a beginning, middle, and end.
In small groups, students will enact a scene from a book with the class. But, with a unique twist, they will create and use doodled finger puppets to share their story with the class. Retelling a story is a fantastic way to build language, speaking, and listening skills. Plus, working together and having an opportunity to design with a 3D pen offers a creative outlet that students will enjoy. The final puppet shows will reflect an understanding of story structure, sequence, and reading comprehension.
Stop-motion animation is a fantastic way to teach students about story structure, think creatively, and work together on communication and teamwork skills. Students will work in pairs or small groups to identify fictional themes in this activity. Next, they will choose a scene representing the theme and doodle their characters and props in 3D. Once ready, they will enact the scene and create a stop-motion animation. The experience will help students build confidence and share their ideas as they work with their peers.
Youth Art Month celebrates the visual arts each March with student exhibitions, public artworks, art festivals, and school events.
Established in 1961 by the Art & Creative Materials Institute (ACMI), the creators sought to emphasize the value children derive from art education. Today Youth Art Month is coordinated nationally by the Council for Art Education (CFAE).
3Doodler is delighted to support the visual arts and inspire young creators to use their imagination and bring their ideas to life. Explore Youth Art Month activities and learn how to engage with 3Doodler’s community to celebrate the visual arts!
New York Youth Art Month Poster
Your Art, Your Voice
This year participants will recognize the month through the theme “Your Art, Your Voice.” In addition, participating states host various activities, from a state flag design contest, local and state Youth Art Month proclamations, and art shows at state capitals and legislative buildings.
The celebration is intended to bring attention to visual art’s value in developing critical thinking skills, raising multicultural awareness, and encouraging technical, communication, and expression skills.
The Texas Art Education Association kicks off Youth Art Month with a Big Art Day, where grades K-12 participate in art events across the state. Big Art Day will take place on March 2, 2023, featuring 1,000 art activities.
In Illinois, students participate in a statewide art show hosted by the Illinois Art Education Association. The submissions are reviewed by a panel of judges who select 45 participants to feature in a statewide slide show that travels across the state.
Visit the Council for Art Education to learn more about Youth Art Month events and activities in your state.
Inspiring Young Artists
3Doodler looks to inspire young artists in the classroom and at home through lessons, projects, stencils, tutorials, and more. All these resources are readily available in the 3Doodler resource library and the 3Doodler App.
The 3Doodler App is a great way to encourage budding artists to expand their ability to draw and create in 3D. Through the app, young artists will find stencils, tutorials, and other art prompts to jumpstart their creativity. Plus, they can share their latest doodle creations with the community via an online gallery. The photos featured are from Doodlers like you. In addition, fellow artists can comment on shared designs and offer support. It’s a fantastic way to build community and celebrate art.
Explore Your Creativity
Get started by creating one of the following projects to celebrate Youth Art Month!
Collage Display
Create a wall display for some of your favorite artwork. Hang it in your room or a common area in your home to celebrate artistic expression all year!
Design and personalize your action figure to represent your art and your voice. Use our stencil to start with the basic shape and add details all your own!
Personalize a box for one-of-a-kind keepsakes, jewelry, or other items you want to keep safe. Follow our pattern using your favorite colors, or create a unique design!
This week is all about engineering as we explore the many contributions this field and the people in it have made to improving our world.
Science, math, and technological literacy help us engage in engineering and solve problems to help those around us. So let’s learn more about these fields and see how we can contribute with 3Doodler tools as an early introduction to 3D printing, creative problem-solving, and breaking down how things work.
Change Makers
Engineer’s Week began in 1951 by the National Society of Professional Engineers (NSPE) to highlight engineers’ critical role in society. The week coincides with President George Washington’s birthday, as he is often described as America’s first engineer. But engineers go much further back in history, and their contributions are vast.
Look around you and imagine for a moment all the things in your life that engineers have played a part in creating. The list is endless. Engineers have contributed many ways to improve lives, from electricity to the telephone, cars, airplanes, and computers.
Meeting an engineer is one way to help demystify the field and learn more about what engineers do. DiscoverE, the organization that sponsors Engineers Week, hosts monthly Chats with Change Makers to speak with a real-life engineer and learn about a new field. Explore past episodes or join the next one live to learn more about technology fields.
Creating the Future
In addition to meeting engineers, young people can explore the various engineering disciplines at school or home with easy-to-follow lessons. This week we’re sharing a few challenging and fun engineering lessons to build and test designs in 3D.
The engineering design process offers a way of thinking that you can apply to solve a problem. Each step provides new information about the situation and encourages you to think critically about how you might solve it. Engineers often repeat the process to come up with the best possible solution. Working as a team, you can share ideas and find new perspectives by involving others.
The Engineer Girl offers a simple way to think about the engineering design process. It’s also a great place to start exploring careers in engineering and learning more about the field.
Design Like an Engineer
Working with friends has never been better as students explore STEM-focused design challenges that span sports, architecture, and design. These 3Doodler lesson plans will inspire critical thinking and opportunities to apply the engineering design process.
Grade K-2: STEM Doodle Hockey
Time to hit the ice! Students will design a template and doodle the best hockey stick in this exciting lesson about design and function. When they’re ready, it will be time to test their hockey sticks out on the ice to see which stick can shoot a puck the farthest and with the most accuracy through a goal. Game on!
With just a few materials, students will be challenged to build the tallest tower. Students will work together and use critical thinking skills to make predictions, record observations, and analyze their structures. It’s a lesson in design thinking they be talking about for weeks to come!
Using their 3Doodler 3D pens, students will attempt to create a functional chair under intense time constraints and with just a few materials. Will they be up to the challenge? Time will tell!
Cornelia Kuglmeier is an amazing 3D pen artist and educator whose talent and techniques are some of the most creative and unusual.
She’s a highly knowledgeable 3D pen art community member who shares her doodling tips freely. Connie’s design approach turns fantasy into reality. You’ve no doubt seen some of her incredible Doodles on our Instagram. In addition to the content she posts on her Instagram, she’s also shared some incredibly detailed and helpful tutorials on her YouTube channel that explore creative tips and tricks to test out with a 3D pen.
This week we’ve partnered with Connie to reimagine the Pisces symbol from an artist’s perspective. Learn how she designed the piece and explore her 3D pen art tips and tricks!
Finding Creative Freedom
As Connie explains it, designing in 3D offers her artistic freedom. She can create anything she can dream up. And, if she’s working on a project and doesn’t care for something or is struggling to get the exact look she wants, she finds the filament is easy to heat and remove to remold.
“Creating in 3D gives me infinite freedom. There’s just no limit,” said Connie. “You can draw lines into thin air if you like drawing, you can design pieces flat and assemble them if you’re into modeling and architecture, you can mix techniques, you can bend the filament pieces with hot air, you can smudge the filament with your pen’s nozzle, or you can bake and melt it into sheets. The creative possibilities are endless.”
Connie also likes to see where the process takes her. While designing, she never knows what might happen. So she takes every opportunity to try a new idea or test a new technique.
“I look forward to seeing where the experience will take me, and what I’ll discover next,” said Connie. “I love to delve into small things, try not to overlook things, and create pieces that give my audience many things to discover.”
Pisces Design Inspiration
Connie doesn’t follow zodiac signs closely, but she enjoys reading her horoscope from time to time. She’s an Aries and enjoys reading about the traits related to her sign to see if any match her personality, and some do.
“When I began working on the pisces piece, I looked up the astronomical sign and when I saw it was a fish I immediately had something colorful in mind,” said Connie. “I envisioned a fish with long fins, to show the floating, waving, weightlessness of those animals. I imagined them swimming in the air just like they do under water.”
Connie thought about using a coy or betta fish. When she was younger, she had a betta fish and was already familiar with it. Bettas also have long fins and come in a wide variety of colors. Connie knew she had a winner!
Aspiring Doodlers Take Note
Connie is a phenomenal 3D artist whose techniques and creativity inspire a community of Doodlers. Her suggestions for anyone looking to gain skills with a 3D pen are pretty simple.
“Work with the 3D pen. Seriously, if you browse my Instagram, I posted one of my first creations there, said Connie. “It was a clumsy little birdie, made with the first 3Doodler 3D pen. I was so extremely proud of it that day.”
Connie explains that working with hot filament and getting a feel for a 3D pen can be daunting. But, the more you work with it, the less afraid you will be about what could go wrong and the more intrigued you become to see what more you can do. She recommends starting small by picking something simple or something you can try to recreate.
“It’s really important to use the 3D pen,” said Connie. “The more you use it, the more comfortable you are with its shape in your hand, the way it functions, the filament and different filaments. You’ll gradually find the technique that suits you best.”
Once you become comfortable with the pen, Connie recommends trying the nozzle set. She used it for this project to create the fins and scales. Next, she attached the scales by melting them onto the body with the hot pen tip.
“For these fish, I used the angled nozzle to draw those ultra-thin, almost see-through fins, and the shiny scales,” said Connie. “The nozzle set is a great way to spice up your projects, if you find yourself looking for something new!”
As far as what to expect next from Connie, she’s happiest when experimenting and learning something new. In addition, she enjoys creating hyper-realistic pieces, like giant butterflies, and makes a nice piece of fan art now and then.
“Currently, I am working on detailed, monochrome pieces,” said Connie. “I’m mixing plants with animal traits and supersizing small things. My artistic style is always evolving as I learn new things.”
3Doodler is delighted to work with a range of artists this year to invite curiosity and spark the imagination as we design and create in 3D.
Each month, the 3Doodler team shares ideas and tutorials to help kick-start the design process. We were curious to see what our artist community would create with the same inspiration.
Last week, we explored the artistry of ice castles. 3Doodler shared a version that is easy to replicate with our free stencil and tutorial. This week, guest artist Ricardo Martinez (riikc) shared his version of an ice castle. See where he found his inspiration and how the sculpture came together.
Creating with riikc
Ricardo is a sculpture artist, painter, and photographer who explores a variety of materials and techniques in his work. Ricardo has extensive experience creating art with 3D pens and often shares his approach with the 3Doodler community.
Ricardo’s latest installation, Memento Vivere, gained worldwide attention as an interactive multi-disciplinary project using light, technology, and science to express an idea. This larger-than-life exhibit consists of a series of electroluminescent cables arranged in a skull structure that Ricardo designed with a 3D pen. The sectors of the installation light up as people interact with the display.
Ricardo lives in Brussels and travels extensively. He takes inspiration from nature, landscapes, geography, architecture, and much more. We were delighted to connect with him about his experience creating an ice castle in 3D.
3D Design Approach
Ricardo had an idea for this design and took inspiration from fantasy video games he’s played over the years, like Final Fantasy. From his home in Brussels, he looks at a large church with a castle-like appearance and eight pillars. Mixing these concepts, he began to sketch the design on paper.
“It seems like a different part of your brain kicks in and starts working as you start building,” said Ricardo. “The design evolves as you go. The castle resembles the sketch but evolved as I sculpted it in 3D.”
Ricardo used existing shapes to begin the sculpture and found it easy to keep adding material to get the form he wanted for the design. For example, he used a glass cylinder to create the pillars’ base. He could continue this process to get the length he wanted for the towers.
To design the castle, Ricardo used the 3Doodler PRO+ 3D pen and PLA, nylon, wood, and bronze filament.
“I love the smell of the wood while I’m creating. It makes me feel like I’m in a woodshop,” said Ricardo. “For this design, the wood and bronze add texture and stand in contrast to the rest of the design, which is the effect I was hoping to achieve.”
Advice for the Community
Ricardo is an experienced artist who shares his success tips freely to encourage others to pick up a pen, paintbrush, or other tool and begin creating.
“It’s important to share that you don’t need to create shapes out of thin air,” said Ricardo. “I recommend starting by using existing shapes. Then, you can find inspiration and doodle anything with objects around you.”
For new 3D pen artists, Ricardo recommends starting with a speed setting of three and gradually working up to faster settings. In this design, Ricardo found he could work effectively with a speed setting of seven or nine.
“I was impressed with the speed settings on the pen. It’s incredible how adjusting those settings can change things and make the experience much more enjoyable, given how quickly you can cover a large surface,” said Ricardo. “The PRO+ pen is much more comfortable and easier to use over long periods.”
Ricardo notes that the PRO+ makes it easier to swap materials and see what’s happening, which saves a great deal of time. He was especially pleased with how the wood detail came out on the ice castle and enjoyed adding contrast with different materials.
When working in bronze, Ricardo recommends keeping a bit of distance from the tip to the surface as the material smudges easily.
“Working in 3D evolves whatever idea you think you have, and it goes into many different directions that you can’t experience with just 2D drawing. It opens your mind to new possibilities and thinking in ways you’ve never thought before,” said Ricardo.
Ice sculptures, castles, and palaces are wonderfully artistic and inspire the imagination just as the temperatures begin to drop.
3Doodler took inspiration from the wintry weather and the long history of icy architecture to create a stunning 3D ice castle. See where we found our inspiration and design an ice castle with our latest stencil!
Ice-Inspired Architecture
Ice castles and palaces have popped up in all sorts of cold-weather locations around the world, from Montreal to Switzerland and even St. Paul.
Montreal has a long history of ice castle creations. Before modern technology, people cut ice blocks from the frozen St. Lawrence river. Montreal’s first ice palace was designed for the Winter Carnival of 1884. In addition to the ice palace, the Winter Carnival featured snowshoe races, toboggan slides, and sleigh rides.
Seeking to attract tourists and following Montreals’ lead, organizers in St. Paul, Minnesota, built an ice castle in 1885. In fact, the city has created 37 ice palaces of all different shapes and sizes to date. Today, the ice palaces appear less frequently. In fact, they are often organized to coincide with significant events, like the Super Bowl in 2018. The city of St. Paul features a video explaining how the project came together with a stunning result.
The Jungfraujoch Ice Palace penguin sculptures.
In the 1930s, mountain guides in Switzerland carved corridors and hallways with picks and saws in the center of the Jungfraujoch Ice Palace. Today, artists continue to astound visitors with eagles, bears, and penguins carved in ice. Beautiful as it may be, bundle up if you plan to visit. The temperature is a frosty -3 degrees celsius.
Designing an Ice Castle in 3D
The 3Doodler team took inspiration from traditional ice castles created with blocks of ice and more modern interpretations, like the ice palace from Disney’s Frozen. The 3Doodler ice castle stencil offers a series of easily made shapes. You can create a small or large castle by attaching the pieces together.
In the 3Doodler version, we used four large sides, two medium sides, and two small sides. Attaching these shapes together, we created alternating sides for the ice castle. If you wanted to create a larger castle, you could continue to make the side shapes to build out the castle design. Follow the process step-by-step in the ice castle tutorial.
The civil rights movement was a fight for equality for African Americans under the law in the United States. Dr. Martin Luther King, Jr. led the movement along with other civil rights activists in the 1950s and 1960s.
Revisit the history of the moment and engage students in an important classroom discussion about the work of Dr. King and other civil rights leaders. As you explore historic events, consider creating the Edmund Pettus Bridge in Selma, Alabama, which was the site of the Selma-Montgomery March in 1965.
Dr. Martin Luther King, Jr. and Rosa Parks at the 1955 bus boycott. (National Archives)
Civil Rights Movement
Slavery was abolished at the end of the Civil War, but it didn’t end discrimination against Black people in the United States. The fight for equality would begin in earnest in the mid-20th century and continue for the next two decades.
After reconstruction, the South implemented a series of “Jim Crow” laws to erase gains made after the Civil War. The laws restricted voting rights for African Americans, banned interracial relationships and allowed businesses to separate clientele based on race.
On December 1, 1955, Rosa Parks refused to give up her seat to a white male passenger on a bus in Montgomery, Alabama. Police arrested Parks, and word of her situation spread quickly, igniting a series of protests. As a result of her act, Parks is known as the “mother of the modern-day civil rights movement.”
Dr. Martin Luther King, Jr. at the March on Washington.
Dr. Martin Luther King Jr.
In response to Parks’ arrest, Black community leaders in Alabama formed the Montgomery Improvement Association (MIA). Dr. Martin Luther King Jr. led the MIA, a role that put him front and center in the fight for civil rights.
Through King’s leadership, the African American community experienced more progress toward racial equality in 13 years than in the past 350 years. Dr. King took inspiration from his faith and the teachings of Mahatma Gandhi to lead a nonviolent resistance that included protests, grassroots organizing, and civil unrest.
King was elected president of the Southern Christian Leadership Conference (SCLC) in 1957 to provide organizational leadership to the civil rights movement. In 1963, he led a coalition of groups in nonviolent protest in Birmingham, Alabama. The brutality that ensued by the city’s police force led to national outrage. Later that same year, King led the March on Washington, where he gave his famous “I Have a Dream” speech to an audience of a quarter-million people.
King became the youngest recipient of the Nobel Peace Prize in 1964 at 35. Also, in 1964, due in part to the March on Washington, Congress passed a landmark Civil Rights Act ending legal racial segregation in the U.S. Congress passed the Voting Rights Act a year later, in 1965, a result of the Selma to Montgomery, AL March for Voting Rights.
The Edmund Pettus Bridge in Selma, Alabama.
Relive a Moment in History: Selma to Montgomery
In January 1965, Dr. King led a coalition of activist groups to call for voting rights in Selma, Alabama, where despite repeated attempts, only two percent of Black voters were registered. The campaign saw mass arrests but little violence until February. Then, in Marion, Alabama, state troopers joined local police to break up a march. A state trooper shot a protester who later died from his wounds.
In response to the death, activists set out to march from Selma to Montgomery. While Dr. King was in Atlanta, Hosea Willams and John Lewis led the march. The marchers made their way through Selma across the Edmund Pettus Bridge. A blockade of state troopers and law enforcement officers ordered the marchers to disperse. When they refused, the troopers attacked the crowd with clubs and tear gas. Television coverage of the event, “Bloody Sunday,” as it became known, sparked national outrage.
On March 21-25, 1965, Dr. King participated in a federally sanctioned march from Selma to the steps of the capitol in Montgomery, Alabama. President Johnson signed the Voting Rights Act of 1965 with Dr. King and other civil rights leaders on August 6, 1965.
Make a bridge through history by recreating the Edmund Pettus Bridge in 3D. It’s an opportunity to learn from events of the past and understand the legacy of Dr. King and other civil rights leaders. The 3Doodler tutorial and stencil provides a straight-forward way to recreate this historic bridge.
3Doodler is kicking off 2023 by celebrating our community of creators, makers, and artists. Over the years, a highlight of our work is to share 3D printing ideas and art that comes directly from you.
As we head into a new year, 3Doodler will look to collaborate with artists, educators, and entrepreneurs to explore ways we elevate creativity. But, of course, it’s also important to inspire new creators. With that in mind, we’ll share accessible stencils, tutorials, and more to support budding artists.
Let’s take a quick look back to revisit the projects and artists who inspired you the most. Plus, we’ll share a quick project to jump-start creativity in 2023.
"I found I could say things with color and shapes that I couldn’t say any other way – things I had no words for."-Georgia O'Keeffe Share
Dina is an animation artist and director who produced “Ties,” an animated short film that debuted in 2019. The film, released to the public in 2022, explores the connection between parents and their children. A young woman leaves home to see the world. Her parents are left behind, and their world changes without her.
Dina also shared a behind-the-scenes look at creating the film using a 3D pen. First, all the characters were created using a 2d digital drawn animation technique and then outlined with a 3D pen. The result was sets of flat filament figures. Next, the director filmed the figures frame by frame in a stop-motion set, along with wire objects.
Rick works in sculpture, painting, and photography and frequently shares his insights on working in 3D. Rick’s latest installation, titled “Memento Vivere,” gained worldwide attention as an interactive multi-disciplinary project that uses light, technology, and science to express an idea. This larger-than-life exhibit consists of a series of electroluminescent cables arranged in a skull structure that Rick designed with a 3D pen. The sectors of the installation light up as people interact with the display.
Rick continues to push the boundaries of art and technology with his creative use of materials. Keep an eye out for a 3Doodler collaboration with Rick later this month!
Connie is a 3D pen artist who shares her passion for 3D art and tips of the trade freely with the community. She is constantly exploring new creative techniques with outstanding results. Her work has been featured often with the 3Doodler community to provide insight and guidance on using a 3D pen to its full potential. For example, we recently shared Connie’s tips for achieving the perfect petal. To see her mastery of 3D application, look no further than a multidimensional snowflake. The use of color, layering, and overall technique are incredible.
See more of Connie’s helpful tips and tutorials on her YouTube channel, where she shares loads of doodling advice.
Edwin is a multimedia artist who shares incredible wearable 3D creations. Each is a delicate piece of art, from jewelry to theatrical masks and other accessories. Edwin exhibited at a range of galleries in Kentucky, including recent shows at Kore Gallery (“The Education of Desire” and “Unknowns: Artists you Should Know”), as well as part of the ongoing traveling exhibition “Our Kentucky Home: Hispanic/Latin American art in the Commonwealth” curated by The Kentucky Arts Council. Musicians, models, and entomologists have all worn his designs. It is a delight to see his creations take form in 3D. Be sure to explore more of his work in the year ahead!
Spark Creativity in 2023
Now that you’ve seen a small sample of our vibrant community, we invite you to make this your year of 3D creativity. Get started by creating a custom work of art for home using our go-to phrase. What will you create?
Ready to celebrate the start of a new year? We’ve rounded up a bunch of creative ideas to make party planning fun and easy with party props everyone will enjoy.
Gather a group of family or friends to reflect on the year and gear up to make new memories in 2023. It’s always an excellent way to close out one year and start another. Depending on the size of the group, you can make a few fun props to share or customize one for each guest. Ring in the new year in style with 3D creations. Let’s go!
Party Hat
Party hats create a celebratory mood and a festive way to set the scene! Find ways to upcycle party hats with a few creative tips from 3Doodler. Adding a dash of 3D design is a surefire way to make designs pop. Attach it to a headband or use it as a classic party hat. The choice is yours!
Get together and make memories with silly photos and photo booth props. Consider custom colors to match the theme of your party. These classic designs include word bubbles, glasses, a hat, and a tie. Make one or all!
The 3Doodler library is full of crafty glasses from retro to classic styles. We chose this pair of party glasses that are sure to spark a conversation. Custom colors will make these shades pop. Inspire friends with your creativity!
Dessert is on the menu with fun cake or cupcake toppers featuring New Year’s Eve designs. Balloons, fireworks, champagne flutes, and a champagne bottle are the perfect decoration for tasty cupcakes. These are super simple to make and add a dash of sparkle as you ring in the new year!
Holiday Gnomes have popped up on everything from napkins and tablecloths to paintings, pillows, and free-standing festive decor. We couldn’t help but ask ourselves how this curious creature became a holiday staple.
Gnomes have been around for ages and feature prominently in many cultures in Northern Europe. So naturally, once we learned more, we had to take a turn at crafting one in 3D!
Scandinavian Folklore
Gnomes trace back to the Nordic regions of Scandinavia, Finland, Iceland, and the Faroe Islands. Folklore suggests that gnomes, elves, and fairies have been part of mythology since the 1400s. Legends about gnomes were shared from the mountains of Switzerland and forests of Germany to the fjords in Norway.
Gnomes were described as mythical creatures who lived underground or as part of the earth. Many tales explained the nature of their magical powers. Given their connection to the land, gnomes positively impacted the natural world and made farms more productive. They worked their magic at night and turned to stone during the day, which explains how they quickly became garden gnomes.
It’s not clear how gnomes have so quickly become part of the winter holiday season, but many believe it’s their resemblance to Santa Claus. Their pointy hats, beards, bellies, and friendly nature encouraged the idea. Plus, gnomes, like elves, have been known to bestow gifts. Whatever the reason, holiday gnomes are here to stay.
The Myth Meets Pop Culture
Gnomes appear in literature, films, board games, and more. More recent depictions of gnomes include movies like “Amelie” (2001), “Gnomeo & Juliet” (2011), “Sherlock Gnomes” (2018) “Gnome Alone” (2018). In these fun flicks, gnomes appear as plot enhancers or as protagonists. In addition, Travelocity’s advertising campaign prominently features a gnome complete with its own Twitter handle.
Following the trend, 3Doodler offered a garden gnome kit that included a canvas gnome shape that creators could doodle on and customize with their choice of colors and textures. The recent popularity of these whimsical winter characters inspired our latest Doodle — a holiday gnome.
All you need to get started is a 3Doodler Start+ 3D printing pen, eco-friendly filament, a DoodlePad, and the 3Doodler stencil. Follow our tutorial for step-by-step instructions to make this fun holiday gnome. We were tempted to change up the colors, but kept it classic for the holidays. Go ahead and change it up, using different colors for the hat, beard, and legs.
We can’t wait to see what you design. Share your creations with us @3Doodler or use tags #3Doodler #WhatWillYouCreate.
We’re making gift giving easy this holiday season with something for every creator on your list!
Holiday Gift Guides Top Pick
Spread the word, 3Doodler is a top holiday gift on multiple gift guides and toy reviews this year. Our hands-on 3D printing pens offer a unique and accessible way to creators to experience 3D design without any complicated technology.
According to Yahoo Life, 3Doodler is a perfect gift for the budding inventor, artist, or engineer—or, better yet, for a kid with all three interests—this easy-to-use 3D pen lets kids literally “draw” in three dimensions.
Doodler elves were hard at work crafting 12 incredible offers that we’ll be unveiling between now and December 14, 2022, to help you deliver smiles as you give the gift of creativity this year. Many of these deals will only last 24 hours so be sure to act fast before it’s too late!
Make the holidays bright and spark imagination with our line of 3D printing pens, accessories, and add on eco-friendly filament or other material for hours of doodling fun.
Check back often to see the latest offer on our list. We’ll be posting each of them here for easy reference.
Doodle Deal 12: 24-Hour Deal Fiesta
One day only to make the season bright for everyone on your holiday list! During our 24-hour Deal Fiesta all the deals come back for one day only. Find something special for the creators, makers, artists, and designers. There’s something for everyone. Shop Doodle Deals now!
And, remember these deals won’t last so act fast!
Doodle Deal Terms
Each deal is a limited time offer, while supplies last. Doodle Deal #11 starts at 12:00 AM EST on December 14 and expires at 11:59 PM EST on December 14, 2022.
These deals apply to orders placed on 3Doodler store during the deal period. Offers may not be combined with any other coupons, discounts, offers, or promotions.
3Doodler’s line of 3D printing pens make it easier than ever to start designing with just a few simple steps, but the real key is learning tips and tricks to use the pen to its full advantage.
It can be challenging to go from a simple idea on paper to creating a 3D shape. We’ve rounded up a few of our favorite tried and true methods for creating in 3D. Design tips for anything you may dream up!
Whether writing with a traditional pen or a 3D pen there really isn’t a perfect stroke. It’s all about the style that you’re looking to achieve. Strong and bold. Light and airy. With a few simple tweaks you can get just the right finish. In fact, with a 3Doodler 3D printing pen you will want to test out your style. Check the pen speed. The height from the surface you are writing on. And, even the direction you write while using the pen. Take a look and see what a difference it can make to push or pull the pen with this tip as you create in 3D!
Rome wasn’t built in a day, and your 3D structure likely won’t be either! It’s important to plan ahead to the extent that you can. The 3Doodler team follows this critical step too with designs like the Brooklyn Bridge, Eiffel Tower, and even a pretzel. Start by drawing what it is you would like to create. Then, see if you can break it down into smaller elements. Having a clear plan or blueprint could be the ticket to success. Check it out!
There’s a certain amount of detail in every design that makes it truly unique and eye-catching. Perhaps you ran out of a favorite color filament or need a small amount of color in a few areas. Consider using acrylic paint to make these quick adjustments and create custom details. You’ll be surprised to see how a little paint can go a long way to finishing off your design to great effect. See how you can use paint as a finishing touch.
Patience and Persistence
Professional 3Doodler artists also have their share of quick tips to share with those new to doodling. Their advice often comes down to two things — patience and persistence. Trying different techniques and enjoying the journey is all part of the experience. “Don’t forget you can cut off or meltdown your mistakes,” points out Rachel Goldsmith, a New York and Seattle based artist.
Prolific 3Doodler Printing Pen Artist, Grace Du Prez, has been Doodling since 2014 and has worked on record breaking projects, such as a life sized car for Nissan. She is also the host of our Bluprint 3D Pen Art series.
Grace has been running 3D Pen Creation workshops for two years, so she knows all the best tips and tricks for beginners. She has gathered the top 10 most common questions she’s received since the beginning of her Doodling career, and answered them here.
1. How do I use a 3D Pen? What can I make with a 3Doodler?
There are three main ways to use a 3D pen like 3Doodler.
Use a 3D pen design Template or Stencil
This technique is great for beginners to draw flat designs. You can also use this technique to construct simple 3D shapes like a cube. Make 6 flat squares then join together to create the 3D shape. There are lots of 3Doodler stencils available for free online.
Using a Stencil
Freestyle Doodling
This involves drawing up into the air or building an object up by layering. This is one of the most common ways we’ve seen 3Doodler art being made. This technique can require a bit of practice as you’re using your eye to judge if it looks right.
Using Molds
This involves drawing over a pre-existing object, such as a salad bowl. The filament will set in that shape and can be removed when you’re done, or remain on the object. If it’s something like a bowl it can be done in one piece. If the shape is something like a ball, you can make the two halves and then join together afterwards. Something like a balloon can be drawn over and then deflated. This technique is used in my Lantern Lights video. There are some great canvas mold 3Doodler projects available, or you can use any household object as long as it’s covered in masking tape – even a smartphone!
2. Why is there a red light on my 3Doodler pen? What do the different light colors mean?
Don’t worry, the red light is totally normal and just means that the pen is heating up to the right temperature. When it’s ready to extrude filament, the red light will change to either blue or green. It’s important to have it on the right heat setting as each filament melts at a specific temperature. Blue for ABS and Flexy, and Green for PLA.
Many people are concerned about 3D pen safety. The 3Doodler pen has a great safety feature – if you’ve taken a short break, the pen will start to cool itself down. This means that the red light will come on again. Simply turn the pen off, and then on again, and it will automatically start warming up to the temperature you set it to.
3. Why is the filament not coming out of my 3Doodler 3D pen?
If your 3Doodler is not feeding, try giving the filament a gentle push into the pen (but make sure you have clicked either FAST or SLOW first). When your filament has run out, just insert the next strand to keep the filament flowing.
It’s better to push the filament from a point on the strand that is close to the pen, otherwise you risk bending and damaging your filament.
If the 3Doodler filament is jammed, there are a few questions you can ask yourself: Are you on the right heat setting? Each filament melts at a specific temperature so if it’s not on the right one it won’t melt. Is there a flashing blue or green light? You may have gone into reverse by mistake, a function that is engaged by double clicking on either FAST or SLOW button. To be on the safe side if you’ve done this, fully reverse the filament out, snip the frayed end of the filament off with a pair of scissors or pliers, and try reinserting it.
4. Should I use FAST or SLOW mode when using the 3Doodler 3D pen?
There is no right or wrong option here, it’s about finding what feels right for you and adapting to the situation.
Benefits of FAST mode
It gets the project done in less time, and is ideal for those large-scale projects.
It’s good for welding two pieces of filament together. As the filament is extruding more quickly it stays hotter for longer, which helps to re-melt the filament you’re welding and give you a more stable connection.
Benefits of SLOW mode
It’s better for beginners as you have more time to think ahead and control your 3D pen.
It’s great for drawing up into the air. When in SLOW mode, the filament is making more contact with the cool air around it and setting in that position. This will really help you perfect those spirals and staircases!
When using 3Doodler Flexy filament, it’s better to be on SLOW mode.
5. How do I start my 3Doodler 3D pen?
Simply click either FAST or SLOW once to start. To stop, click either button once again. A common mistake is to press and hold the button, which you don’t need to do, as the filament will continually extrude with one click.
Something else to watch out for is that there is a slight delay between pressing a button and the filament extruding. Avoid clicking multiple times as you’ll just be starting and stopping your pen repeatedly.
6. How should I hold the 3Doodler 3D pen?
Hold it like you would a marker pen. You can hover your index finger over the buttons so that you can easily start and stop. Some find it easier to turn it upside down so that the clear filament window is facing up and your thumb is hovering over the buttons. What’s important is that you find a way that suits you.
Hold at a 90-degree angle
You might naturally want to hold the pen at a 45-degree angle and move it at the speed you would with a regular pen or pencil. This can result in an inconsistent texture in the filament. Instead, try holding your 3Doodler at a 90-degree angle so that it’s vertical to the page. This will make sure that the filament extrudes evenly – imagine that you are mimicking a 3D printing machine!
Try experimenting with the speed that you move your hand. The slower you move, the thicker the Doodled line, and therefore the stronger your creation will be.
Test to see the difference between pressing down onto the page, versus hovering slightly above the page. Making contact with the page will give you a more precise line that will stick to the template, whereas having the pen tip hovering will result in a random squiggly effect. Have a look at my Getting Started video for the 7 top techniques on using a 3Doodler 3D pen.
7. How do I change the filament color in my 3Doodler 3D Pen?
There are two ways to change the filament color in your pen. If the filament is sticking out of the feed port, you can reverse the strand and gently pull it out, then load your desired color. If the strand is too short to pull out of the feed port, you can carefully remove the hot nozzle with the mini spanner (be sure to do this with the pen turned on and heated up), engage the reverse function, and insert the unblocking tool through the nozzle end of the pen. This will push the short strand out of the rear of the pen. Then you can replace the nozzle with the mini spanner, being careful not to overtighten it, and load the new strand of filament.
Double-click to reverse strand, then remove
The filament doesn’t need to go to waste! There are a lot of fun things you can make with half a strand of filament. You could even try out these projects to transform leftover filament into beautiful jewelry and decor items!
Don’t try to apply too much force to pull the filament out, as you could end up doing some damage to the pen. Simply double click either the FAST or SLOW button, and the pen will do the hard work for you. Once it’s finished reversing, gently pull out the filament. Watch this video to see how it works.
Reversed filaments may have a wispy ends, which can get tangled up in the mechanism of the pen. It’s important for you to snip it off before re-inserting it into the pen.
8. How do I get rid of mistakes in my 3Doodler art?
Mistakes are bound to happen, even for the most professional Doodlers. The nozzle tip can help you melt away pieces you don’t want on your design. You could also use scissors to create a super accurate edge. They need to be sharp, but don’t use your best sewing scissors as it may blunt them.
9. Why are there wispy strands on my 3Doodler creation, and how do I get rid of them?
You might notice that there are some ‘hairy’ bits on your creation. They can easily be melted away using the nozzle tip, but it’s better if you don’t make them in the first place (unless it’s intended)!
These might be caused by lifting the pen away from your work too quickly. A bit like mozzarella on a pizza! Once you’ve pressed stop, count to three and then pull away. You’ll get a much cleaner finish.
10. Is 3Doodler filament environmentally friendly?
PLA (Poly Lactic Acid) is a eco-friendly type of filament that is made from the starch of plants such as corn, sugar cane or sugar beet. This means that it is environmentally friendly and sustainable. With the right conditions it can take approximately 6-12 months to break down compared to other filaments, which can take hundreds of years.
ABS (Acrylonitrile Butadiene Styrene) can be recycled, but it is not widely accepted by local authorities. Don’t let that stop you, as you can do it yourself at home with a few easy steps!
When it came time for Geert de Coninck and Michelle Mortelmans to choose their wedding rings, they ran into a major problem.
None of the rings they saw were right for them. “We visited some jewelry designers but every visit ended the same,” Geert says. “They all only had standard rings that didn’t reflect our personality.”
As a creative designer, Geert and Michelle wanted their rings to be unique, and to symbolize their passion for creativity. “As creative people, we wanted to have a less conventional ring,” he says. And that’s when inspiration struck.
“I’d started to use the 3Doodler Create pen after getting it as a new year’s gift,” Geert says. “It’s a nice way to play around with shapes. Clients love to see the creations standing on my desk and play with them.”
"As creative people, we wanted to have a less conventional ring." Share
Looking at the creations he had made, Geert had an idea. “Michelle was following a course in jewelry design. I asked her if her course master could help us to translate a 3D-sketched ring into a gold version,” he explains.
The concept was to create their own rings in filament using the 3Doodler pen, which could then be cast in gold using the lost-wax technique.
“We did not have any guarantee that this would work,” Geert admits, “but we all got excited about this and took the risk of not having the rings finished before the wedding.”
The couple used a cylindrical ring holder to create tests of their rings in the correct size. “We made a lot of prototypes because the idea was to avoid sharp edges and not have double layers to keep the size from getting too thick,” Geert says.
The result was perfectly cast rings that matched the couple’s personality, and were—quite literally—made with love.
“My ring is a little more chaotic and has more ripples,” says Geert. “My wife’s has multiple smaller rings and a more simple and clean look.”
The rings were ready on schedule, and provided the perfect symbol for a union built on creativity.
At a dinner party in 1945, famed architect Ludwig Mies van der Rohe was approached with an offer.
Prominent Chicago nephrologist Dr. Edith Farnsworth wanted Mies to create a weekend getaway along the Fox River in Plano, Illinois. The offer was for Mies to design the house as if it were for himself.
The result was the culmination of the unique take on modernist architecture for which Mies became an icon. With the launch of a new 3Doodler Create themed kit for the Farnsworth House, we take a look at the inspiration and architectural movement behind this stunning example of modernism.
A Higher Unity
While many modernist architects believed architecture should be used to socially engineer human behavior and guide occupants to higher ideals, Mies used his buildings differently.
Farnsworth House by Ludwig Mies van der Rohe
His architecture still represented his ideals and aspirations, but instead of constructing in a way to carefully engineer a result, Mies instead focused on freedom of movement and use. With a minimal framework and expressed structural columns, his buildings offered and open space in which inhabitants could express their own spirit—something he saw as crucial to elevating the harmony between architecture and humanity.
"In its simplest form architecture is rooted in entirely functional considerations, but it can reach up through all degrees of value to the highest sphere of spiritual existence into the realm of pure art."-Ludwig Mies van der Rohe Share
Mies often reflects the industrial culture he saw as growing in the United States within his own architectural aesthetic, and uses this to offer occupants a flexible and unobstructed space.
His ultimate purpose was to join together natural elements with culture and construction. “We should attempt to bring nature, houses, and the human being to a higher unity,” Mies once said, and he reflected this ideal through designs featuring glass walls and few solid exterior walls.
Part of a Larger Whole
Constructed in a pastoral setting, the Farnsworth House is a clear culmination of the modernist ideals Mies sought to bring together in his designs.
"If you view nature through the glass walls of the Farnsworth House, it gains a more profound significance than if viewed from the outside. That way more is said about nature—it becomes part of a larger whole."-Ludwig Mies van der Rohe Share
The singular geometric form of the house is simple in the extreme, constructed of steel and glass with a minimal form. The one-room rectangular structure sits parallel to the Fox River, with a perpendicular cross axis directly facing the river and nature.
Elevated 5 feet and 3 inches above the ground, and with floor-to-ceiling glass as the outer walls, the Farnsworth House appears to be floating within the natural landscape around it.
The glass walls encircle an open floor plan with a core wooden block containing the toilet and kitchen—a wooden room nesting inside the larger glass rectangle. Each area of the living space—areas for sleeping, eating, sitting, and cooking—is suggested by the arrangement, but ultimately the inhabitant is free to decide the use of space as they desire.
An Icon of Modernism
To honor this National Historic Landmark and icon of modernist architecture, 3Doodler is pleased to present a unique Farnsworth House theme kit for 3Doodler Create.
The 3Doodler Farnsworth House Kit
In collaboration with the National Trust for Historic Preservation, the Licensed Project Kit includes detailed stencils created from the original Farnsworth floor plans, so anyone can create this modernist masterpiece in miniature scale. The kit also includes a visual step-by-step guide and four packs of ABS filament to replicate the original structure. Learn more about the the making of this kit here.
The Farnsworth House Kit will be available alongside Frank Lloyd Wright’s Fallingwater Kit. Sign up for notifications on the release of these new kits:
The father of organic architecture turns 150 years old in June. The impact of interior designer, architect, writer, and educator, Frank Lloyd Wright can still be seen today.
Having designed over 1,000 structures in his lifetime, the work of Frank Lloyd Wright has made a lasting impact on architecture and design. In celebration of his 150th birthday, we are pleased to present a new 3Doodler Create Project Kit for Wright’s signature example of organic architecture, Fallingwater.
Celebrating 150 Years
With 532 completed structures over the span of a 70-year career, Frank Lloyd Wright has become an icon of American architecture. Twelve of his buildings are listed amongst Architectural Record’s hundred most important buildings of the century.
"We are all here to develop a life more beautiful, more concordant, more fully expressive of our own sense of pride and joy than ever before in the world."-Frank Lloyd Wright Share
Wright firmly believed that architecture was “the mother of all the arts,” and approached each design with this intensity of conviction. His aim to was to reflect the landscape, people, culture, and feel of America within his own designs and architecture.
With dramatic new shapes and designs, Wright developed what he called “organic architecture”, representing what he saw as the harmonious connection of the citizens of the United States with both each other, and to the land they call home. As such, his homes center around shared spaces such as the dining table, music rooms, and terraces to encourage a sense of community and closeness to both family and nature.
Fallingwater
None of Wright’s structures reflects the harmony between architecture and nature better than Fallingwater.
"The making of a good building, the harmonious building, one adapted to its purposes and to life, [is] a blessing to life and a gracious element added to life, is a great moral performance."-Frank Lloyd Wright Share
Constructed between 1936 and 1939, the residence was designed for the Kaufmann family in southwest Pennsylvania. Stretching over a 30-foot waterfall, the house is a shining example of Wright’s commitment to a unique architectural design that integrates family life with natural surroundings.
While the Kaufmanns had requested a house with a view of the waterfall, Wright wanted them to instead live with the water itself, and to make the falls an integral part of their everyday life. His organic design was detailed down to the colors, with only two distinct colors used in the final building, both tied closely to the materials used—the light ochre of the concrete, and Wright’s own signature Cherokee red on the steel.
Since Fallingwater first opened its doors to the public in 1964, over 4.5 million visitors have come to see Wright’s architectural masterpiece first-hand.
Recreating a Piece of History
To honor this National Historic Landmark and icon of organic architecture, 3Doodler is pleased to present a unique Fallingwater theme kit for 3Doodler Create.
In collaboration with the Western Pennsylvania Conservancy, the Licensed Project Kit includes detailed stencils created from the original Fallingwater floor plans, so anyone can create Wright’s masterpiece in miniature scale. The kit also includes a visual step-by-step guide and four packs of ABS filament to replicate the exact colors of the original structure. Learn more about the the making of this kit here.
Celebrate Frank Lloyd Wright’s 150th Birthday by recreating one of the most powerful pieces of American architecture. Sign up for notifications on the release of this new kit at the3Doodler.com.
Subscribe For Special Offers & Inspiration
By subscribing, you agree to receive emails from us. Please find our privacy policy here.


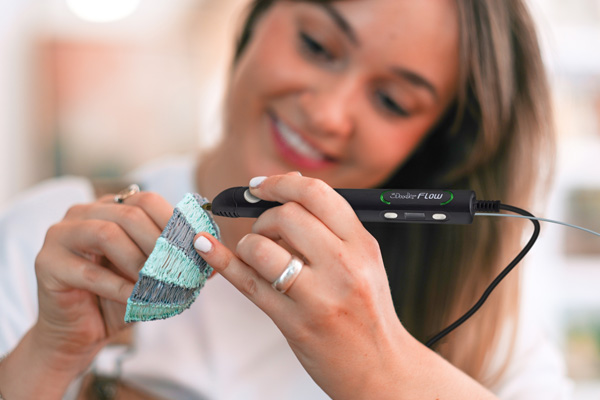

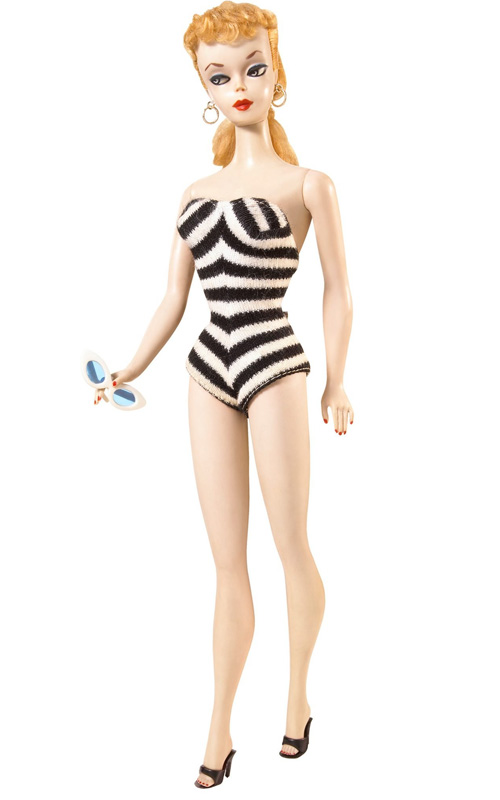


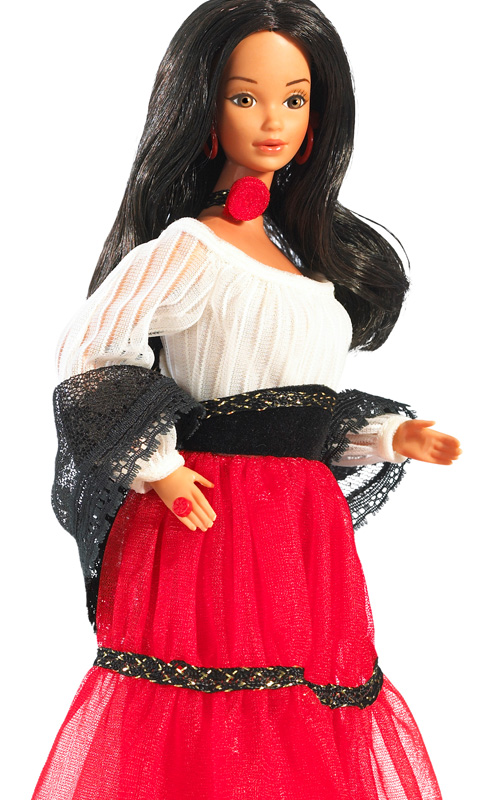

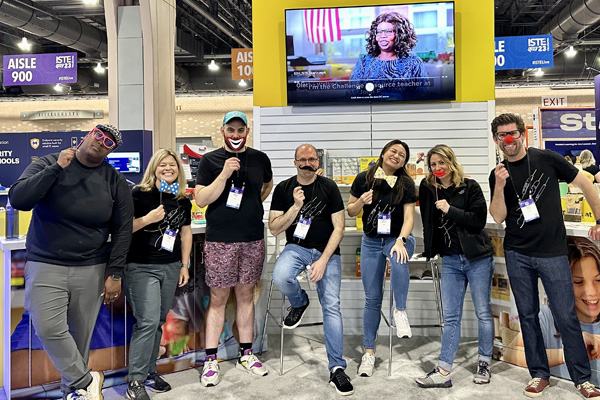

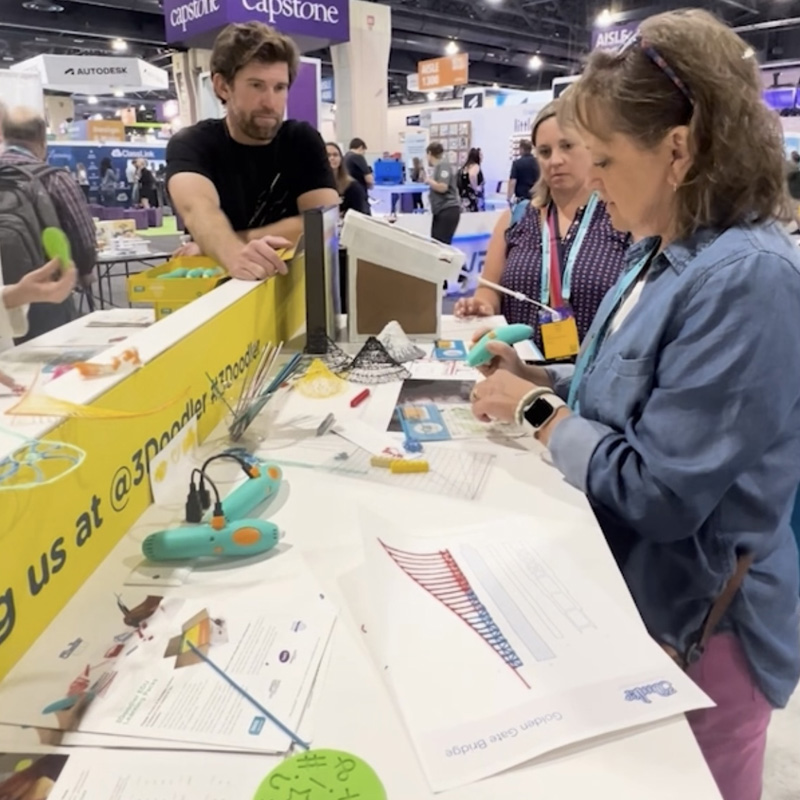
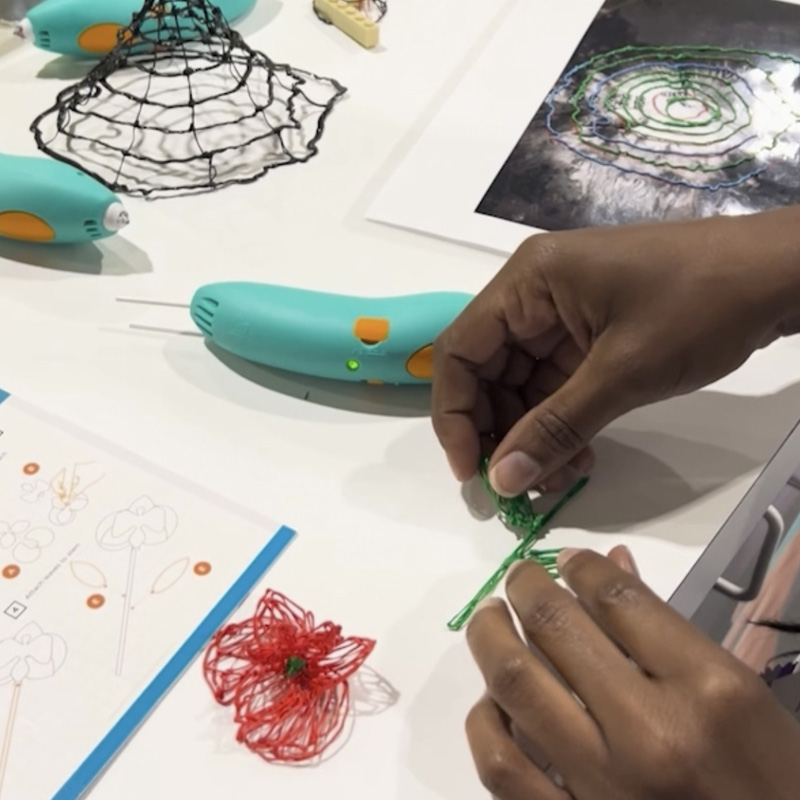
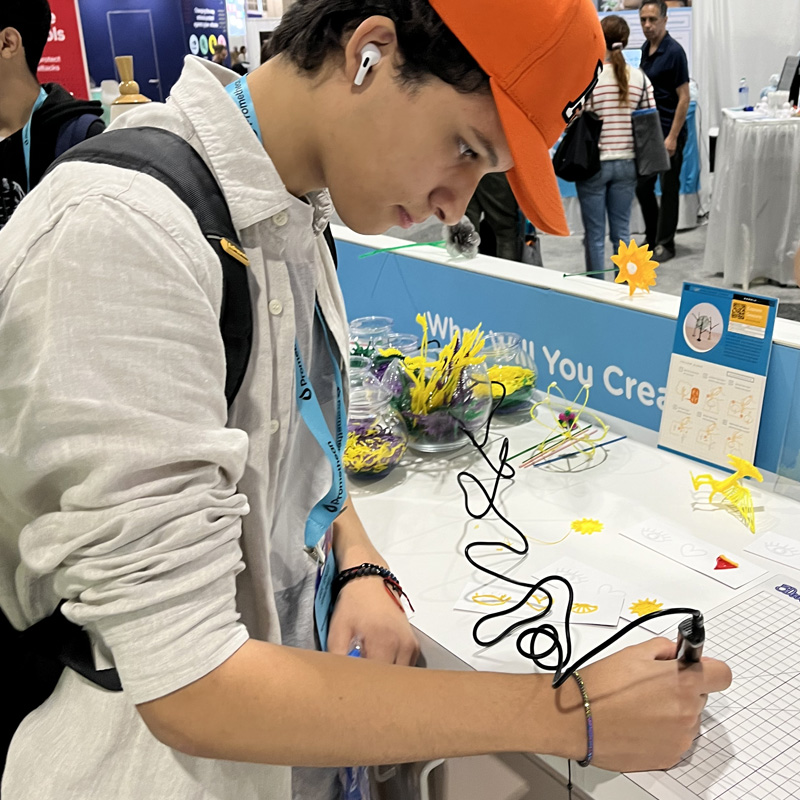


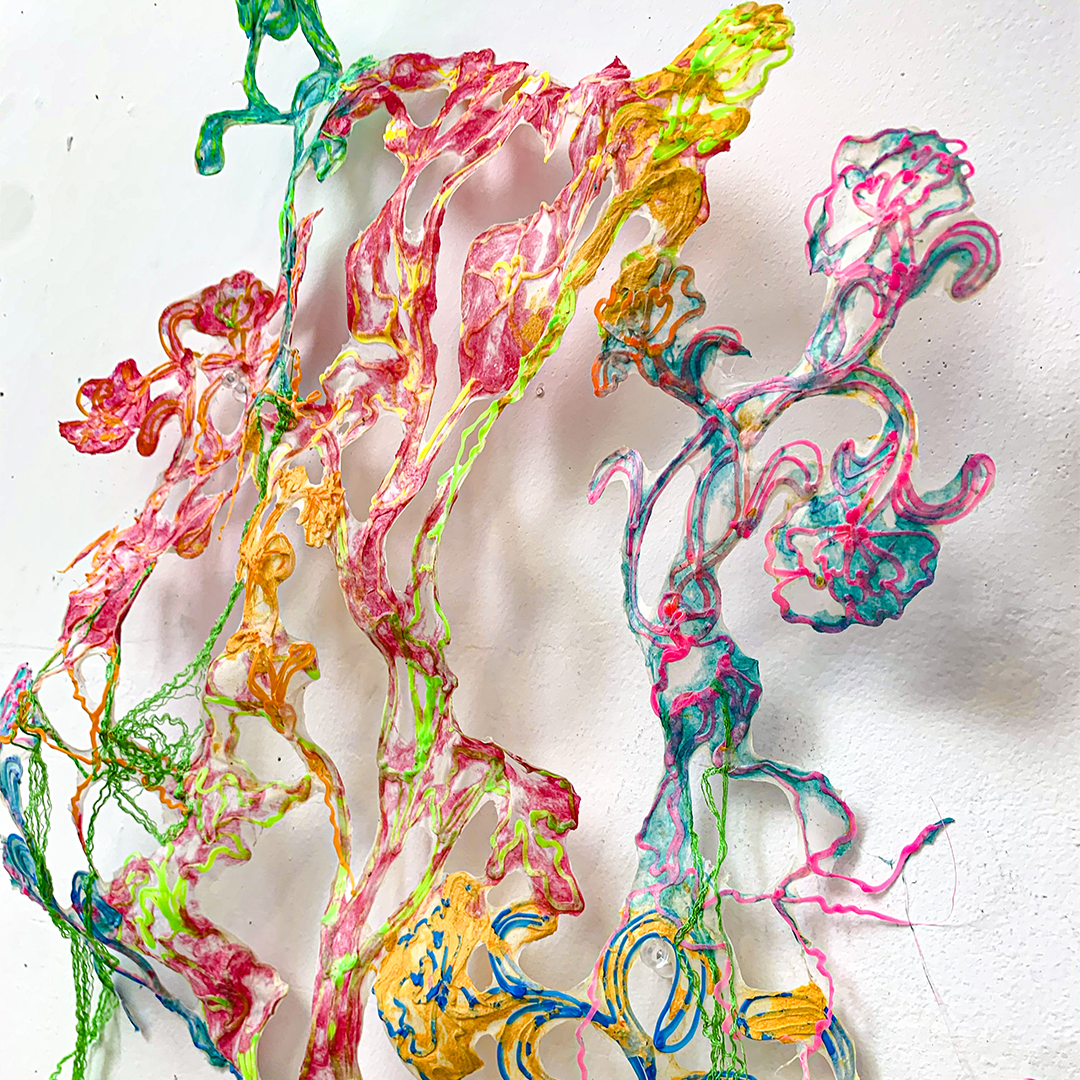
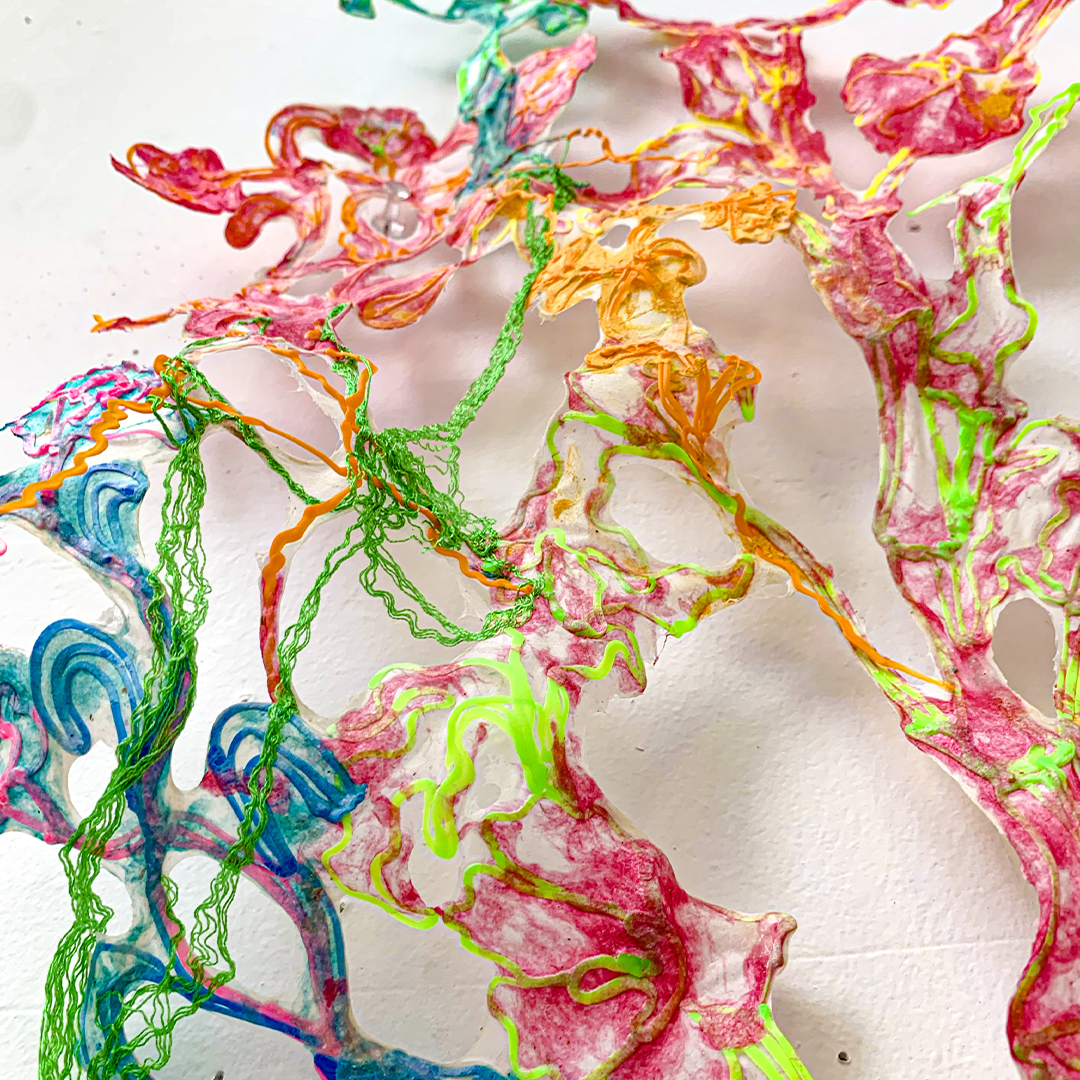


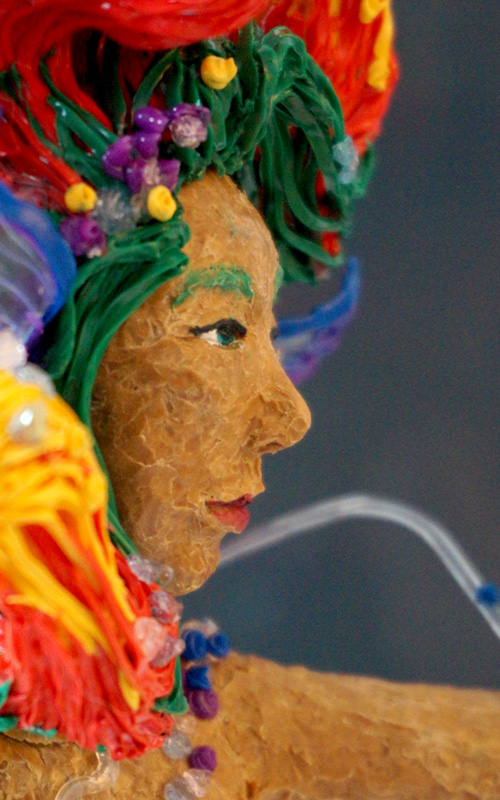


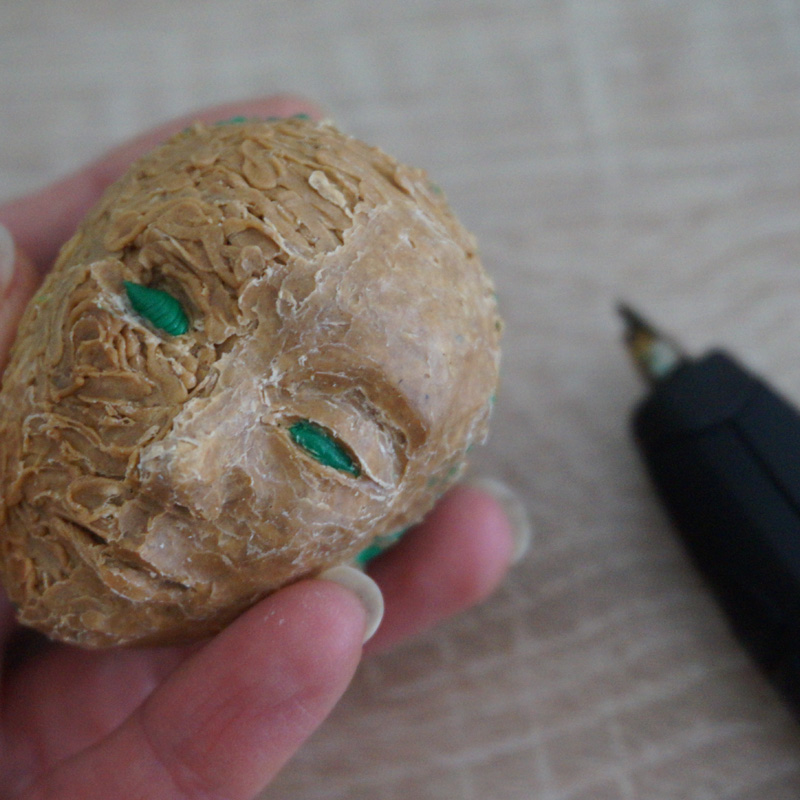


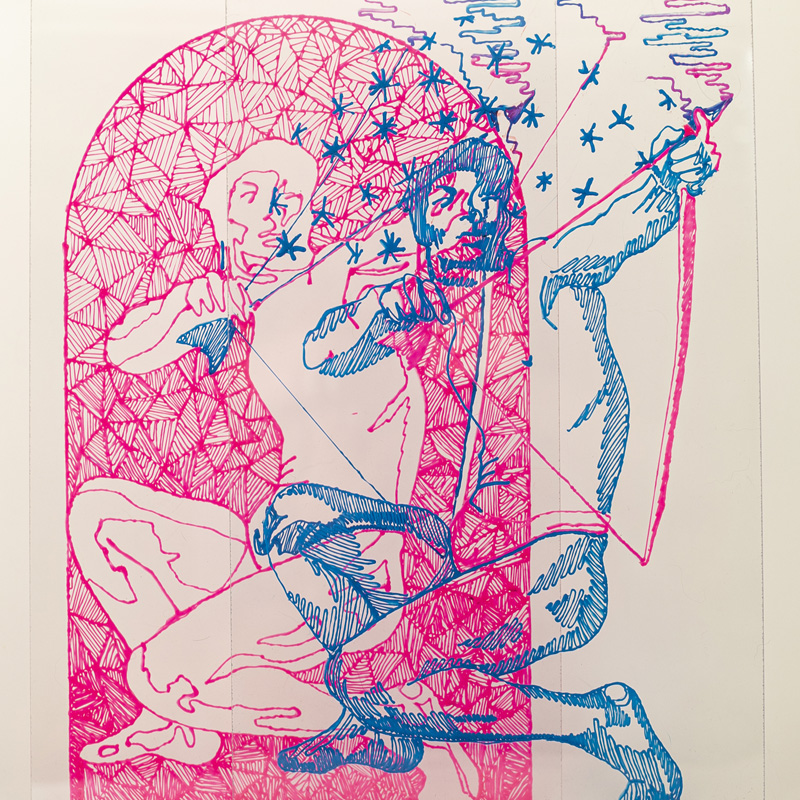
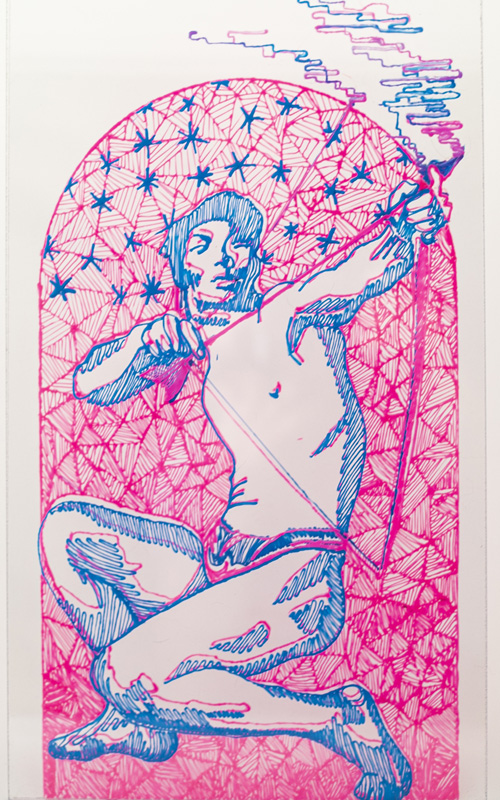
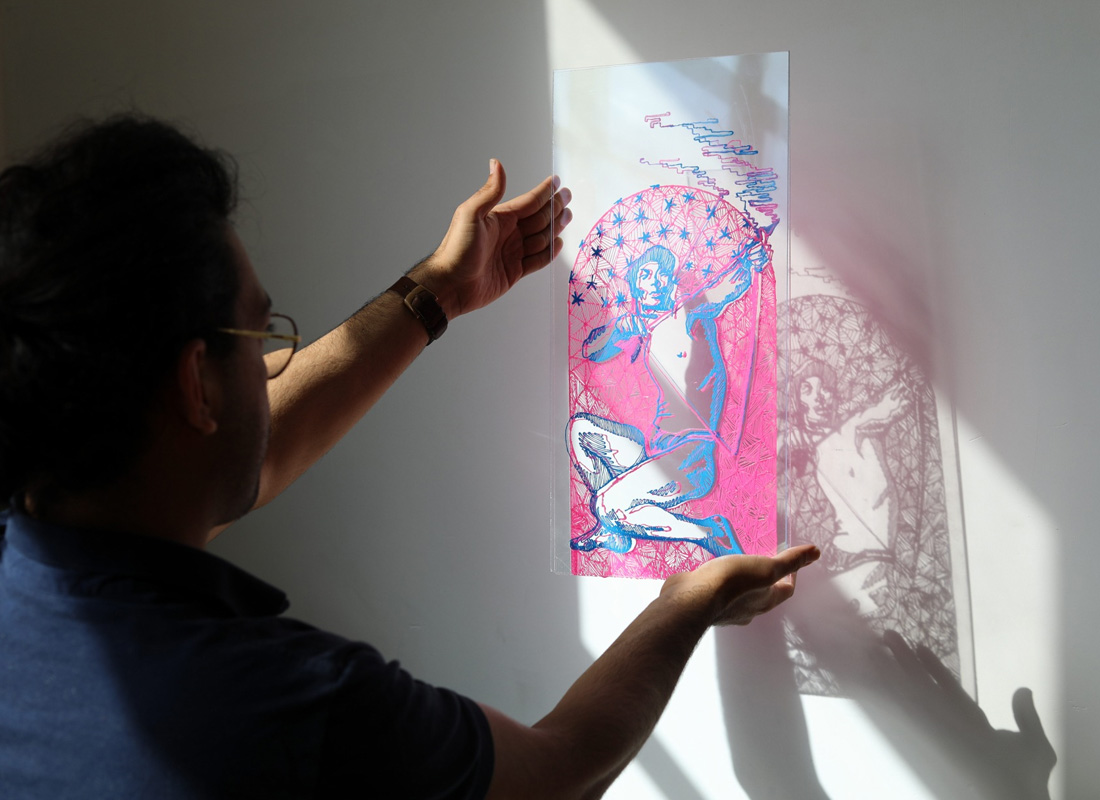
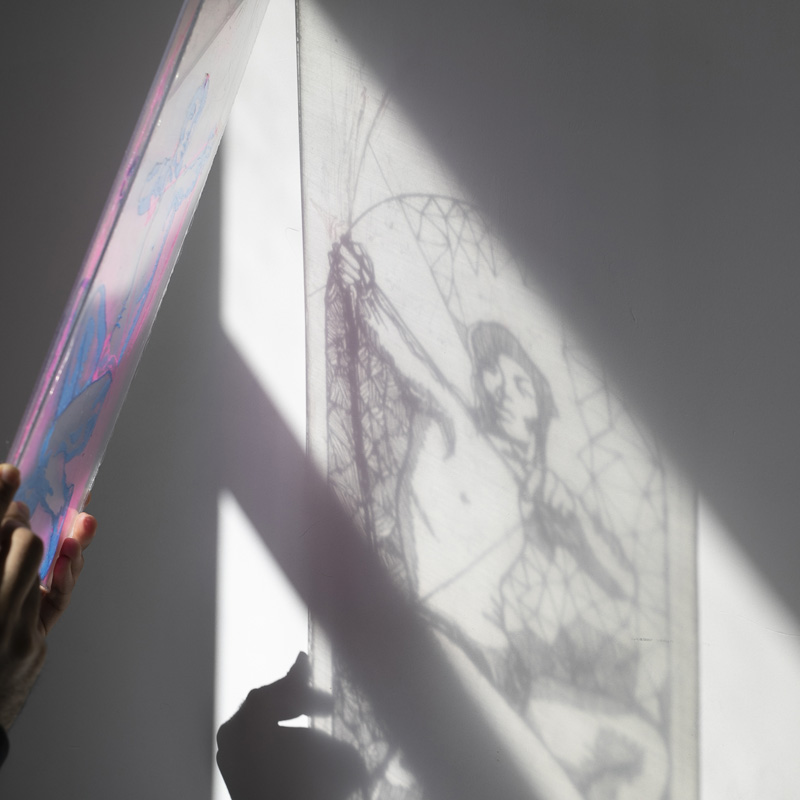


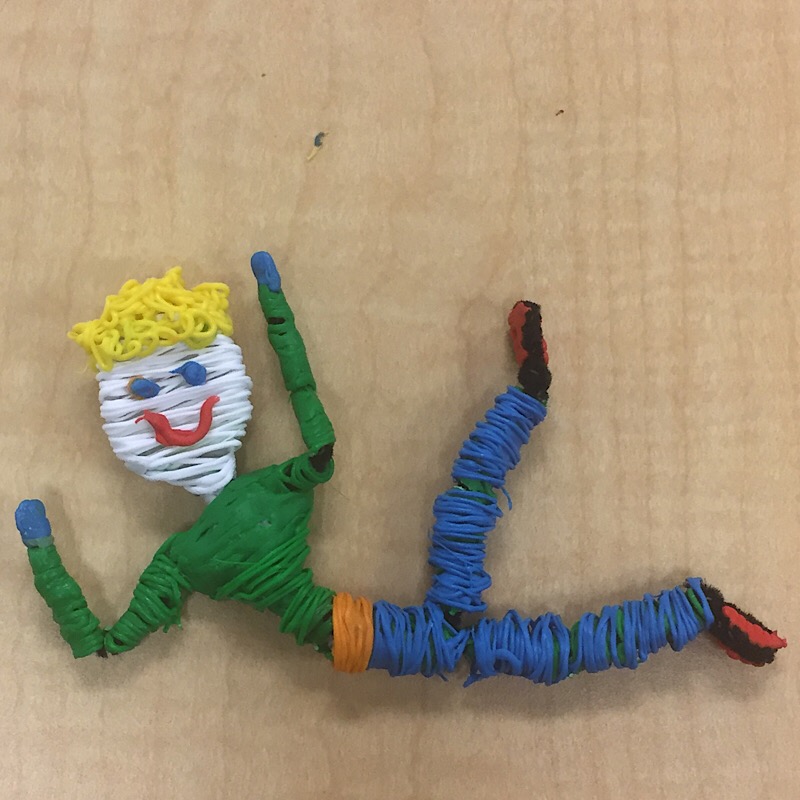
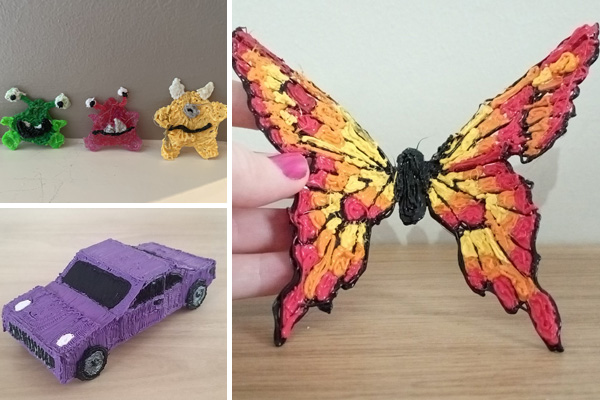


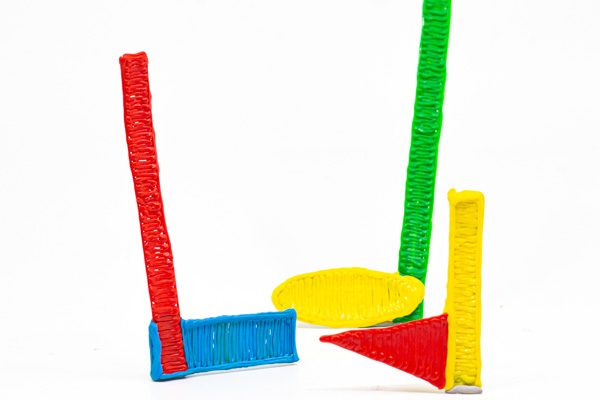


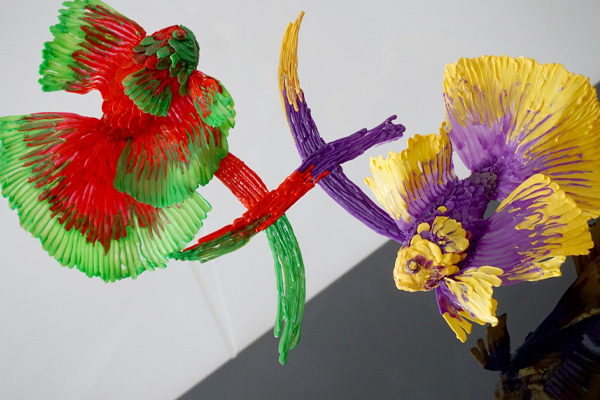
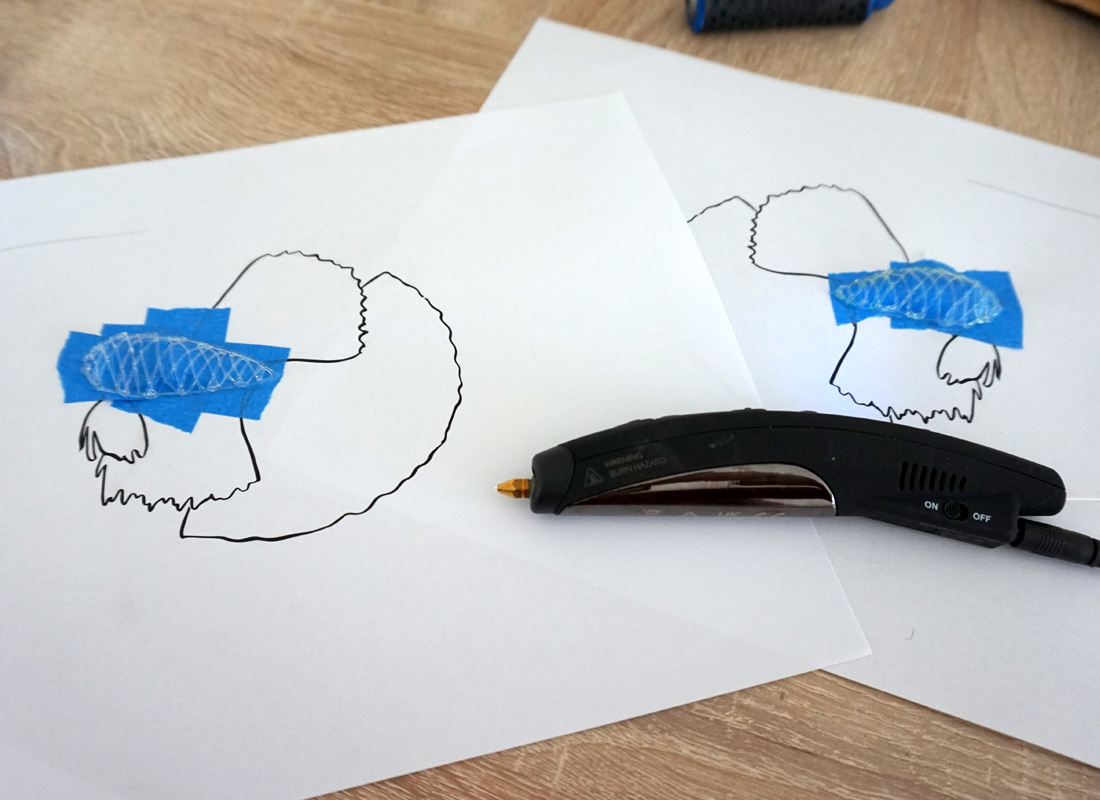
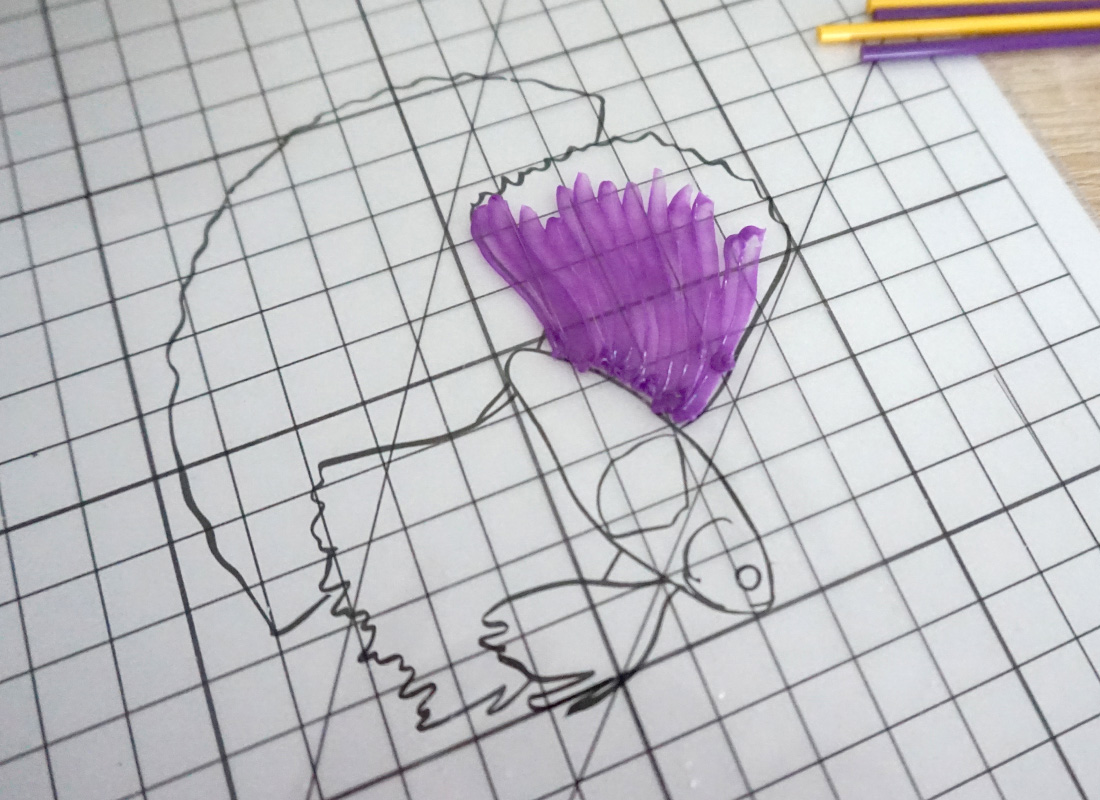
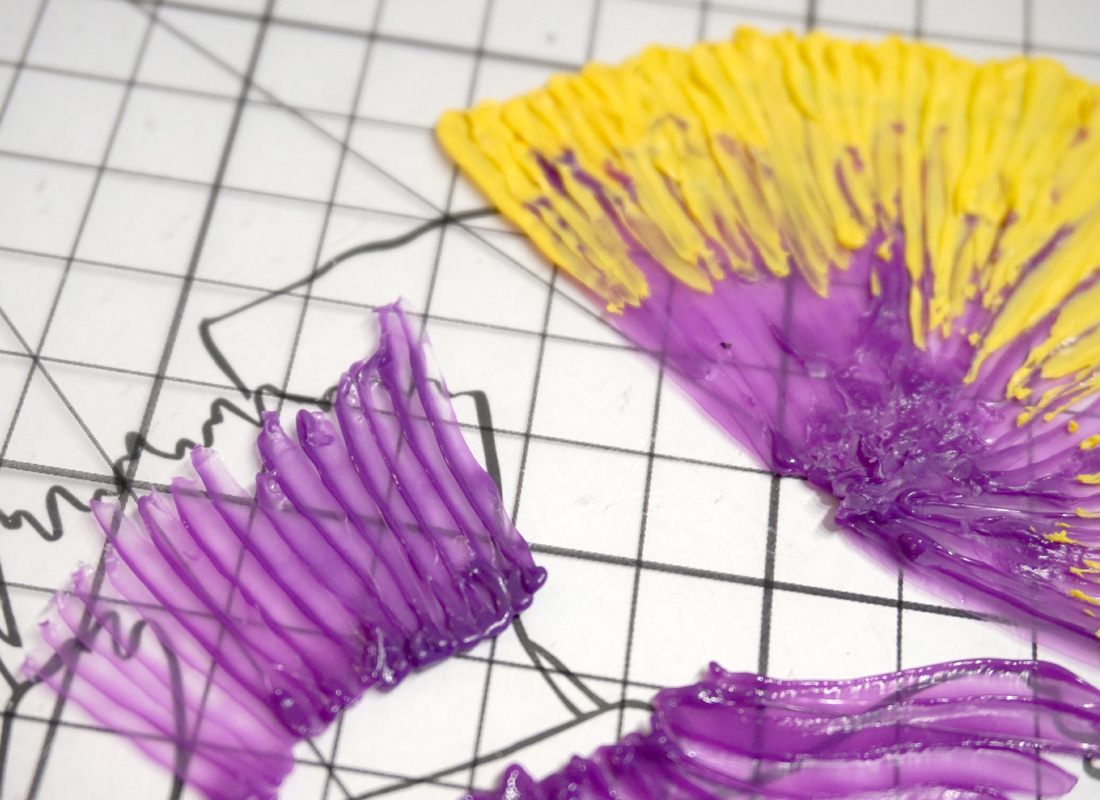
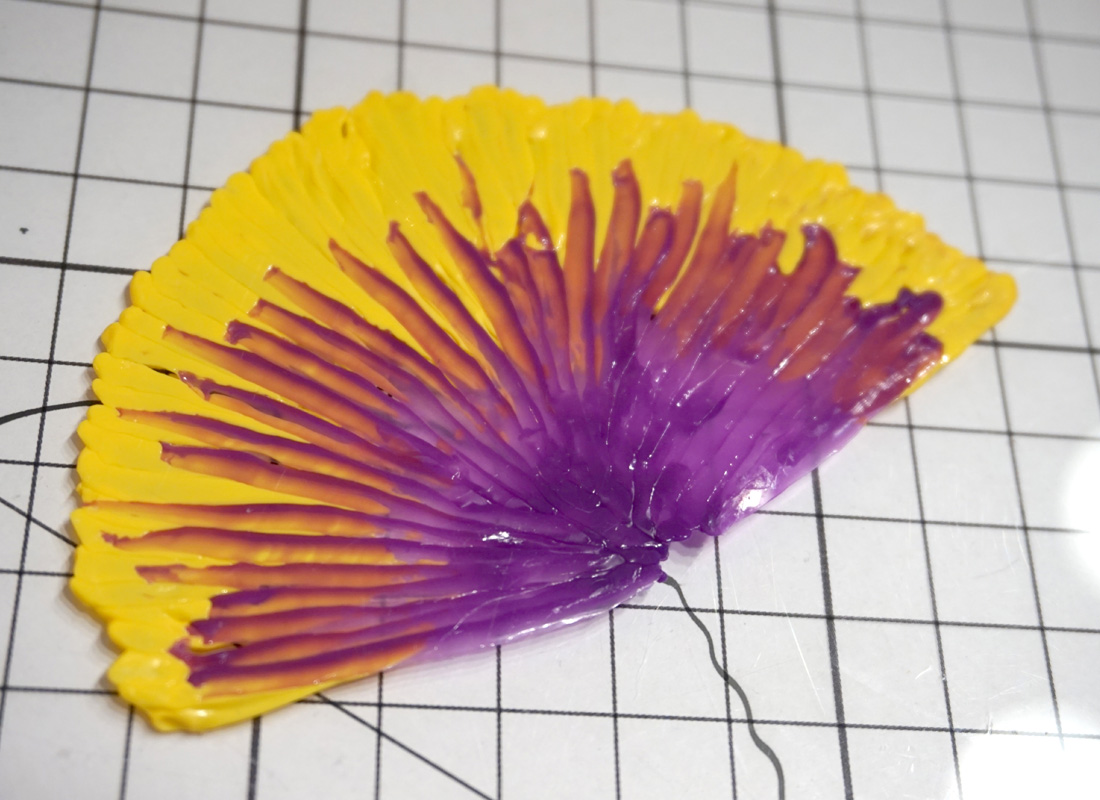
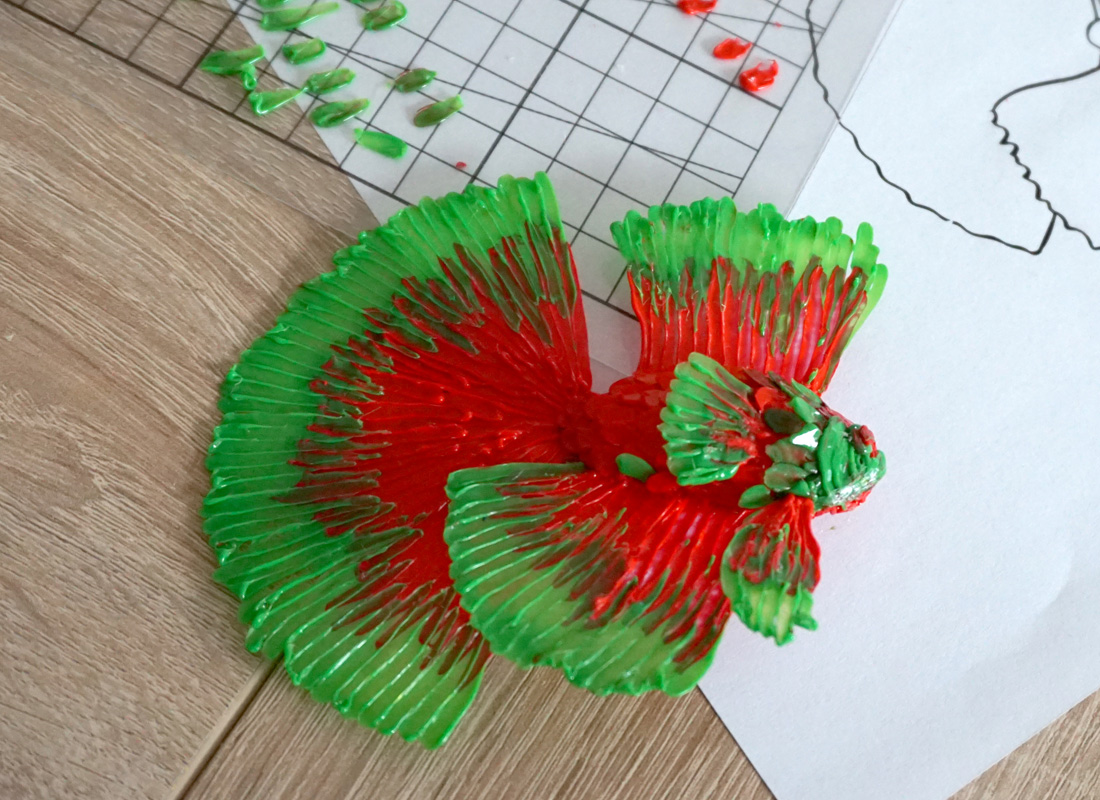
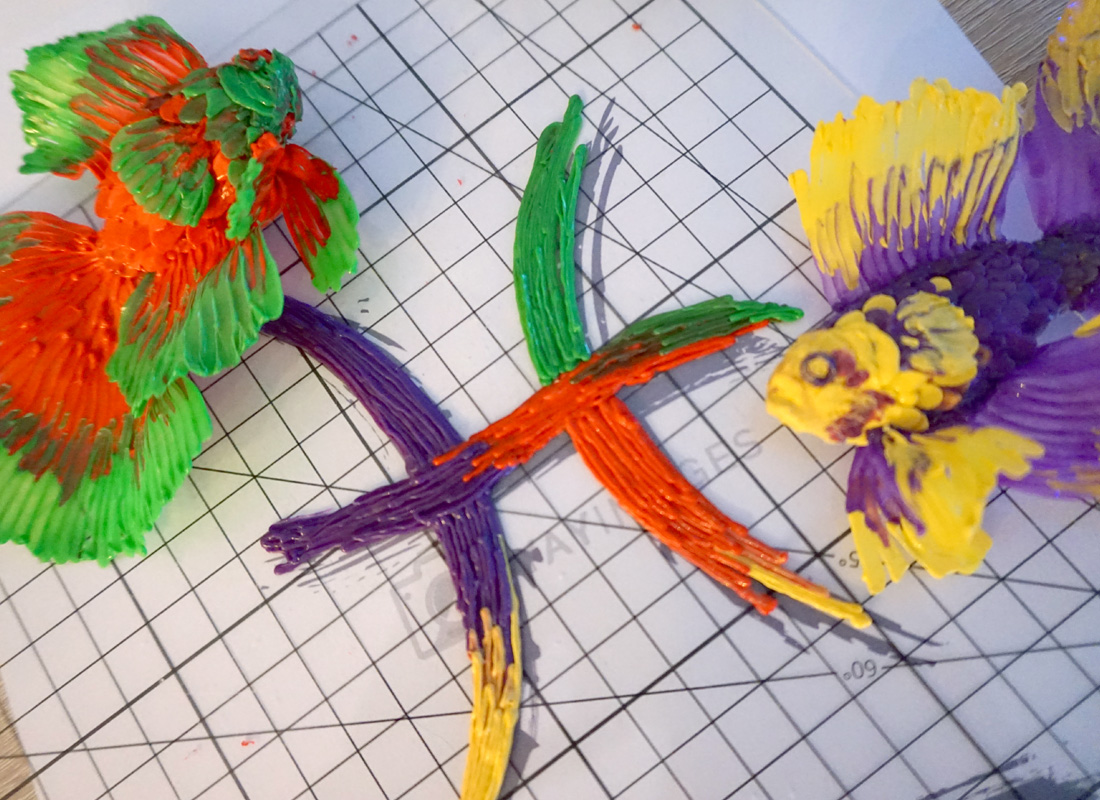
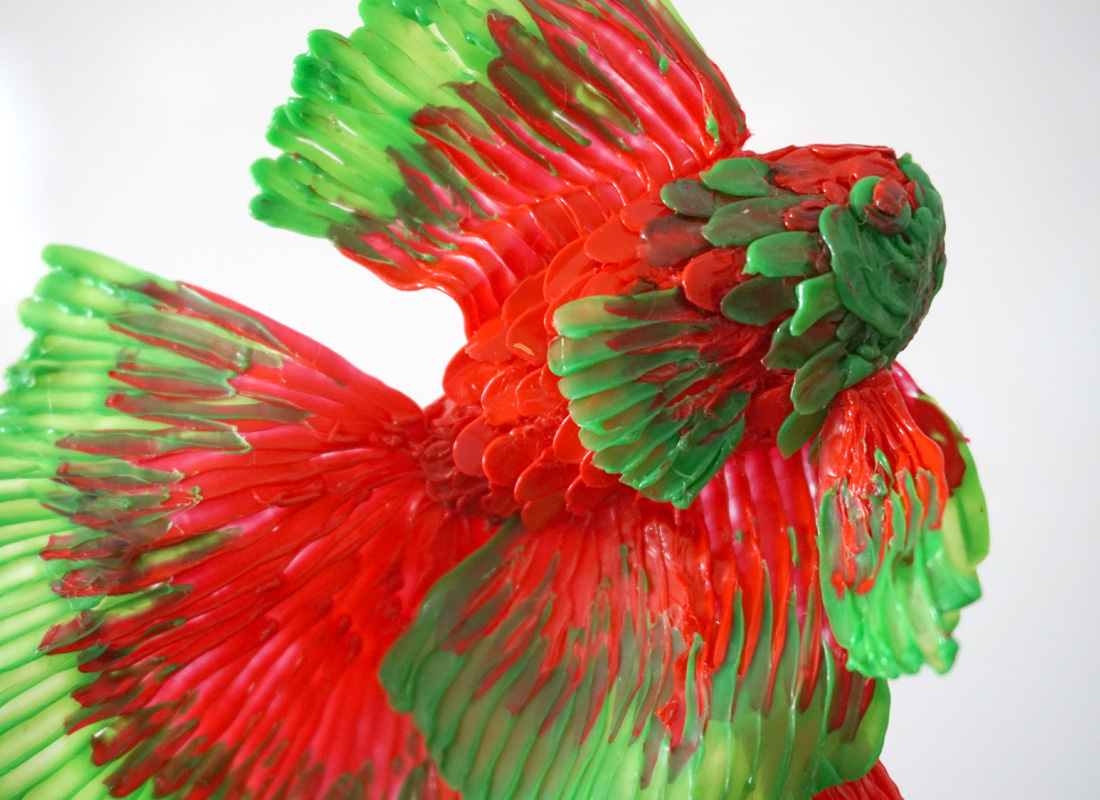
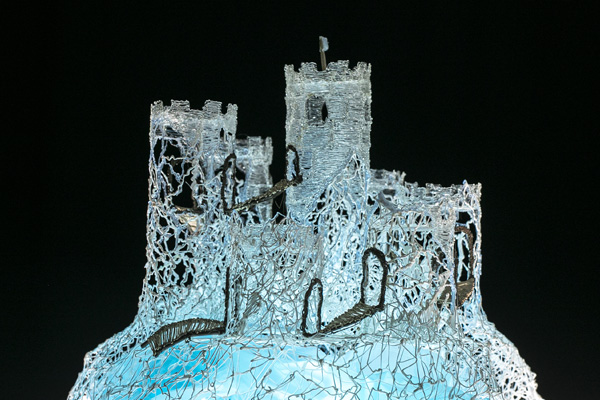

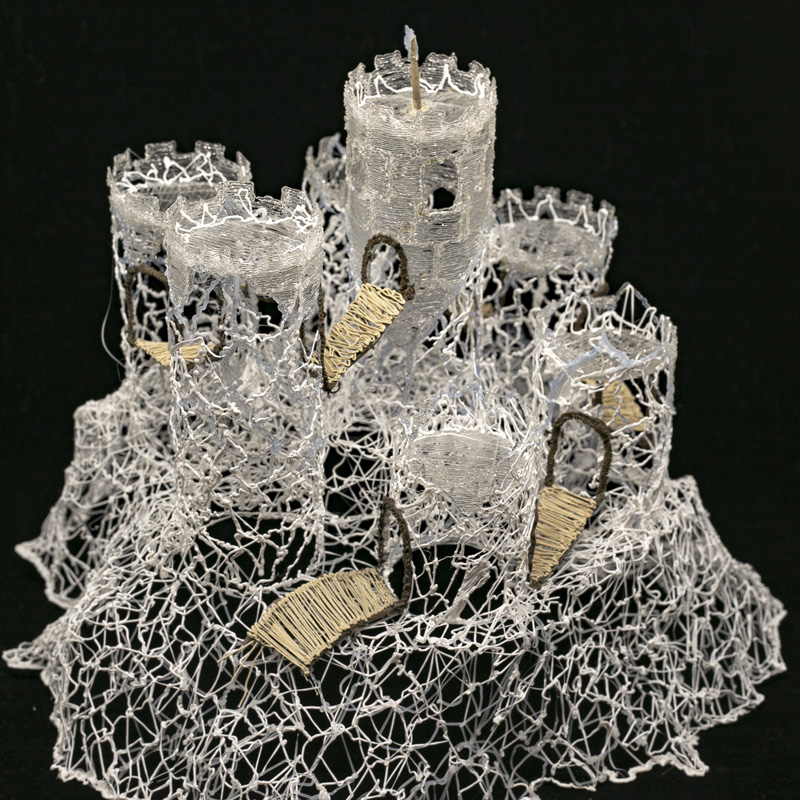
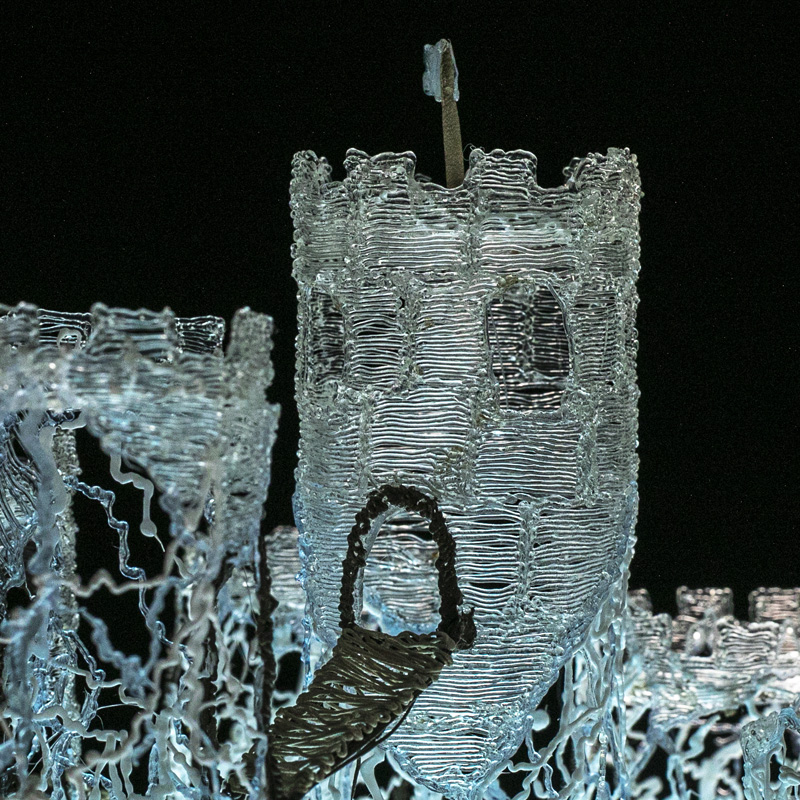
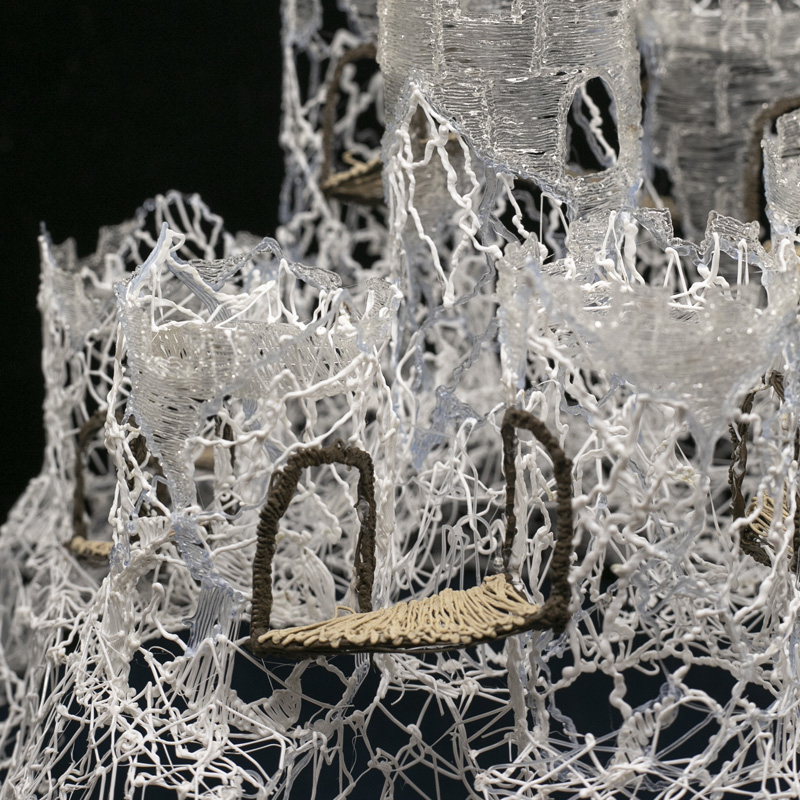
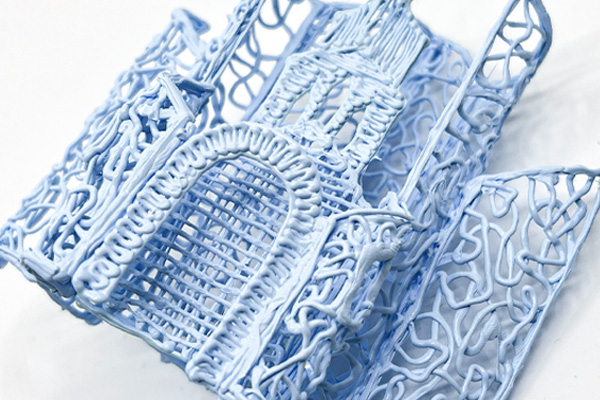


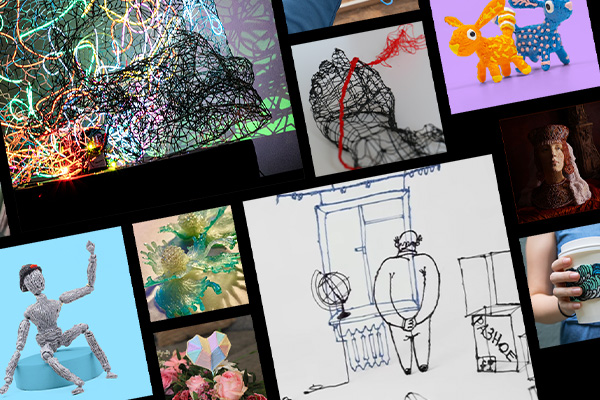


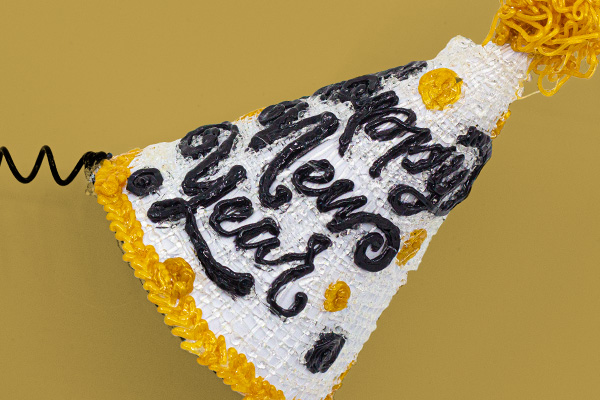


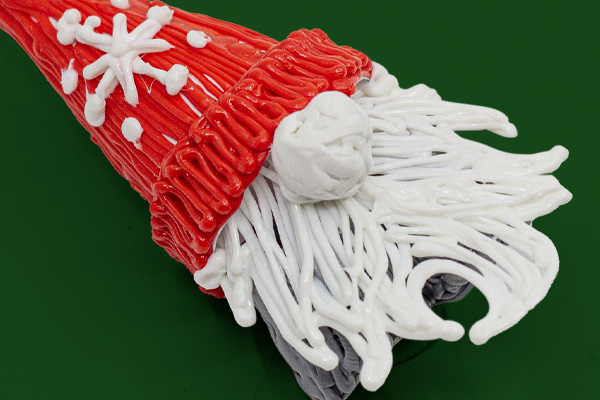

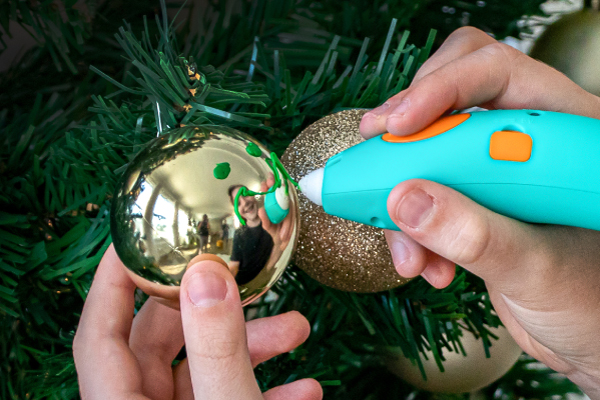

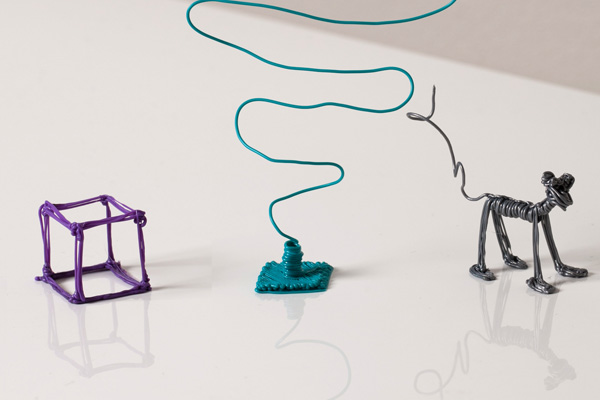


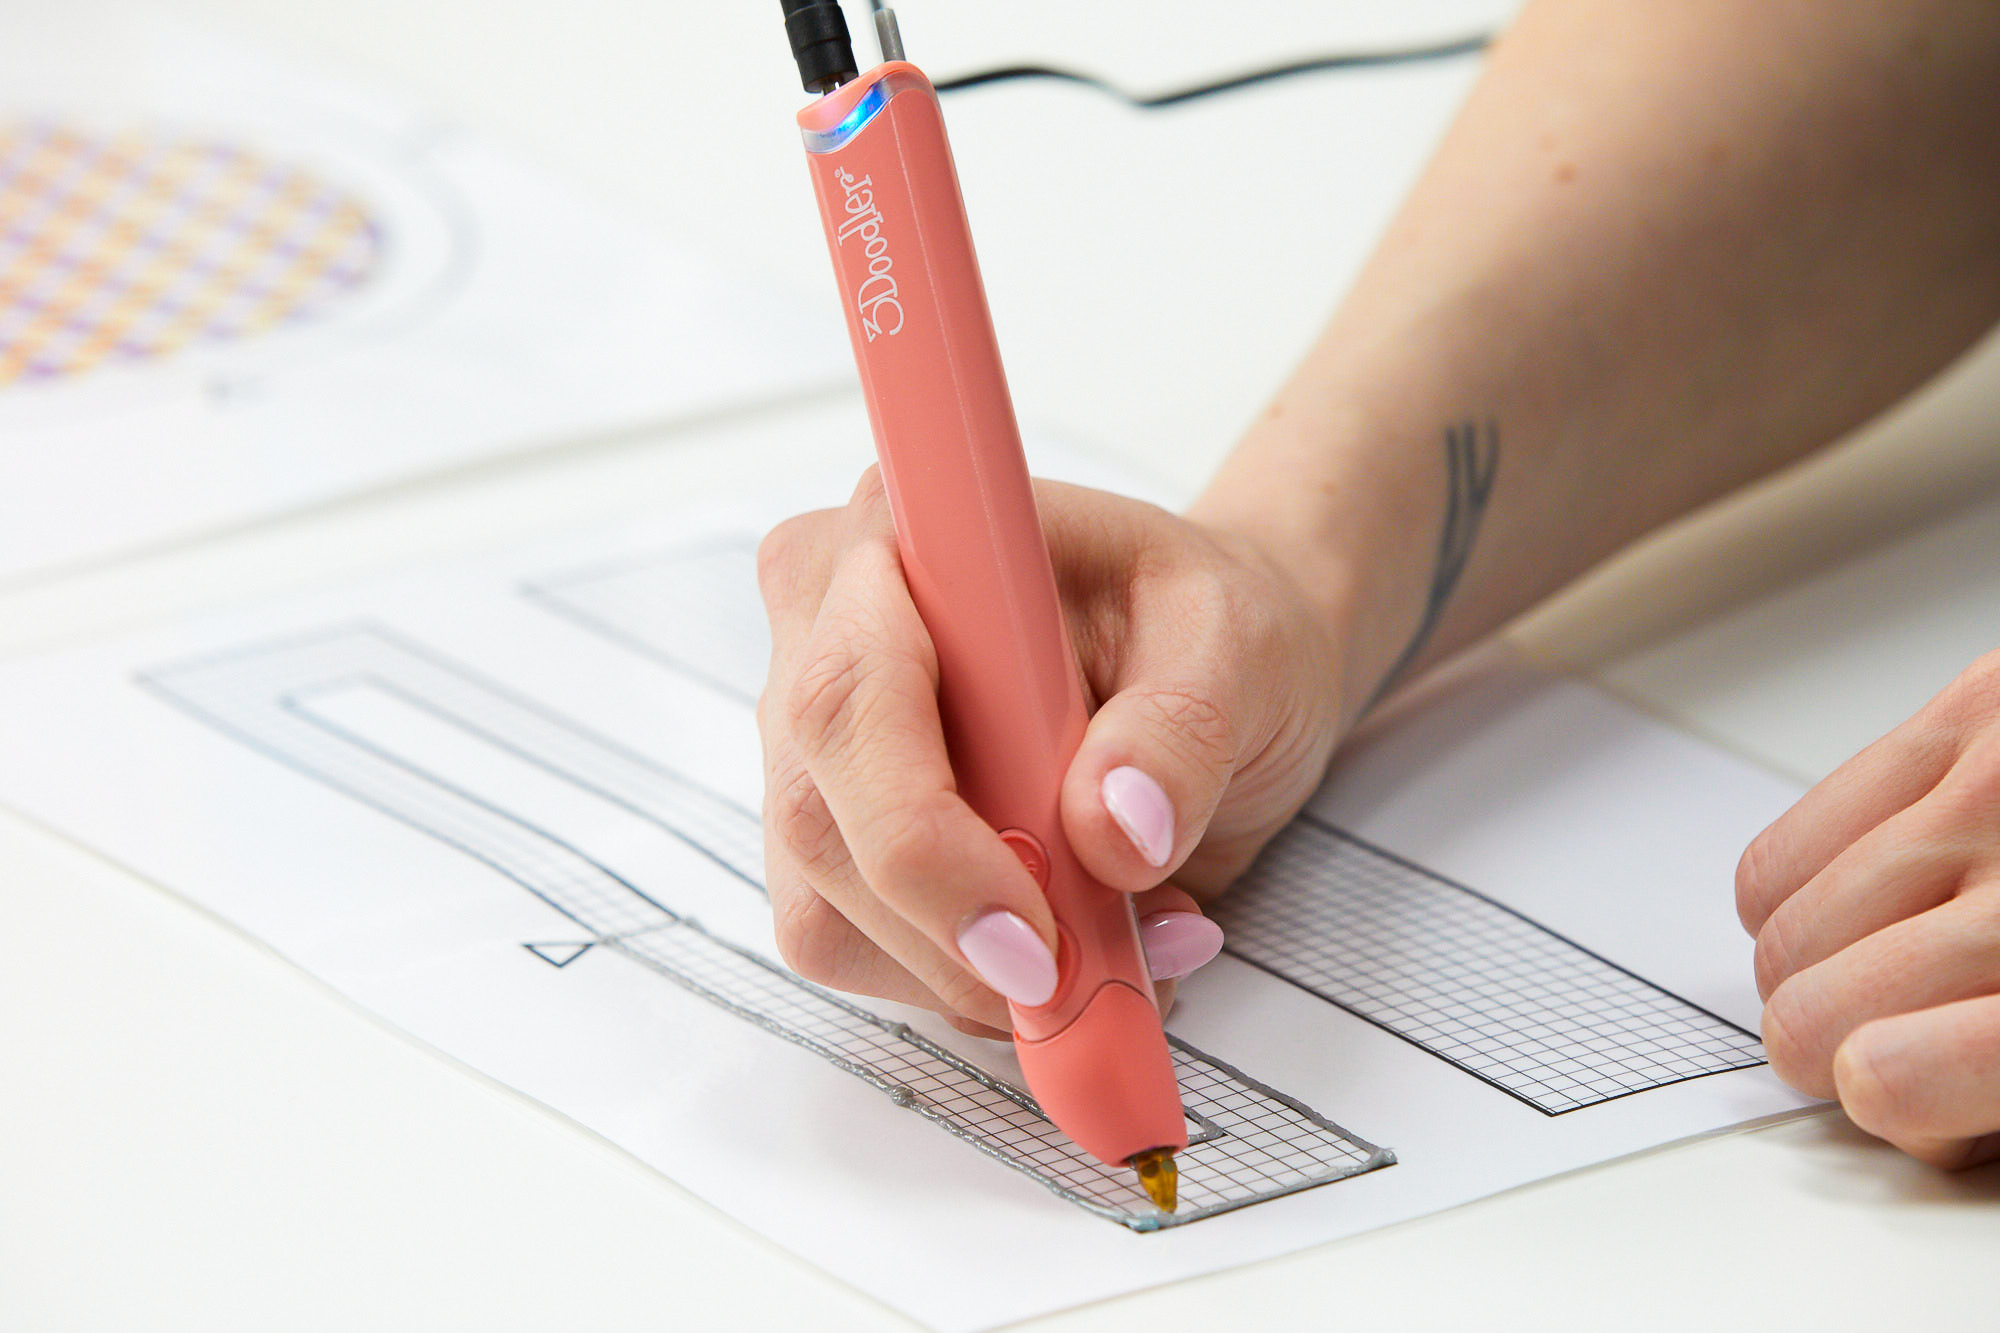
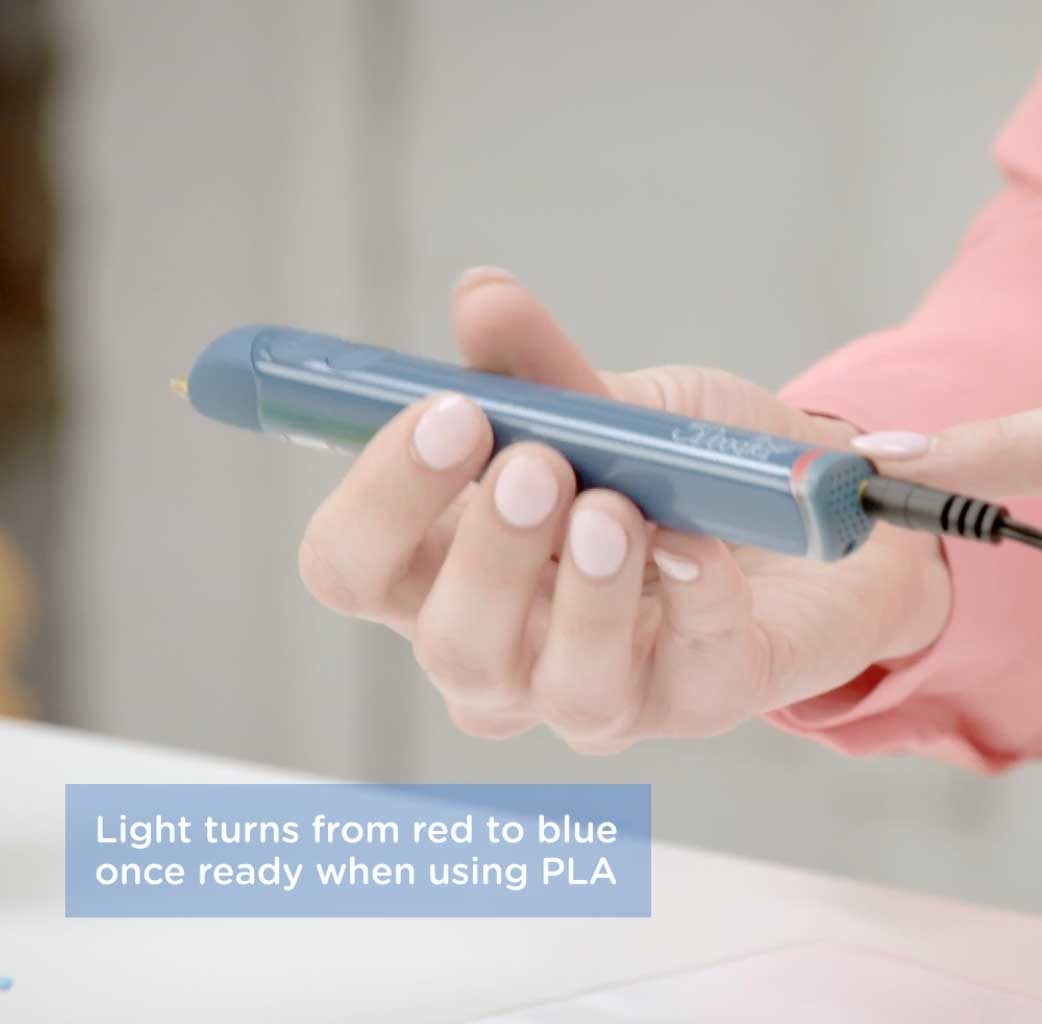

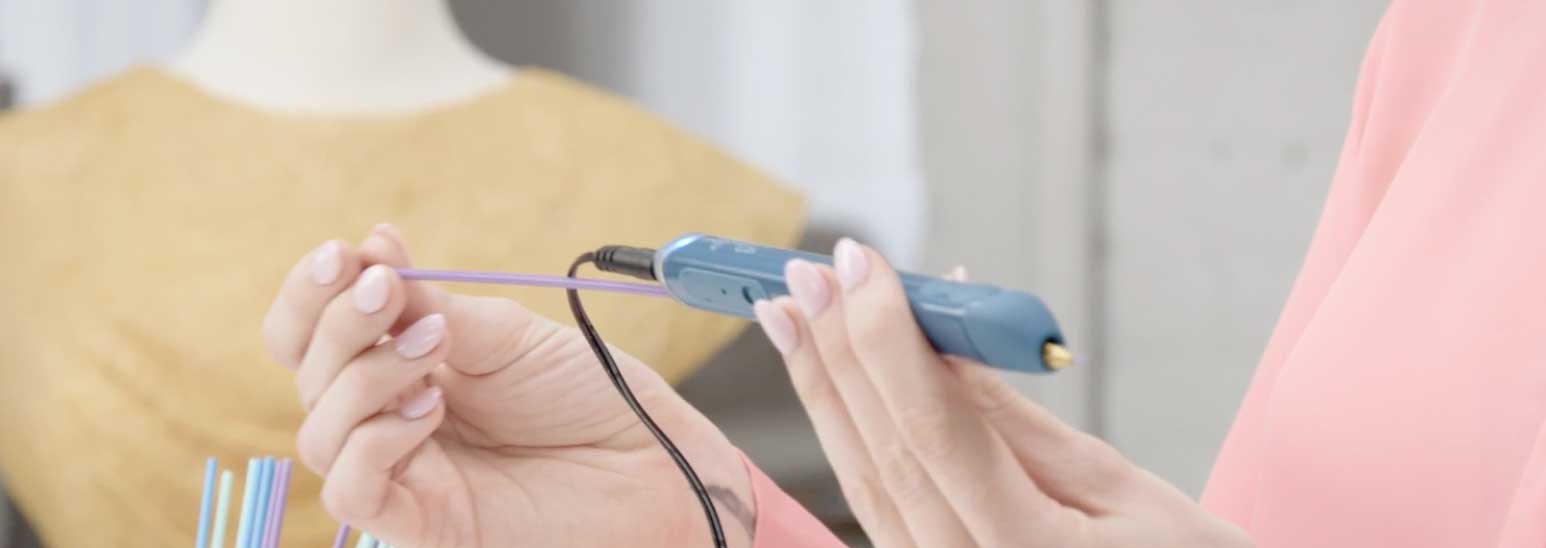


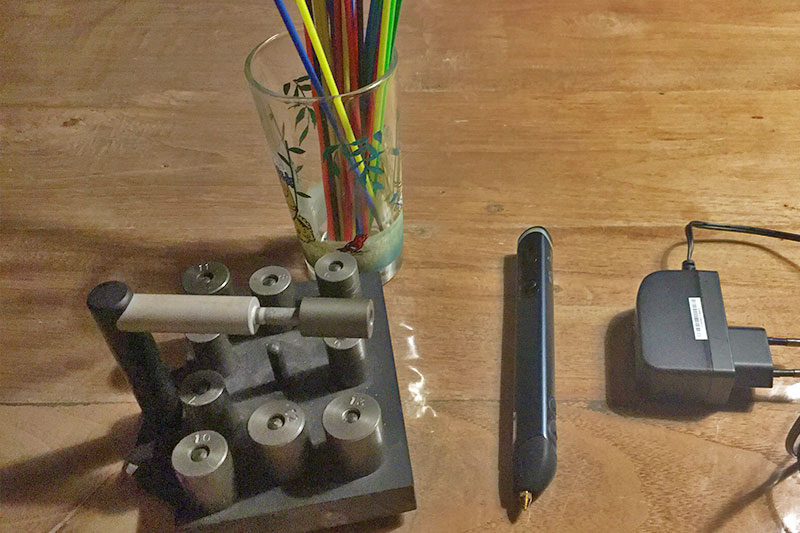
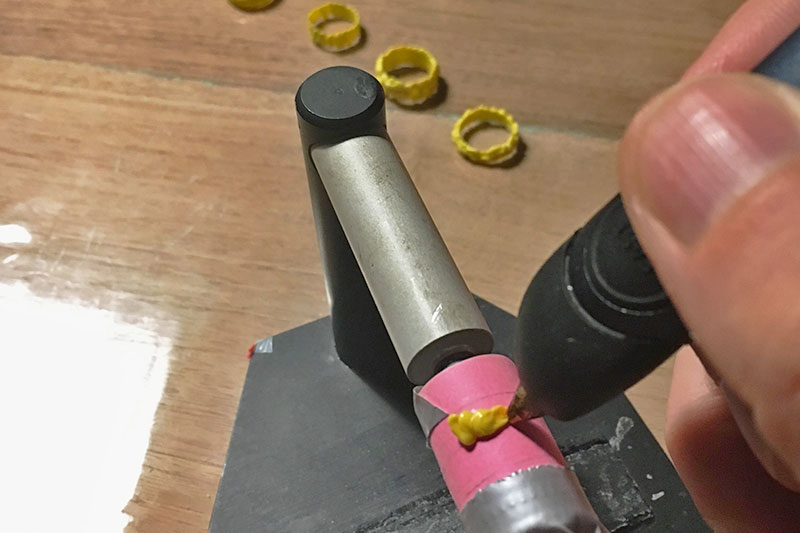
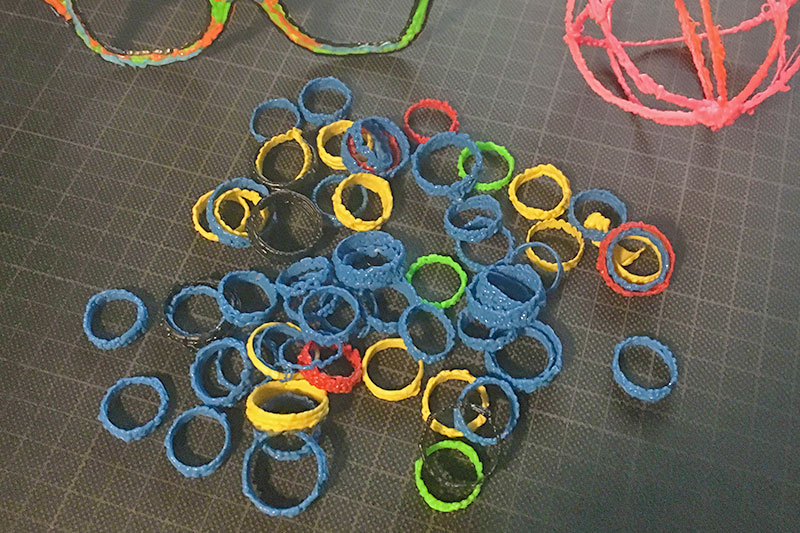
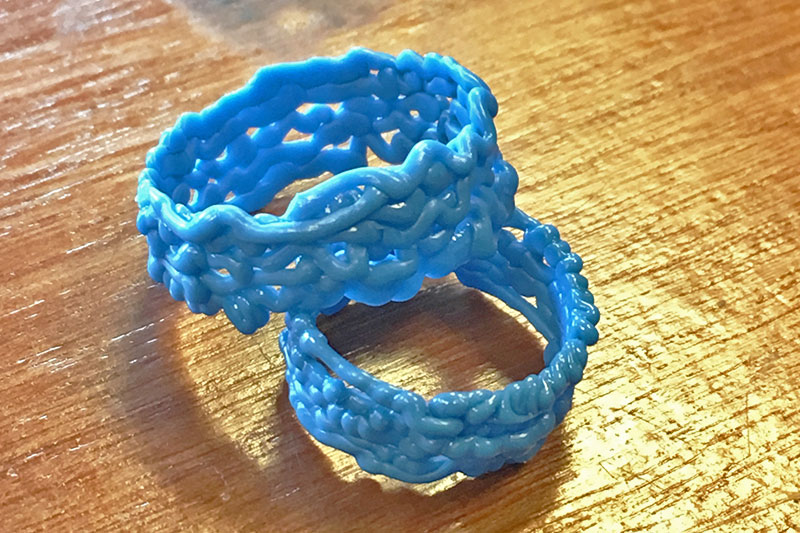
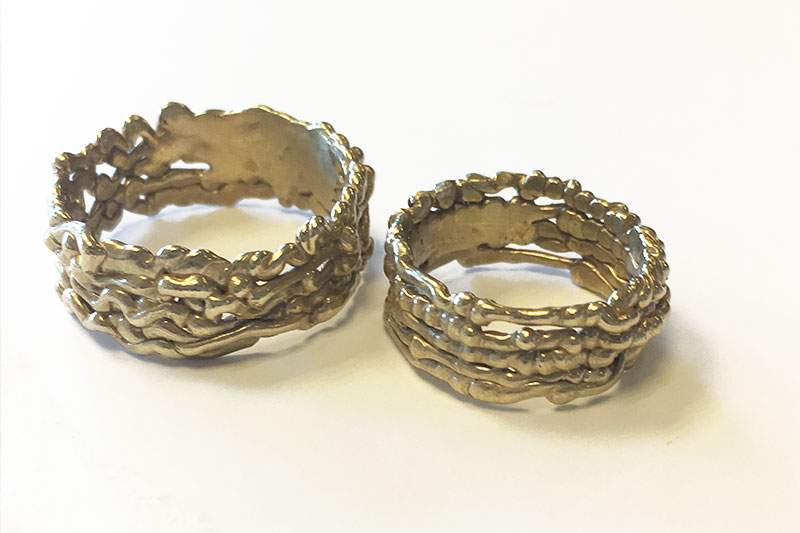
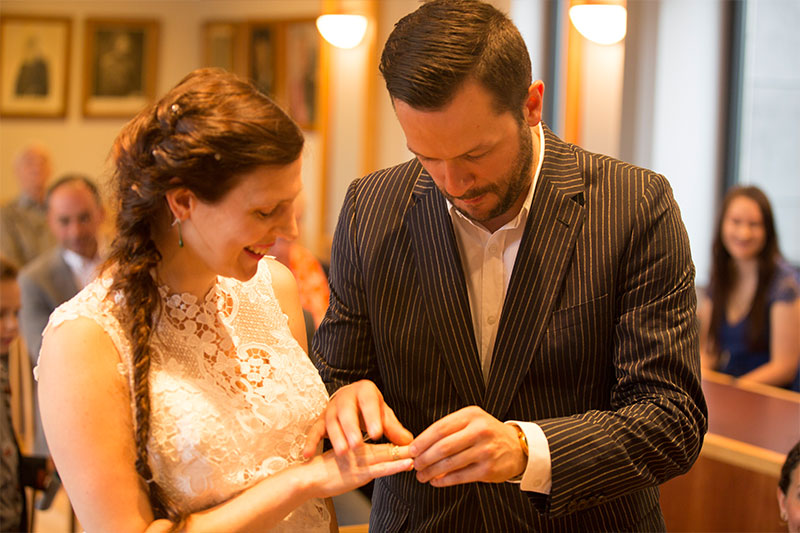

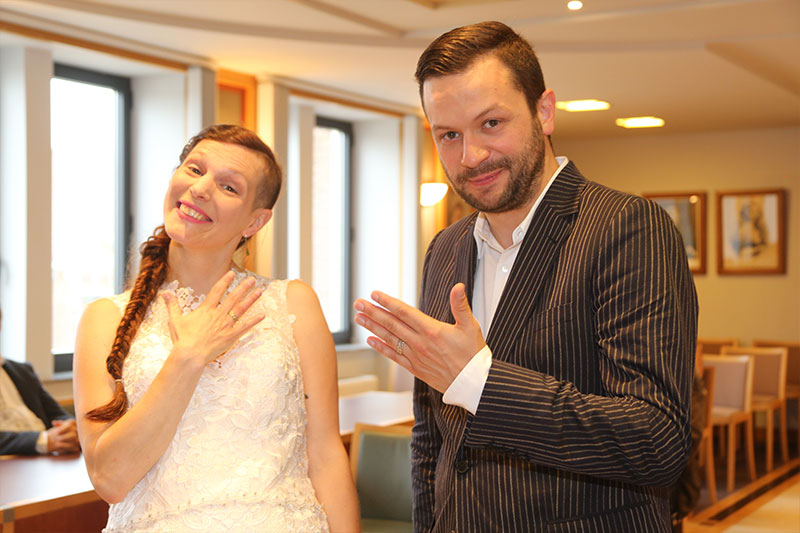

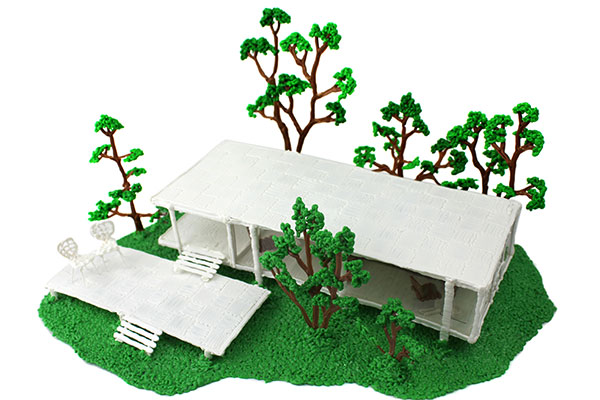


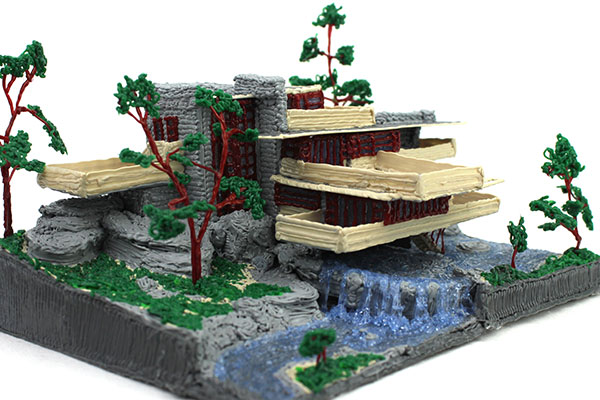


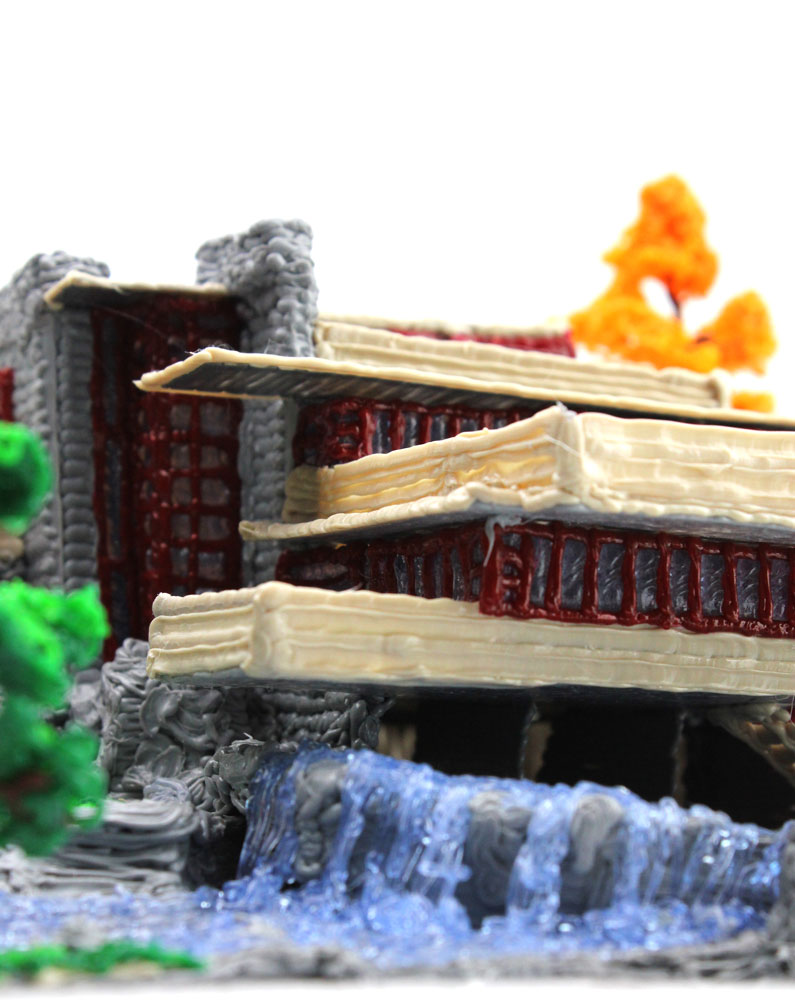
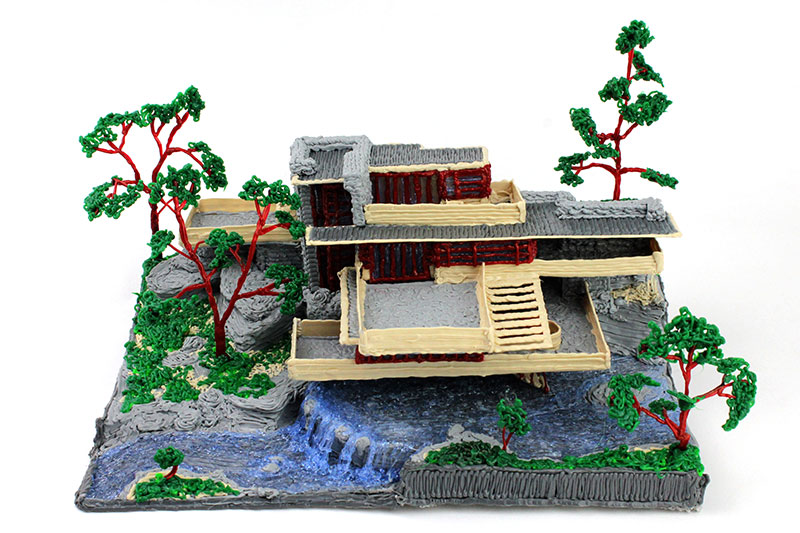

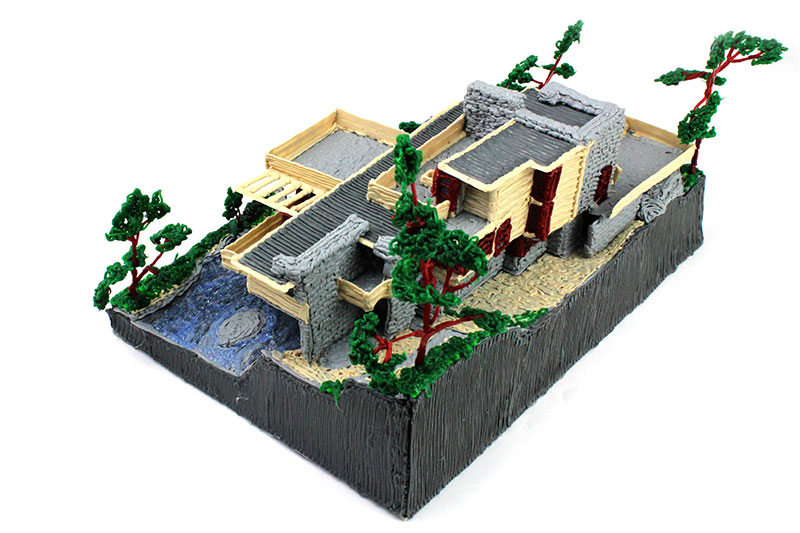
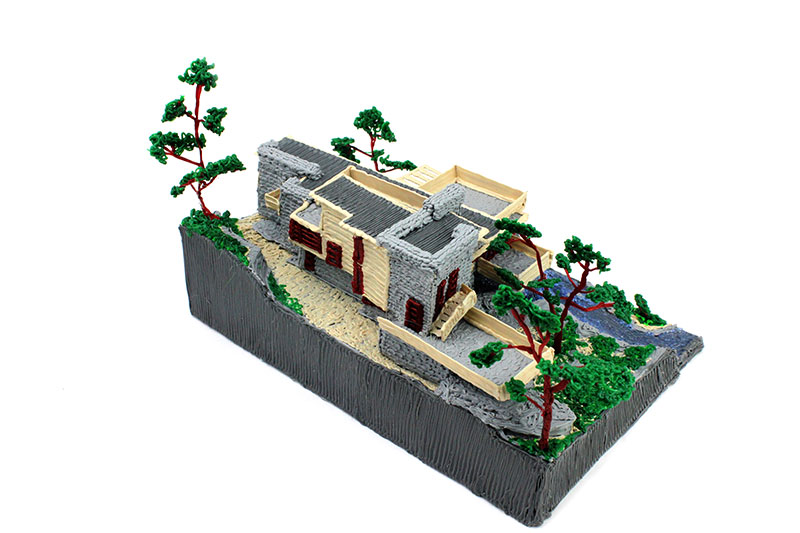
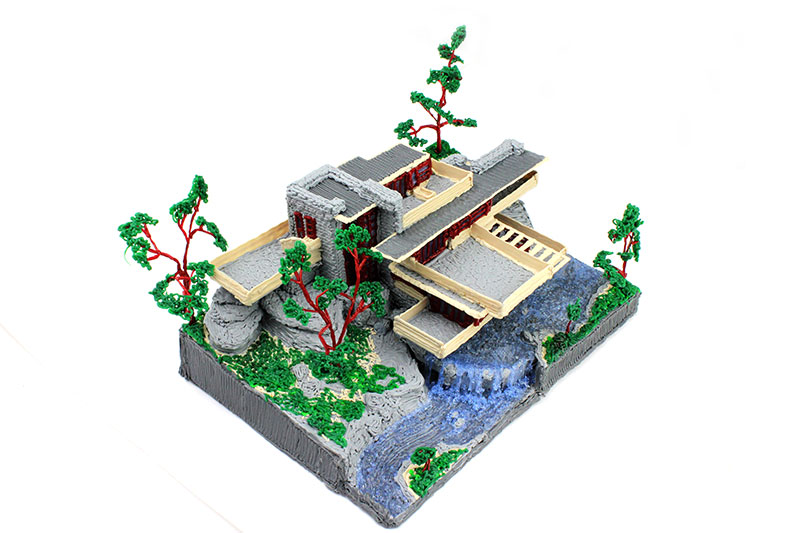